Garden to Kitchen
How-To Tips for Growing and Cooking Your own Produce
Garden to Kitchen
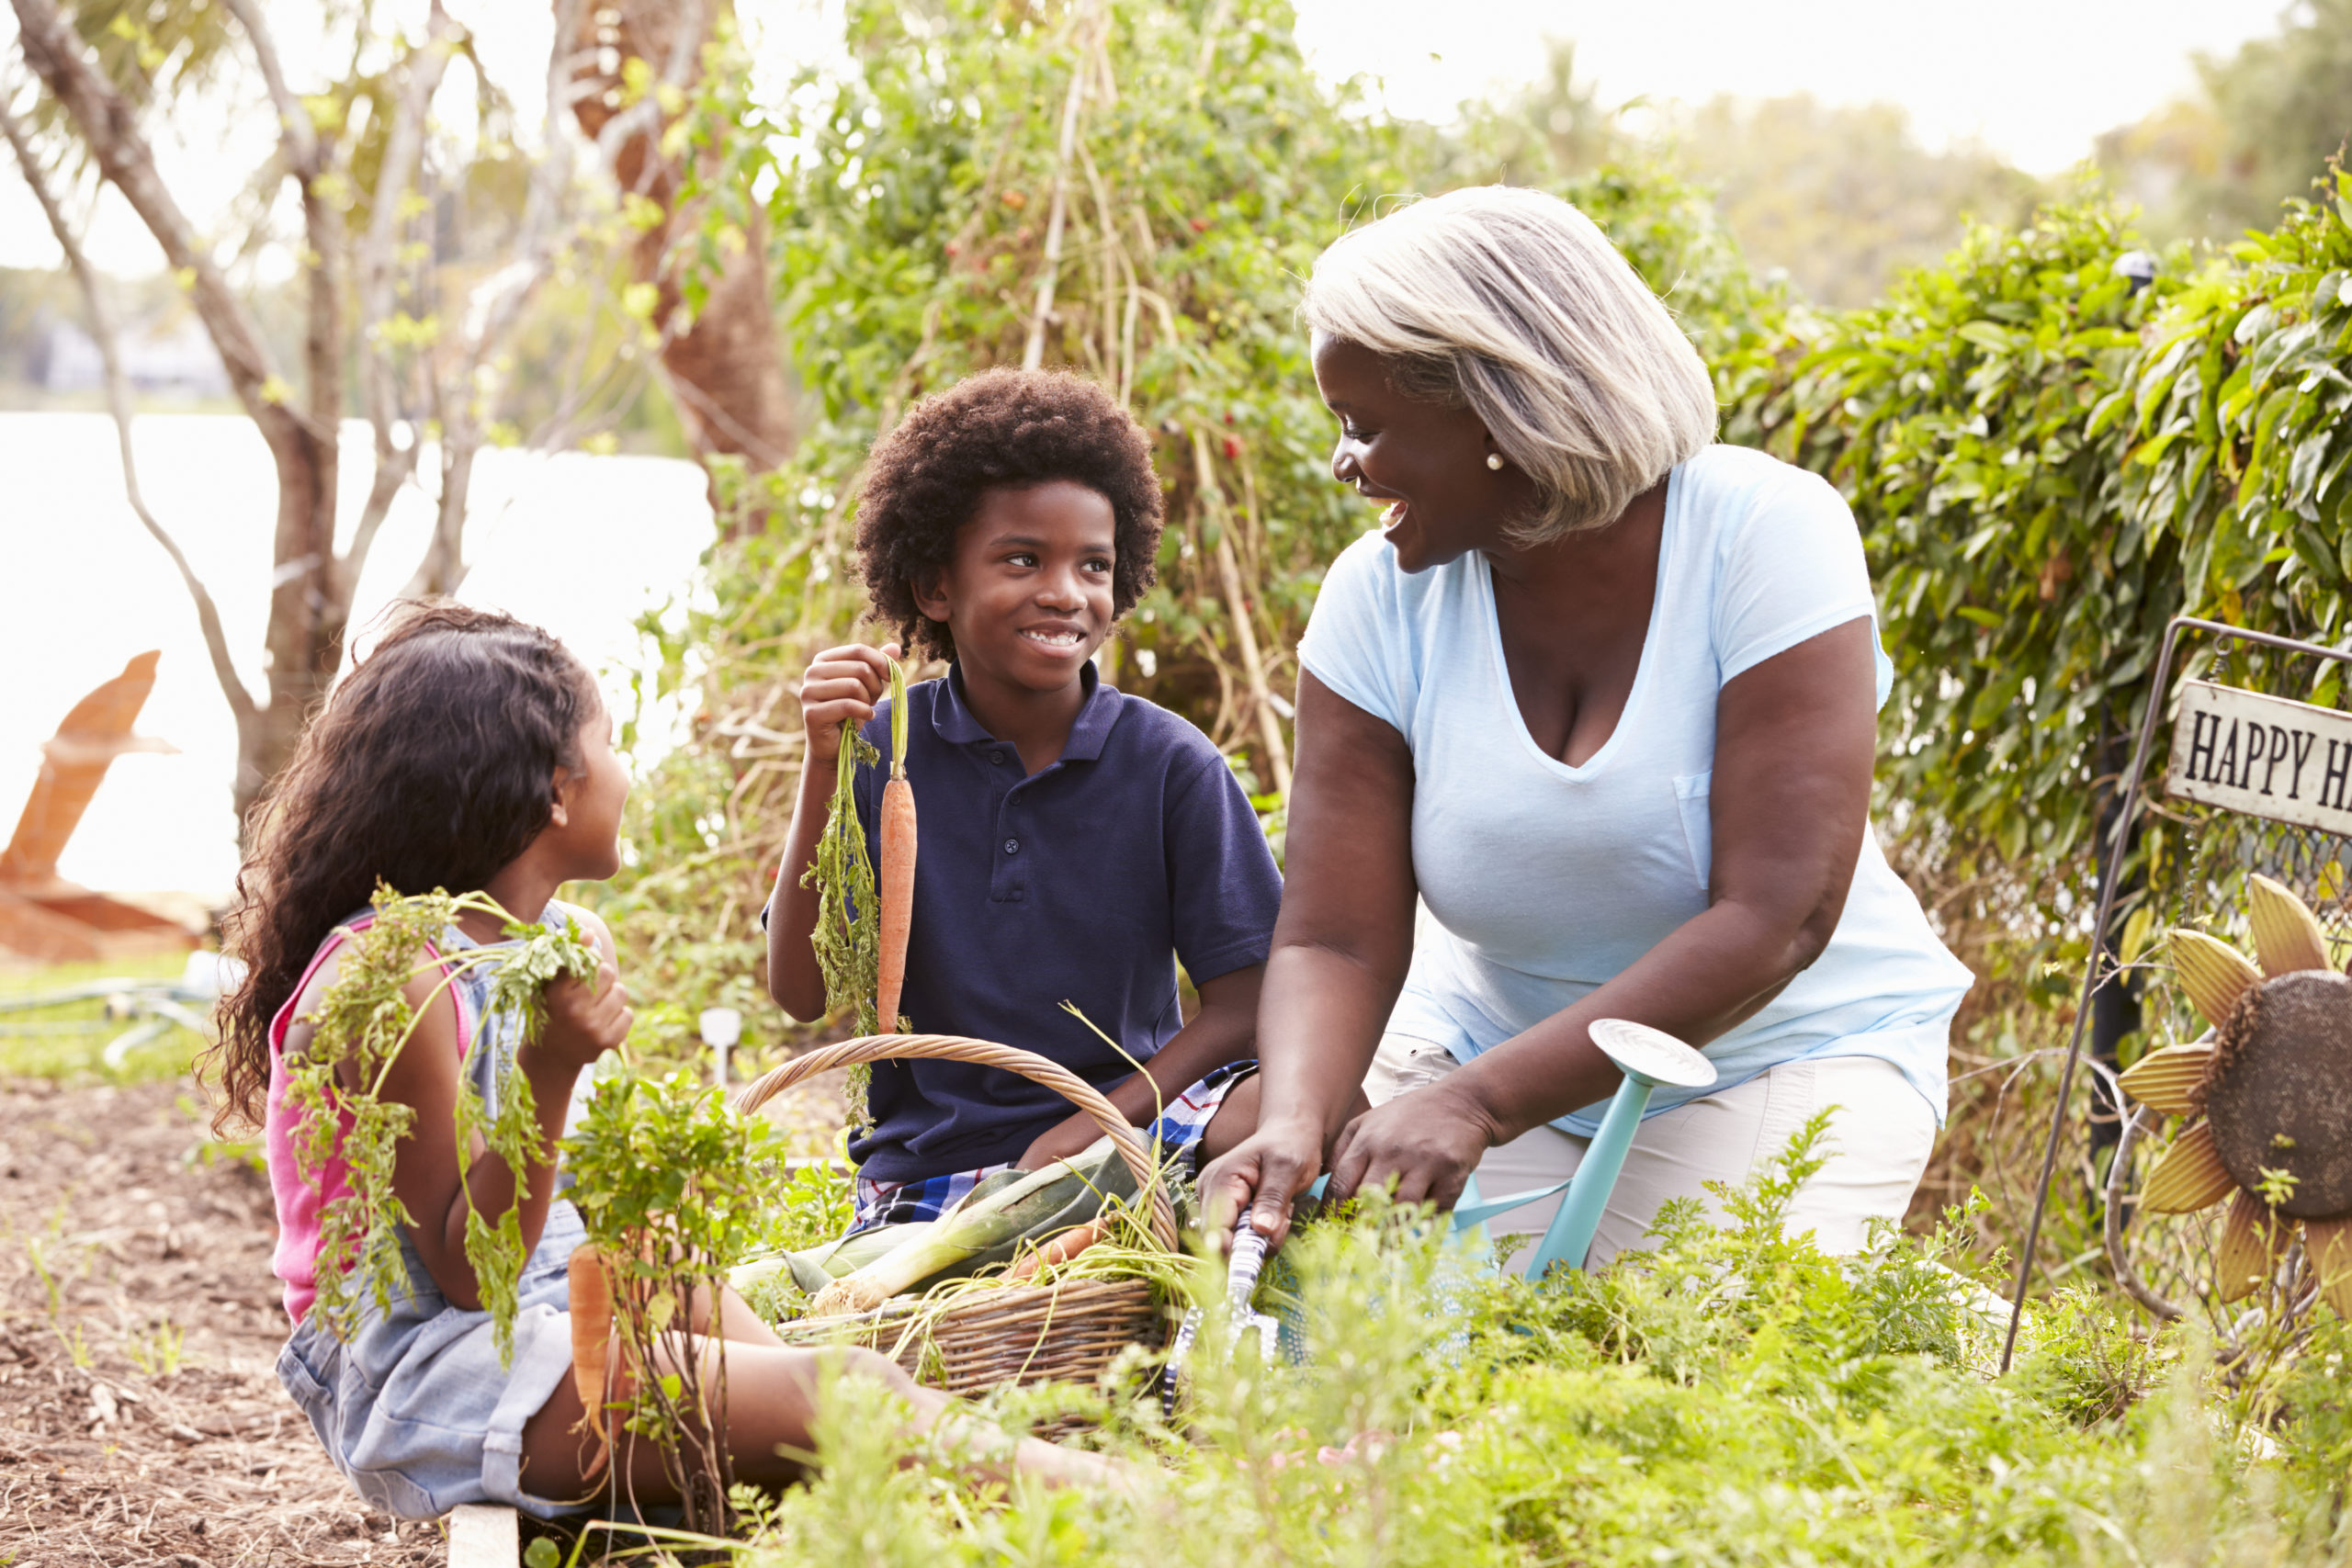
Creating connections between your kitchen and garden can be so rewarding. From having a convenient source of herbs and produce to getting exercise to enjoying nature, there are so many benefits to gardening with edible plants. Each month, the Poe Center’s expert health educators post how-to instructions for growing and maintaining edible plants and how to use them in the kitchen.
Get this great content delivered directly to your inbox. Subscribe to our monthly nutrition email newsletter.
Waste Reduction
In the February 2023 Garden-to-Kitchen blog, we introduced food waste reduction, discussed harvesting entire garden beds, and urged readers to let their gardens rest before the spring planting season. This month, we will examine different ways to preserve food as another means to tackle food-waste reduction.
Worldwide, one third of food produced goes uneaten, and 40% of food waste in the United States comes from consumers (Leah’s Pantry, “Food Smarts: Waste Reduction”). Using a variety of food preservation techniques at home, in the garden and kitchen, is a great way to help address this important issue.
Food Preservation:
While the garden beds are resting, make plans to use the harvested produce for meals now and in the future. While some produce can be stored fresh on the counter or in the fridge to be cooked in the coming weeks, remaining produce can be frozen, canned, or dried for future use.
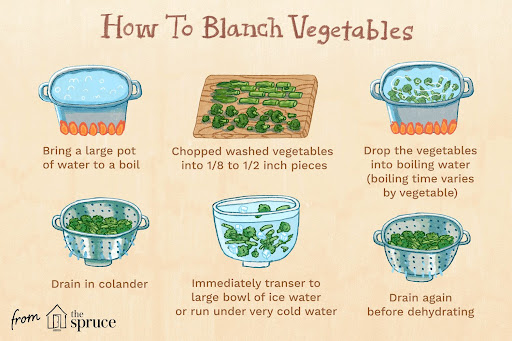
- Freezing: Freezing produce is effective and accessible. Many people already have access to freezers and freezer bags. Frozen foods can be used for three to six months. Freezing for more than six months leaves foods susceptible to freezer burn and worsened quality. Several factors can impact the shelf life of frozen food and include properly blanching the food, packaging food in appropriate materials, and storing food at an acceptable temperature. Read about more tips on freezing.
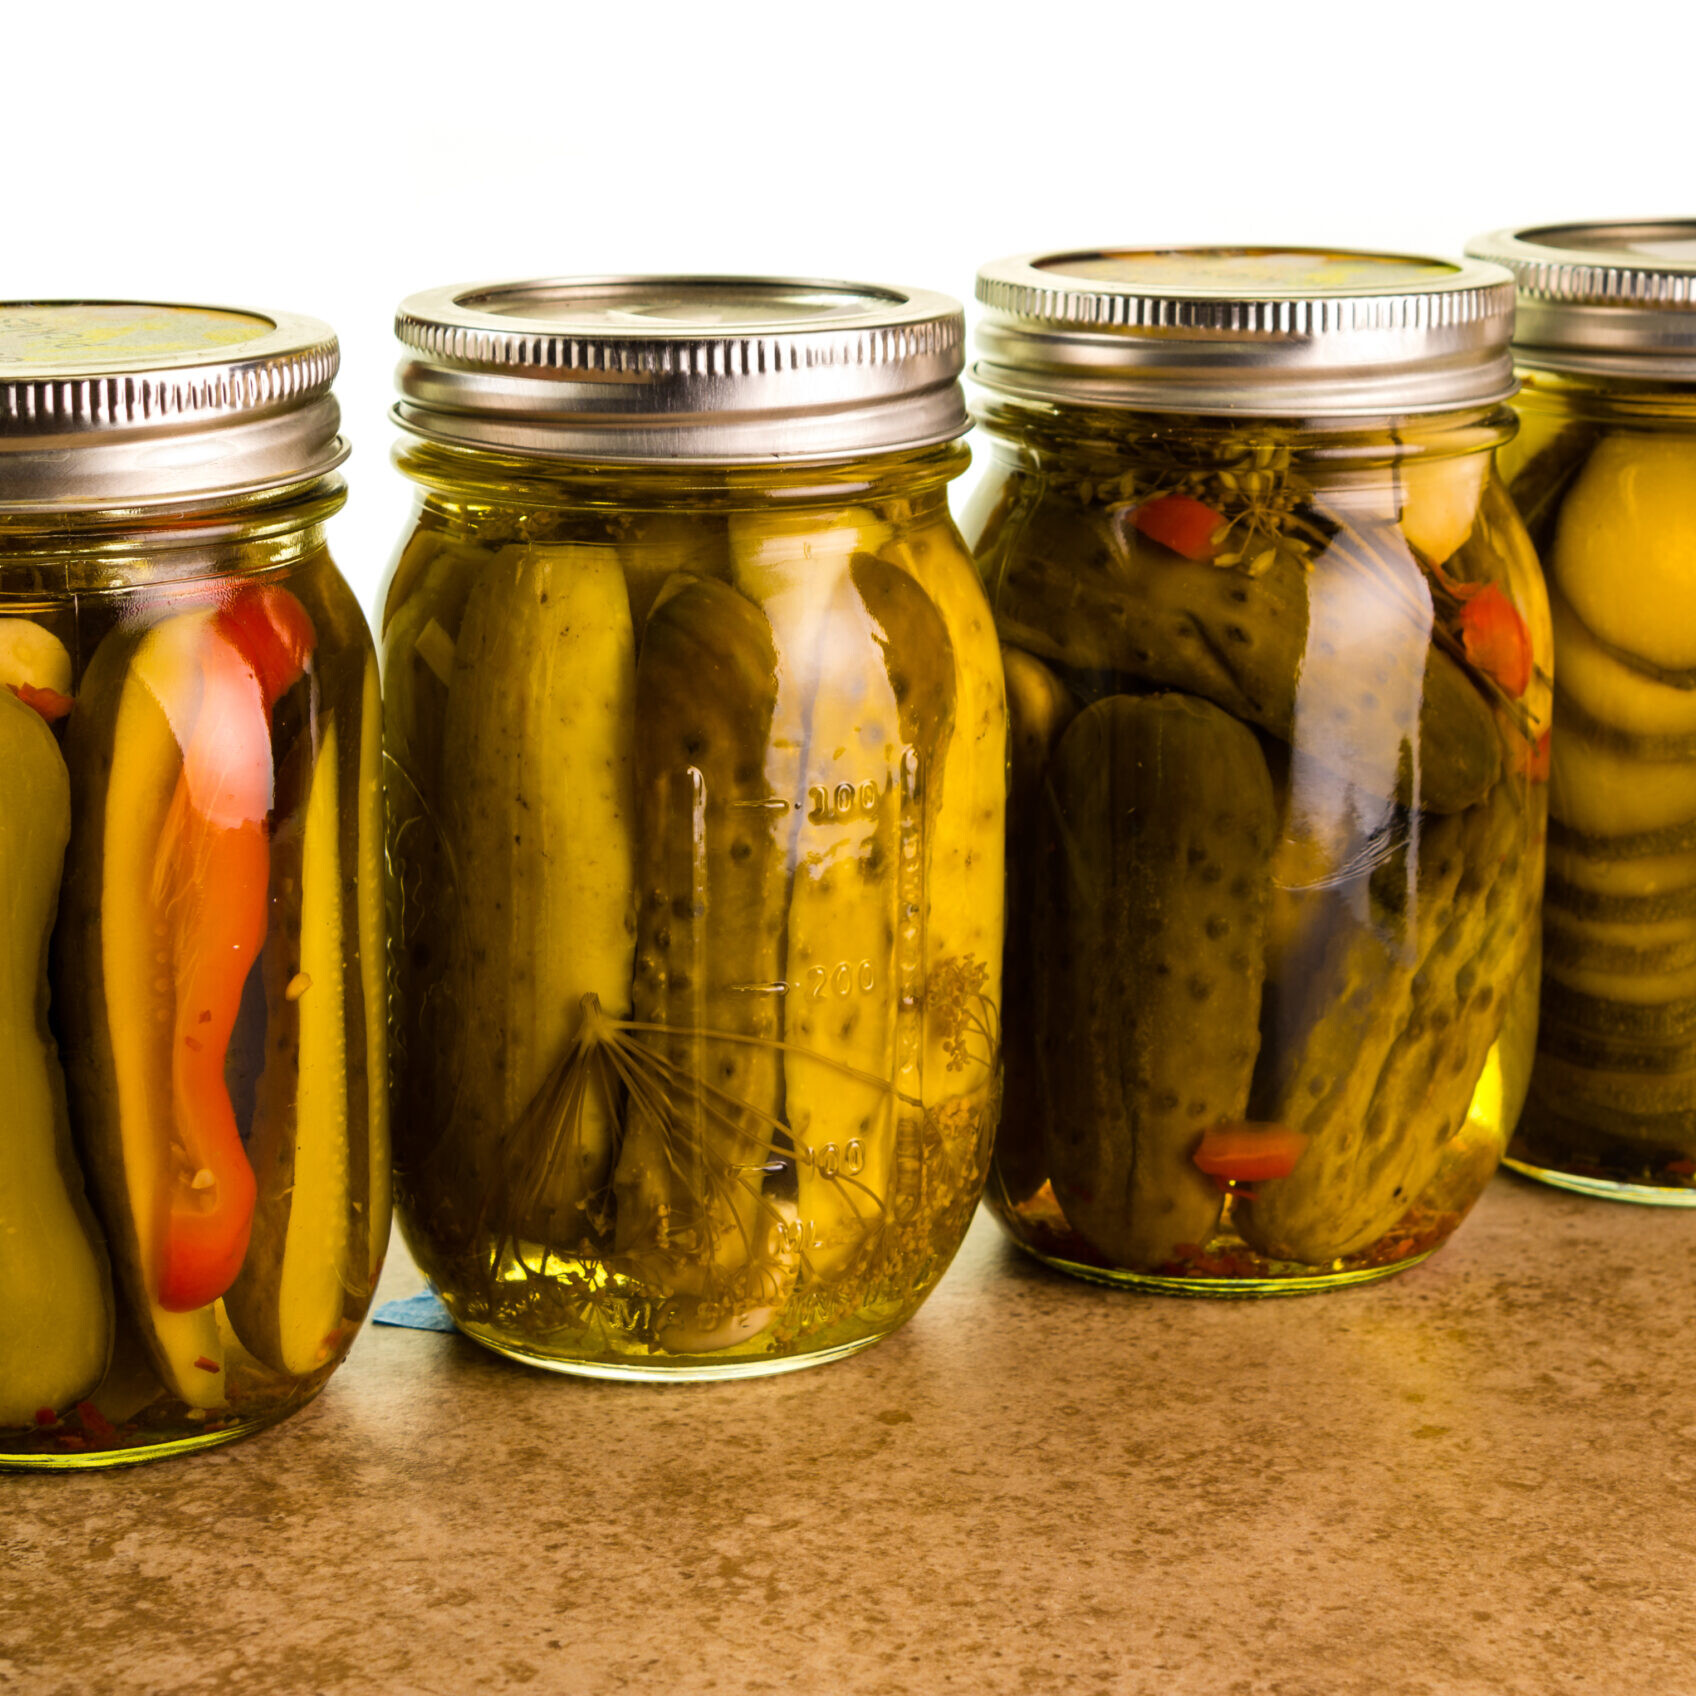
- Canning: Canning refers to water-bath canning and pressure canning techniques. Products high in acid or sugars (pickles, jellies, jams) can be safely water-bath canned because they have low pH levels. Pressure canning is useful for soups, meats, and low-acid products because this technique stops bacterial growth and safely preserves foods. Kept out of the sun, properly canned products can have a 12 to 18 month shelf life.
*Always use a tried-and-true canning recipe and procedure. Improperly canned products put you at high risk of e.coli and botulism, which can result in death.

- Drying/Dehydrating: Drying, or “dehydrating,” foods is less popular than freezing and canning, but is an equally trusted practice historically. Dehydrated foods are lightweight, easy to store, easy to carry, and can require no preparation when eating (think dehydrated apple or strawberry slices). Drying can be done in a conventional oven, a special dehydrator, or even in the sun, if your location’s climate allows. Read here for more extensive directions on drying foods at home.
Recipes:


Fall/Winter Gardening
Planning for Fall/Winter Gardening
If you are thinking about planning a fall/winter garden, August is a great time to establish many cool-weather crops – so let the planning start.
Think about your location and how much sunlight you get. Most fruits and vegetables require at least 6 hours of direct sunlight per day, although 8-10 hours is even better.
Get to know your soil. The ideal soil for vegetables is fertile, deep, well-draining, and within the pH range of 6-6.5. Do your best to create ideal conditions for your plants in advance. If you don’t have perfect conditions, don’t worry, give it a try and see what thrives.
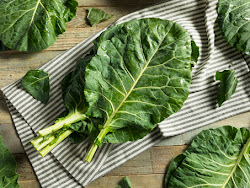
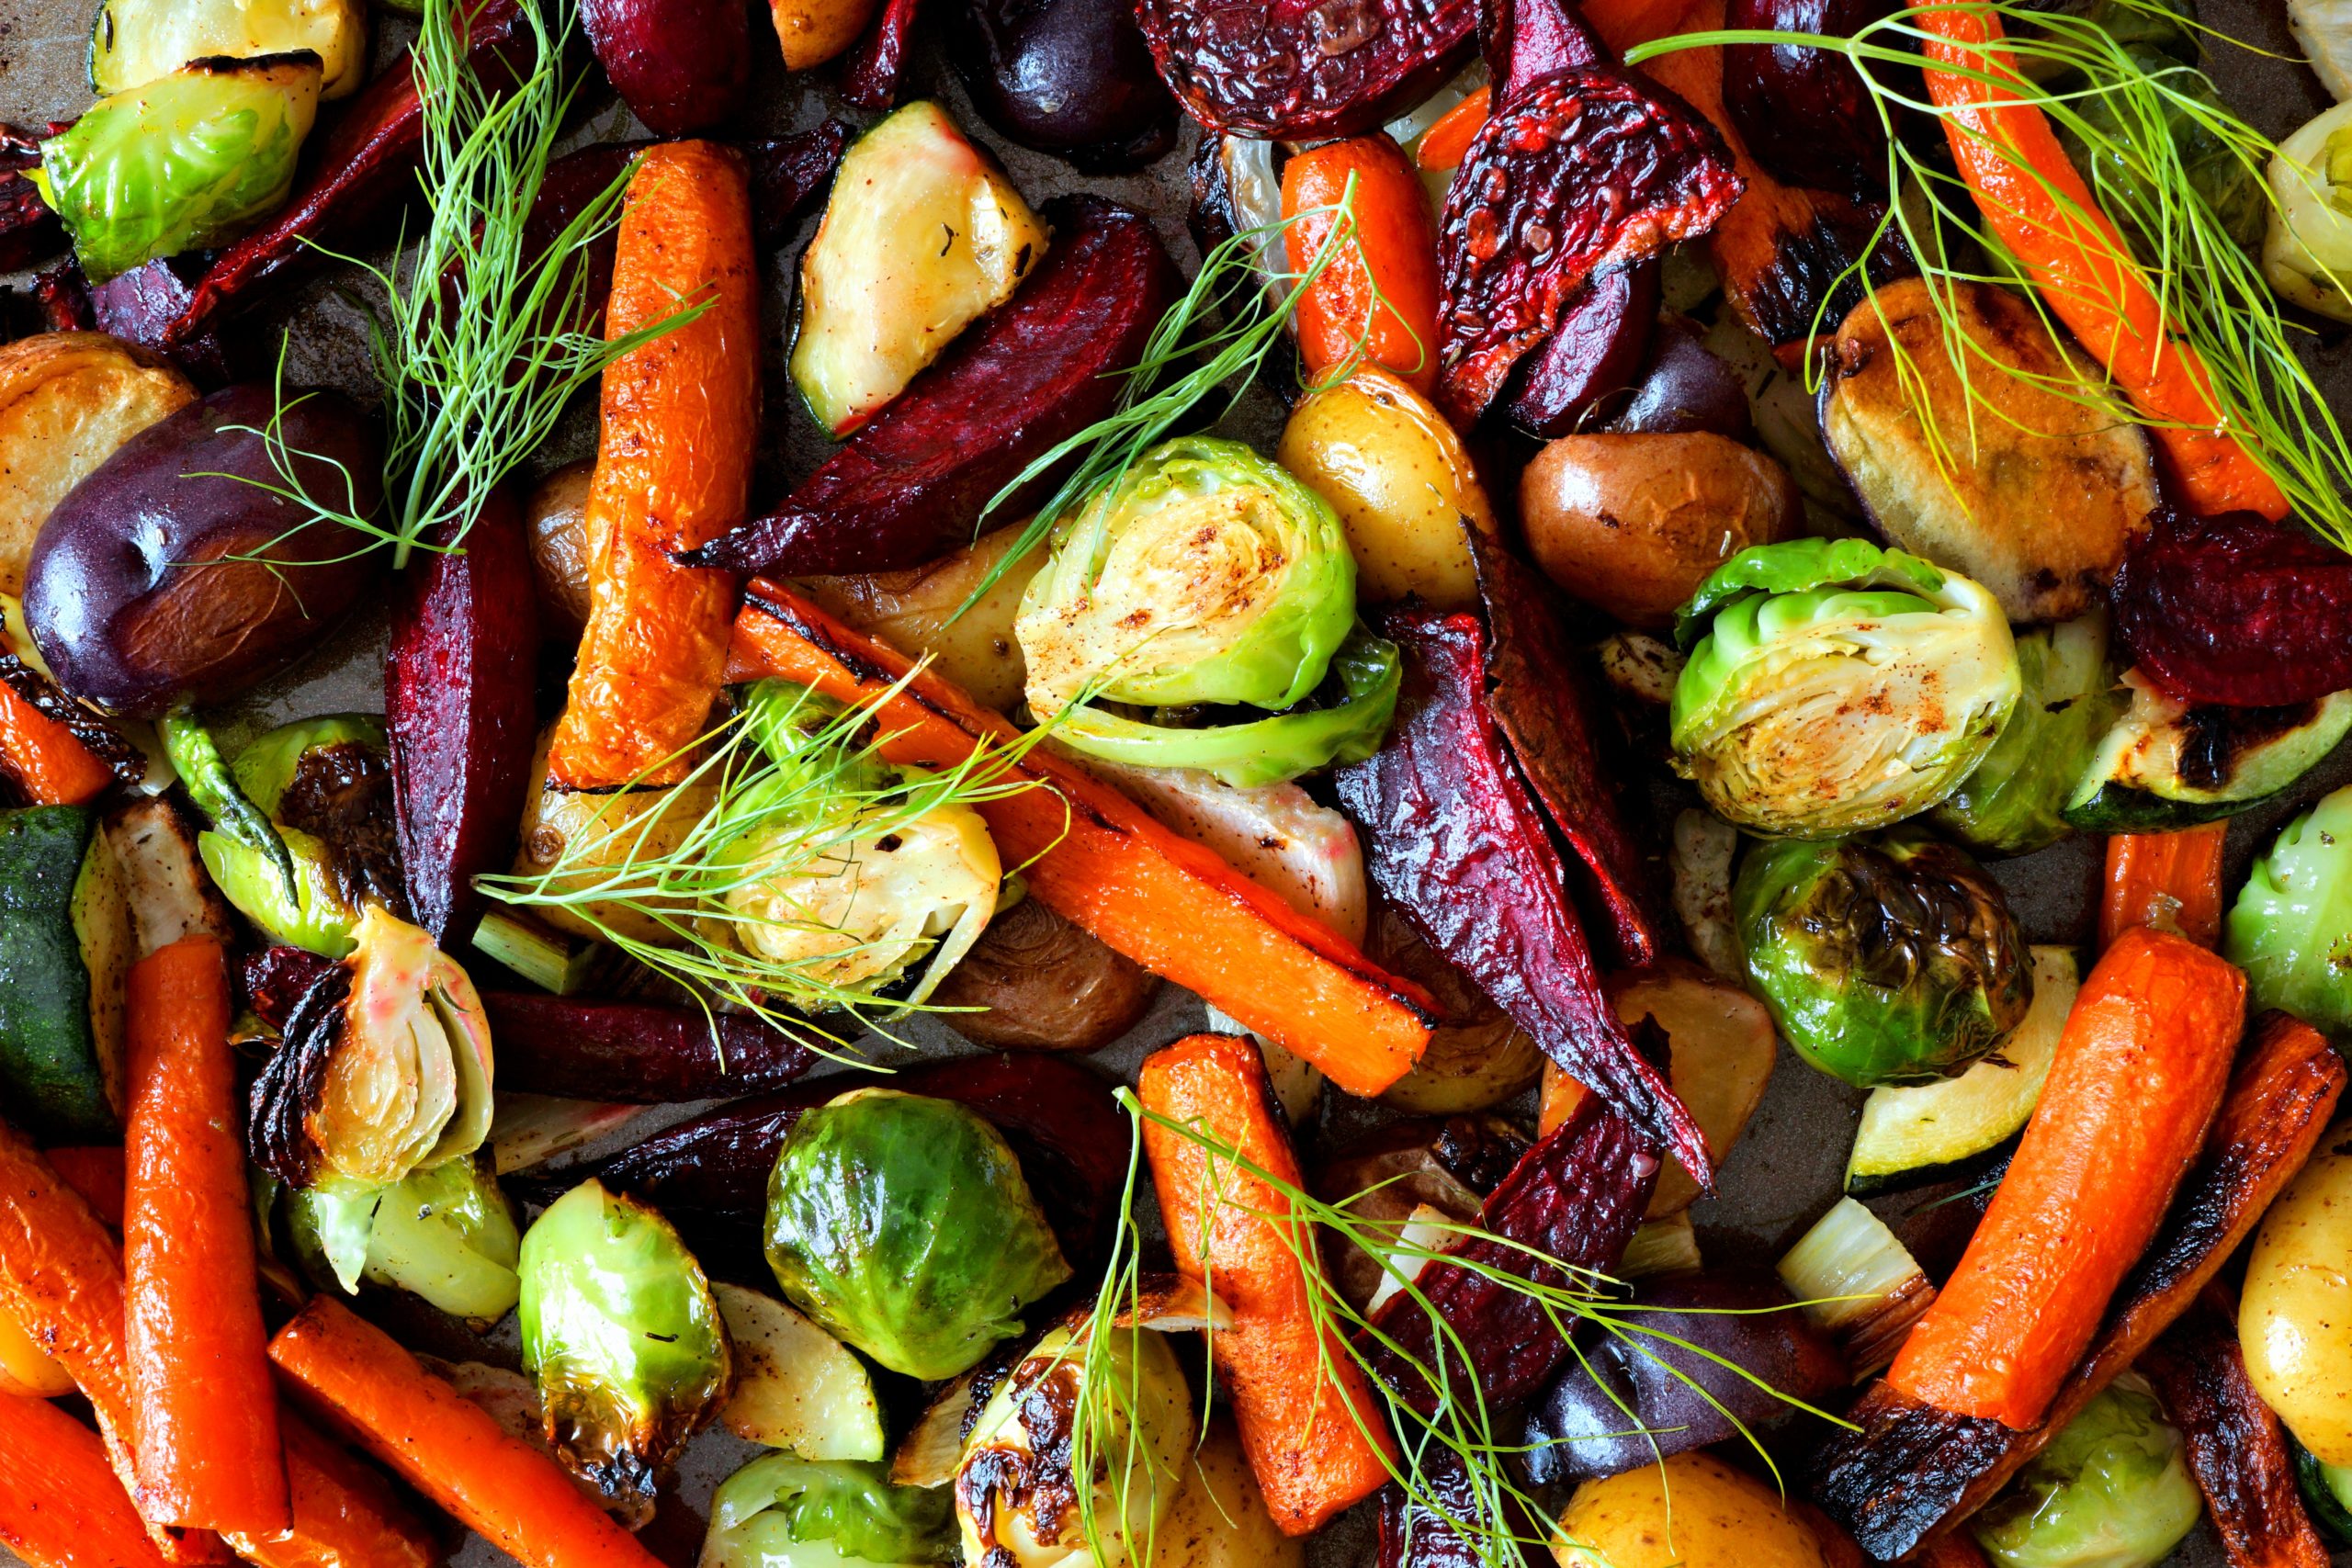 Plant what you enjoy eating. Try to plan a variety of colors to encourage a wide range of vitamins and minerals – carrots, broccoli, brussel sprouts, leafy greens such as kale, collards, or swiss chard, beetroot, cabbage, leeks, and cauliflower. If you select foods that match well with your specific growing conditions, you will be more likely to have a plentiful harvest. For example, did you know leafy vegetables and root vegetables are better at tolerating shade? This includes lettuce, collards, kale, cabbage, spinach, carrots, beets, radishes, and more.
Consider timing before you begin to plant. Use Poe’s Vegetable Planting Guide for Central NC, or the Cooperative Extension Planting Guide for NC for details on what to plant when.
- You may prefer to start seeds indoors to get a start on fall crops while your summer crops are still producing. This overlap can also help ensure your frost-sensitive crops will reach maturity before the freezing temperatures arrive. Be sure to check the seed packet for when to start seeds indoors for your area.
- If you’re looking for particularly hardy crops that will continue to produce food through the winter, a few favorites include: collards, mustard greens, kale, root veggies, and cilantro.
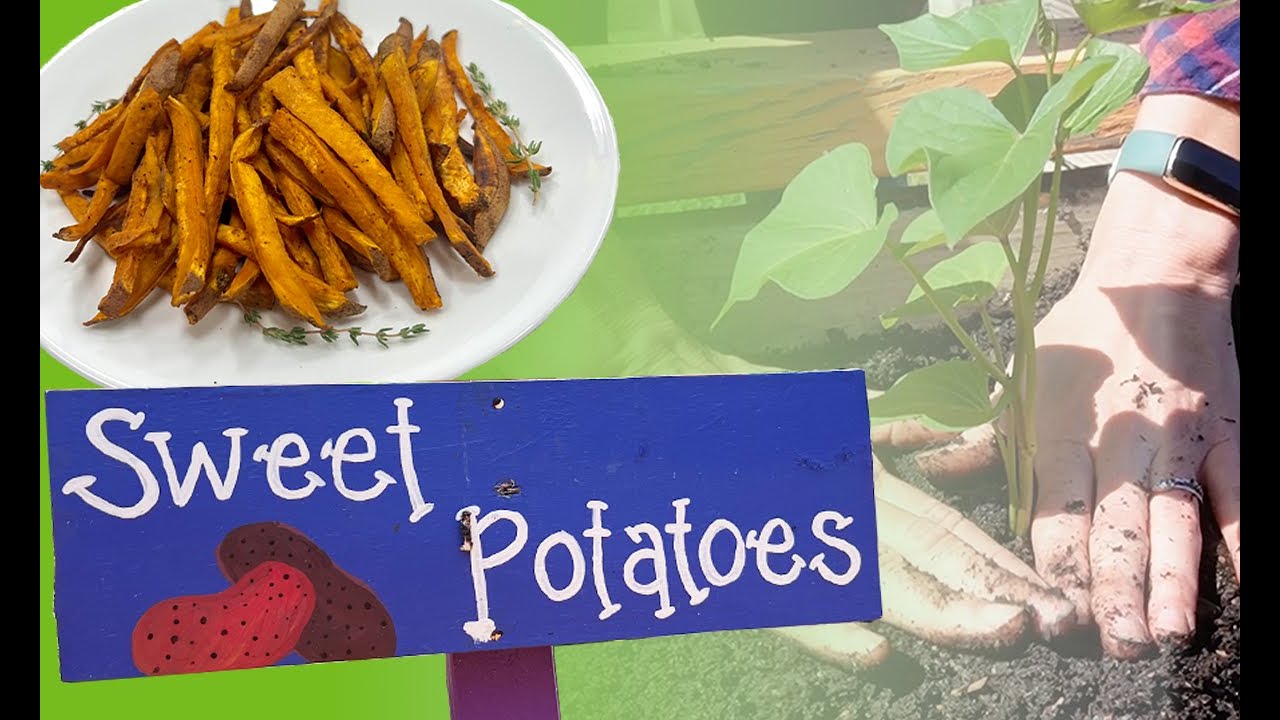
- You may think we forgot to mention some fall favorites like pumpkin and sweet potatoes. They are delicious in fall recipes and ready to harvest in the fall, however, need to be planted in the summer.
Time for planting. Make a map of your garden and mark off where you planted everything. This is not necessary, but it is a fun visual to keep as a reminder of plants that need your attention.
- Before planting your fall crops, it is often helpful to incorporate organic compost into the top 4 inches of soil. Leaving the deeper soil intact helps preserve a healthy soil structure that beneficial earthworms, bacteria, and fungi have worked hard to establish.
- You can incorporate compost in stages or all at once depending on your gardening style. By gently stirring compost in between late summer crops that are still producing, you can overlap the growing seasons and increase yield. If your summer crops are spent, you can remove them all and incorporate your compost all at once.
Recipes:

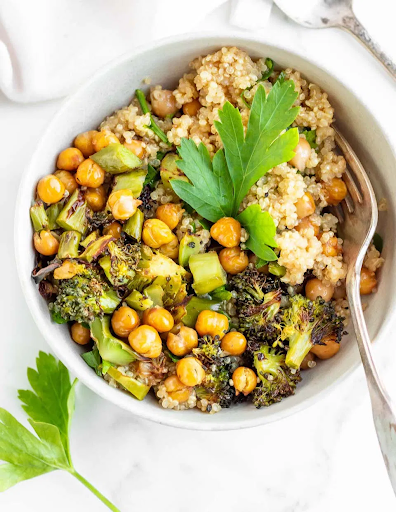
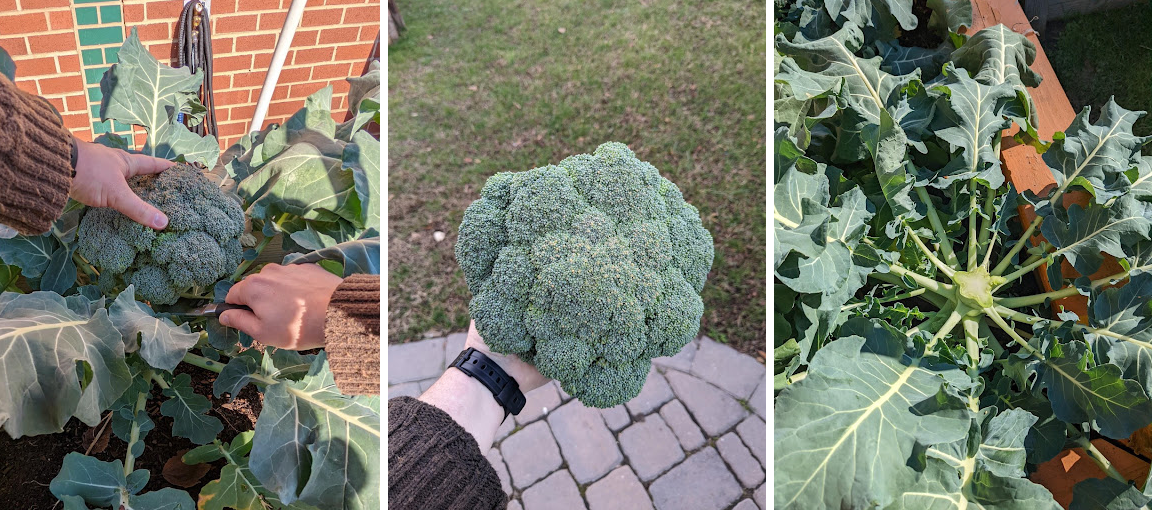
Roasted Broccoli and Chickpea Quinoa Bowl
Try this Poe Center recipe for a Grain Bowl packed with fall favorites.
Ingredients:
For the Bowl:
- 1 cup canned chickpeas, drained, rinsed well and patted dry (optional to replace with baked chicken)
- 1 small bunch of broccoli, cut into mini florets (about 3 cups)
- 1 tablespoon oil
- salt and pepper
- 1 cup uncooked quinoa
- 2 cups water or stock
- 1/2 cup fresh parsley, roughly chopped
For the Dressing:
- 5 tablespoons extra virgin olive oil
- 1-2 tablespoons pure maple syrup
- 1 tablespoon apple cider vinegar
- 1 teaspoon Dijon mustard
- Pinch of salt
- 1/8 teaspoon dried dill (optional)
- Garnish with extra parsley, sliced green onions, dried cranberries or raw pumpkin seeds
Instructions:
For the Bowl:
- Preheat oven to 400 degrees and line a baking sheet with parchment paper or a baking mat.
- Transfer chickpeas and broccoli to the prepared baking sheet and drizzle with 1 tablespoon oil and sprinkle with a pinch of salt and pepper.
- Roast in the oven for 25-30 minutes, or until chickpeas are crispy and broccoli is browned and tender, being sure to stir the broccoli mixture half way through.
- While the veggies are roasting, make the quinoa. Add quinoa to a medium-sized pot over high heat with 2 cups of water or stock. Bring to boil, then reduce heat to low, cover and let quinoa cook until all the water is absorbed, about 12 minutes. If using brown rice, cook according to package instructions.
- Remove from heat and let quinoa or rice cool slightly.
For the Dressing:
- In a large mixing bowl, whisk the oil, maple syrup, vinegar, mustard, salt and dill (if using) until smooth and consistent.
Assembling the Bowl:
- Set aside a small amount of the dressing.
- Fold the slightly cooled quinoa into the dressing in the large mixing bowl. Add in about 1/3 of the roasted broccoli and chickpea mixture along with the chopped parsley and mix until well combined.
- For serving, portion quinoa or rice into about 4 portions and top each portion with remaining roasted broccoli and chickpeas. Garnish with sliced green onion, more parsley, dried cranberries or raw pumpkin seeds. Drizzle remaining dressing on top.
Sources:
 Intro to Kale
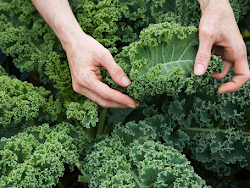
It’s finally time for cool-weather crops, a favorite time of year for many gardeners. Among the cool-weather crops are leafy greens, such as kale. Kale is packed with vitamins and minerals, especially Vitamin C. Learn more about growing preferences, planting tips, highly ranked kale varieties, and recipes that include kale in this month’s Garden-to-Kitchen blog.
Growing Preferences:
-
- Plant in the fall, kale prefers 25-75°F.
- Kale prefers neutral to alkaline soil.
- Transplant seedlings with generous spacing.
- Kale prefers full sun, but will tolerate partial shade.
Planting Tips:
-
- Plant kale six weeks before your first frost date in the fall for an autumn and early winter harvest.
- Seeds should be planted in rows 1 inch apart and can be thinned to 8-12 inches apart.
- Seedlings can be transplanted 12 inches apart.
- Kale will do better with fertilized soil, a thick layer of compost, and mulching.
Highly Ranked Kale Varieties:
-
- Dwarf Siberian: A Russian variety that produces 16-inch plants with slightly frilled leaves.
- True Siberian: Fast growing 24 to 30-inch plants with large, frilly, blue-green leaves. They are cold hardy and can be picked all winter in some areas.
- Red Ursa: A cross between ‘Red Russian’ and ‘True Siberian.’ They produce 24 to 30-inch plants that are bolt-resistant and heat-tolerant similar to ‘Red Russian,’ but the leaves are more rounded and curved at the ends.
- Premier: Bolt-resistant plants that produce smooth, deep green leaves with scalloped edges. This variety remains compact when over-wintered, while developing new growing points on the main stem.
- Redbor: Hybrid plant with curly, maroon-red leaves that grow to 2 feet. This variety is quite cold-hardy and does best in the fall. Plants can grow to 5 feet in long growing season conditions.
Note: Bolting is the term used when vegetable crops prematurely produce seed, which causes plant growth to stop. This can be caused by a cold spell.
To the Kitchen:
Kale should be rinsed thoroughly to remove sand and dirt that has accumulated on the leaves and stems. Cleaning methods include running under water leaf-by-leaf, soaking in a clean sink basin, or even using a salad spinner.
Kick-off the fall season with one of these kale recipes:
 Kale Maintenance & Harvesting
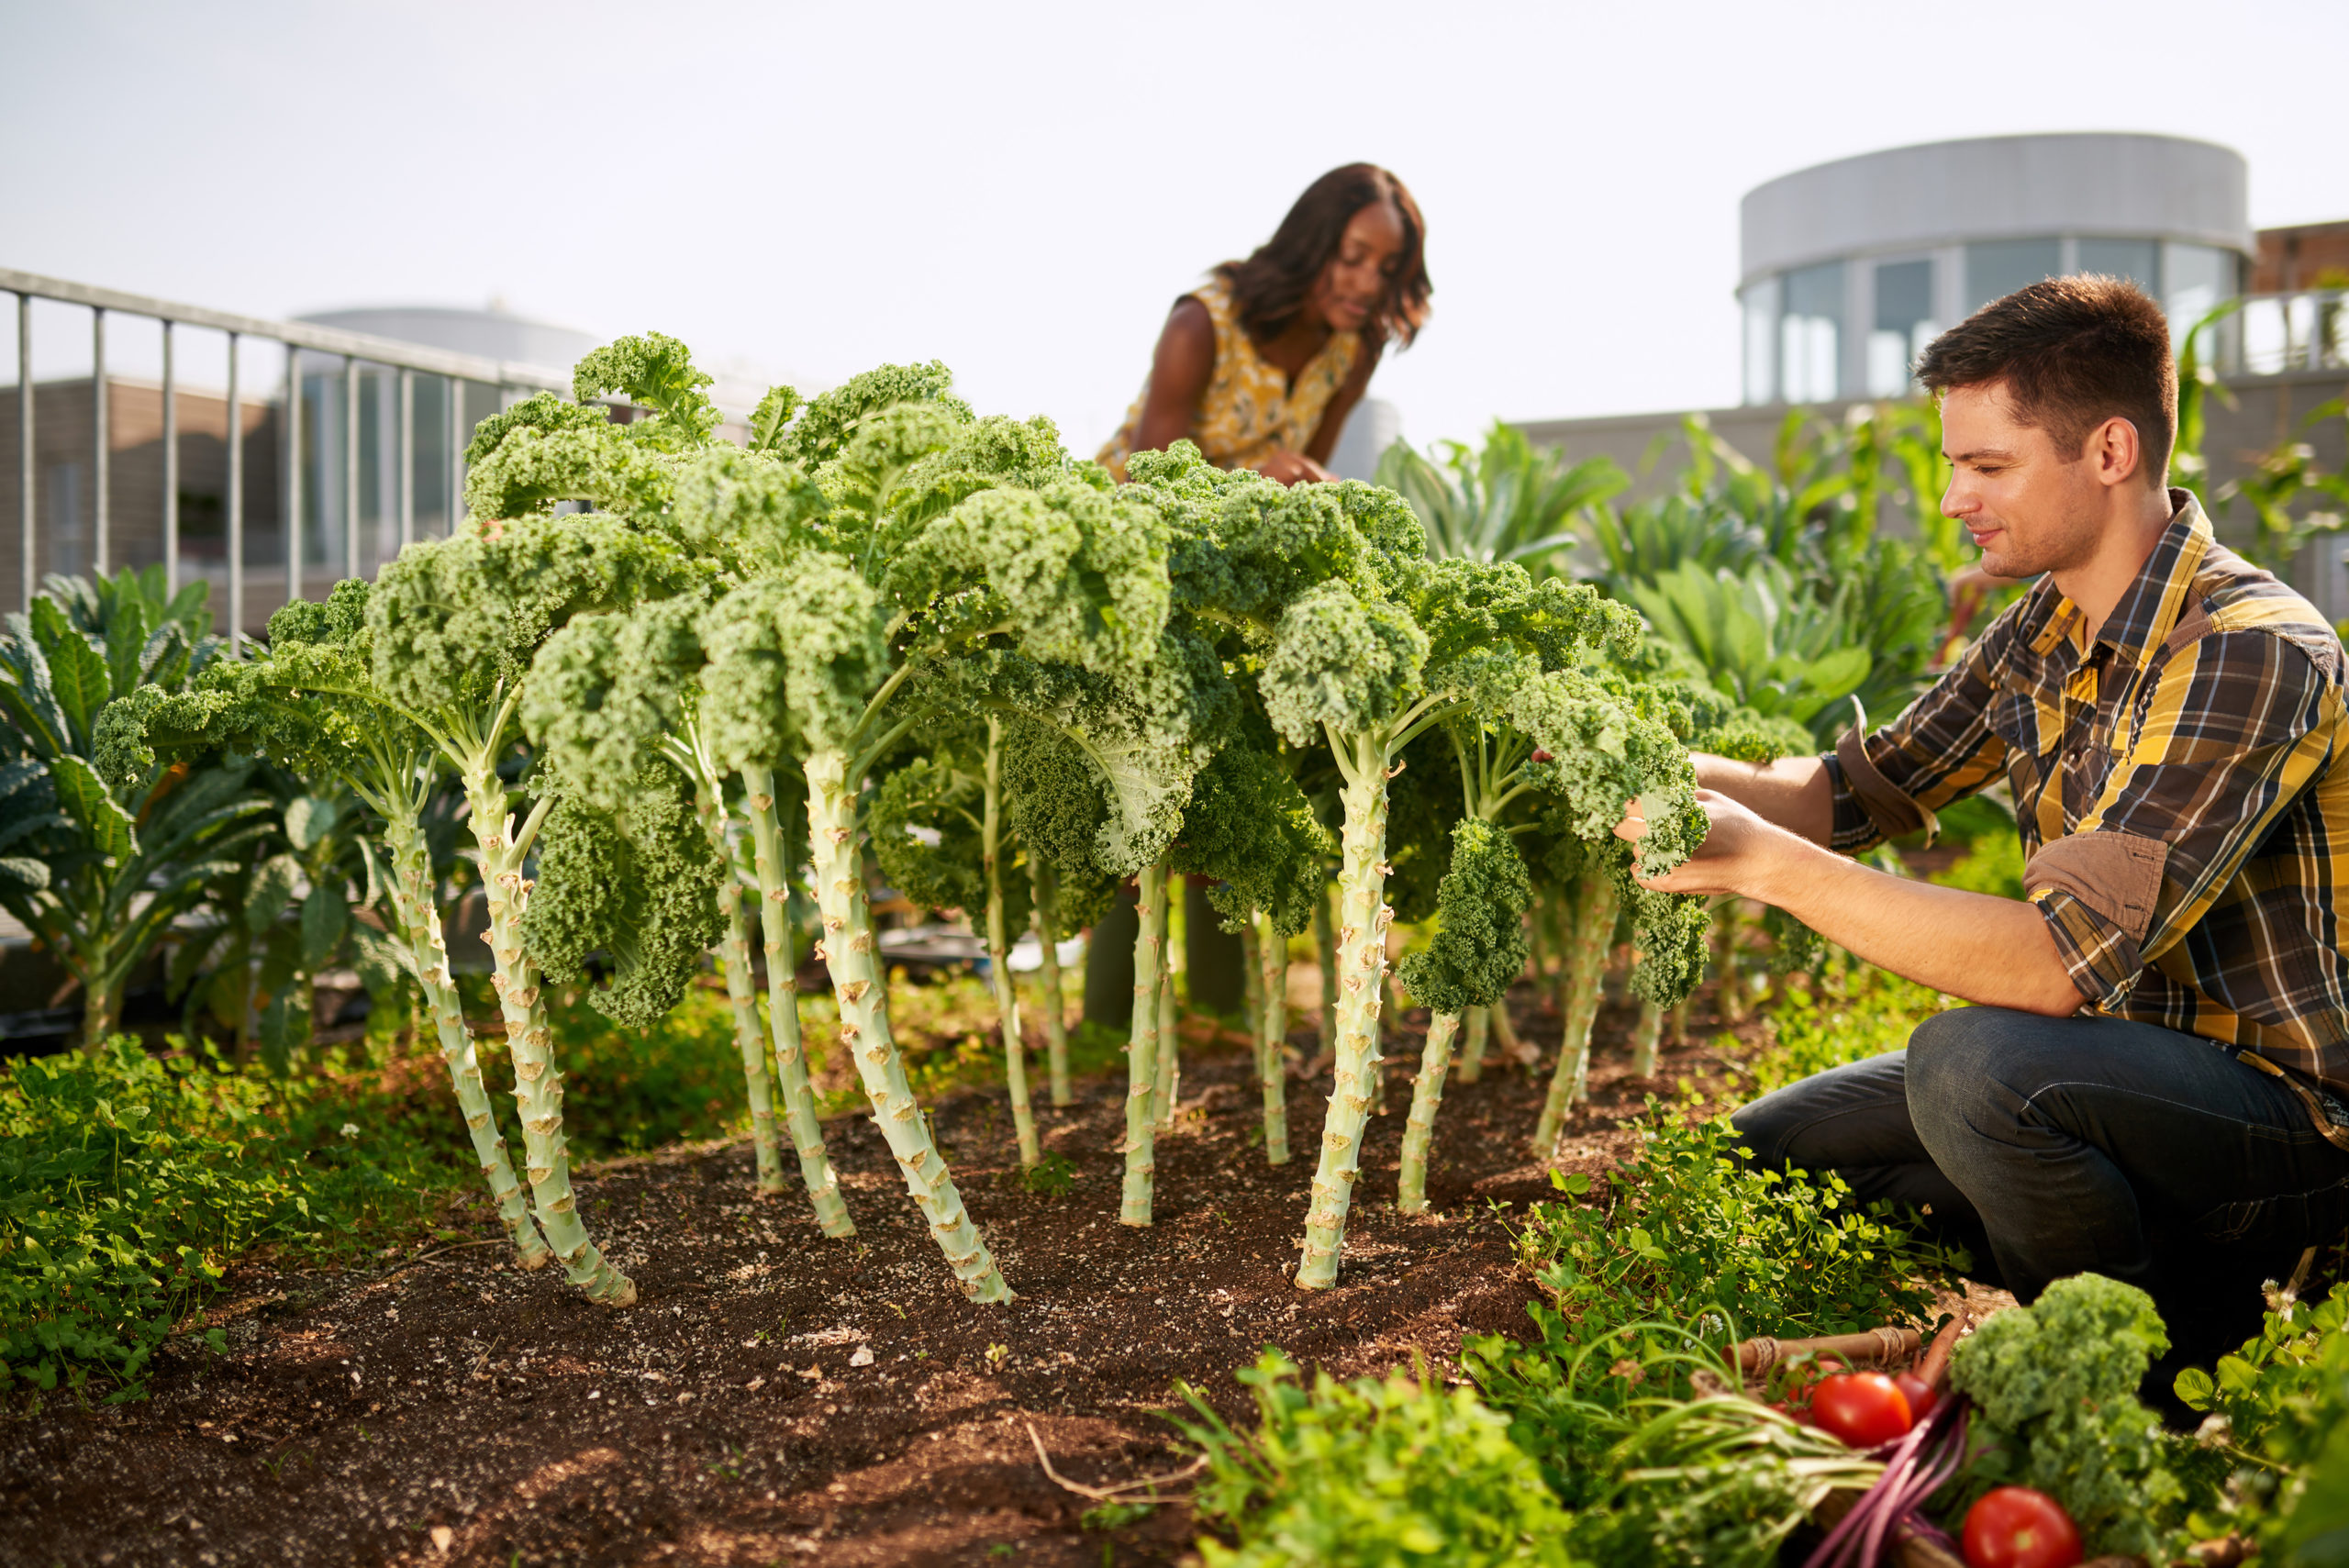
Did you know that a kale plant can grow for 2 years and become as tall as you? It’s true! With strategic harvesting and care, the kale you plant this fall will feed your family for seasons to come. Learn more about kale maintenance, harvesting, preparation, and recipes that include kale in this month’s Garden-to-Kitchen blog.
Maintenance Tips:
- Water Regularly: Although fairly drought tolerant, 1-1.5 inches of water each week will help kale leaves grow quickly, which improves flavor. When watering, aim water towards the roots.
- Add Extra Mulch: 2-3 inches of mulch will help retain moisture and keep this cool season crop from getting overheated if temperatures rise above 75°F. The mulch will also help keep the roots warm during frigid winter days.
- Fertilize: If your kale is growing poorly or turning yellow, you may have a nutrient problem. Consider side-dressing with a high-nitrogen fertilizer.
*Side-dressing means to place a line of fertilizer about 4 inches from the stem on both sides of the plant.
 Harvesting Tips:
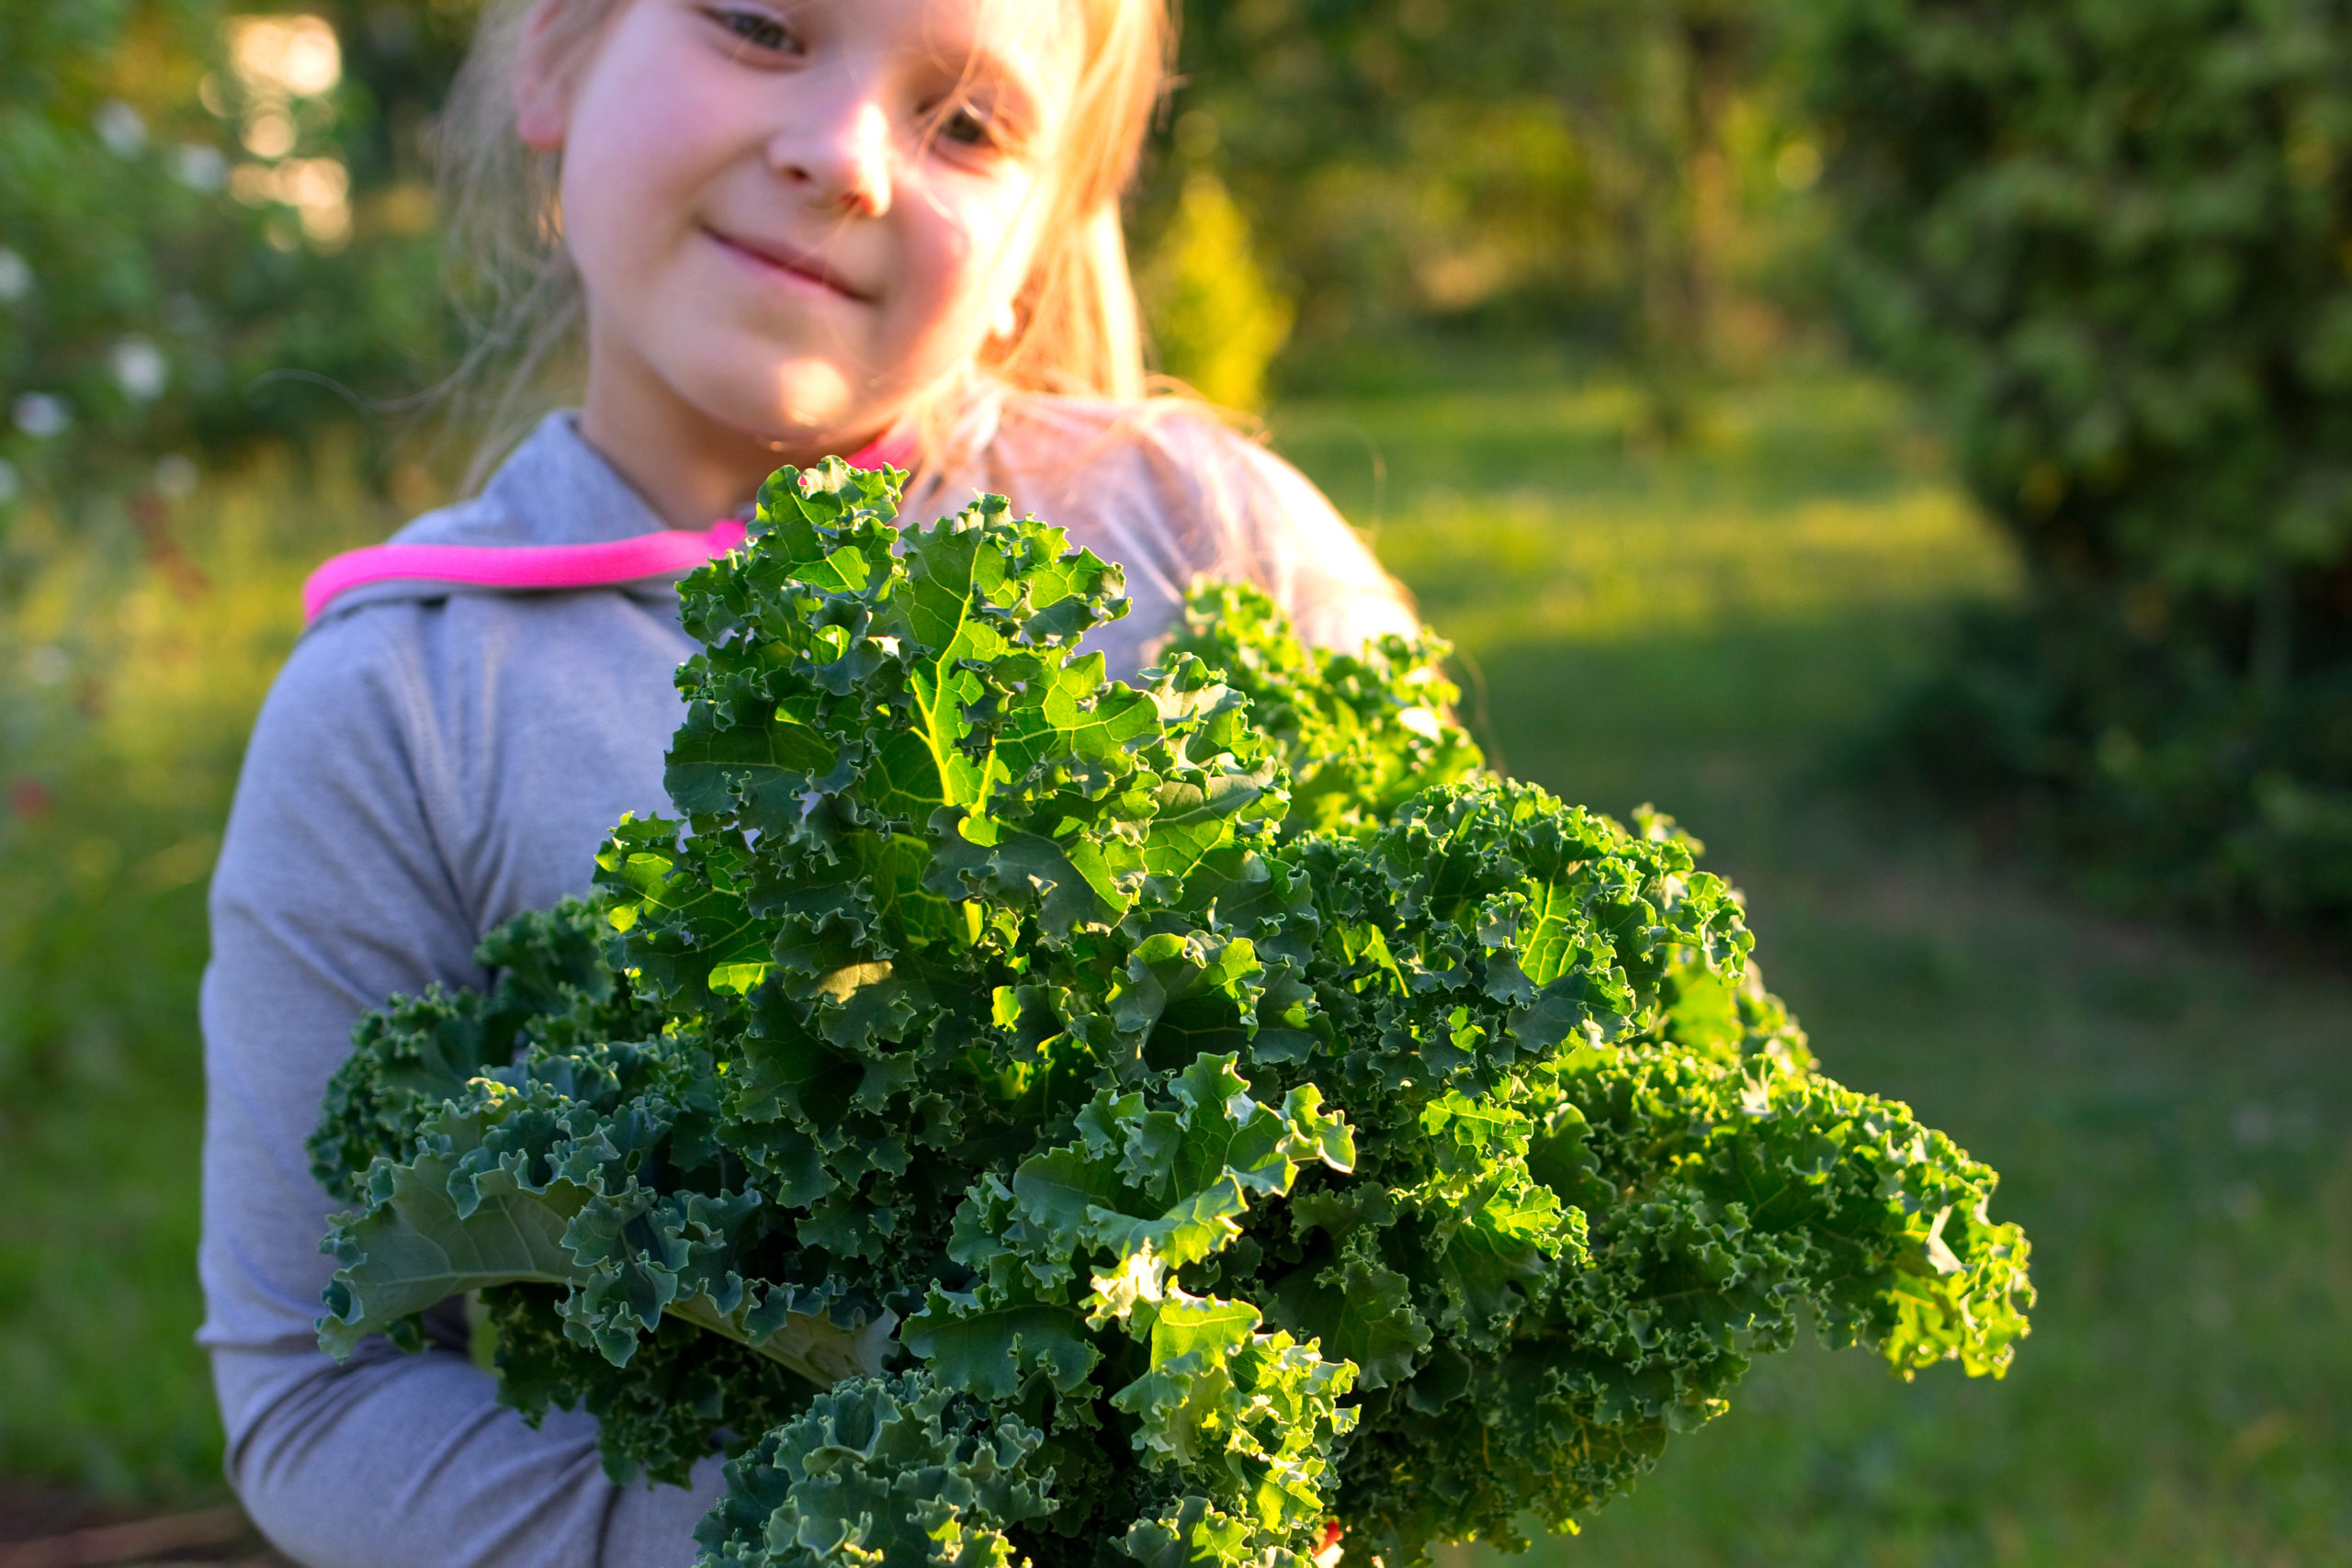
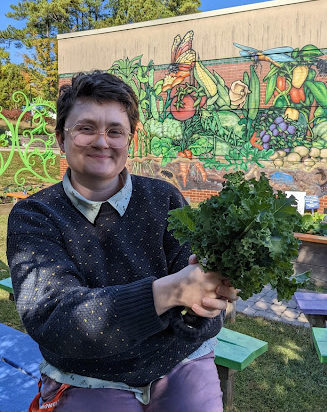
Harvesting is one of the most important and easiest parts of kale maintenance. Don’t stop harvesting! It’s fun to continue to pick for desired tastes and textures.
- Mature leaves are ready to harvest when they are about the size of your hand.
- Pick the larger outer leaves to keep the plant producing. Cutting the top off the plant will slow growth considerably.
- Take no more than 1/3 of the leaves at a time.
- Pick younger leaves (1-3 inches long) for a softer texture that’s great in salads.
- Wait for the first freeze or colder temperatures for a sweeter tasting leaf.
- Harvesting is a great task for kids because the plant is tough, and the leaves tend to snap off easily if pulled in a downward direction.
- Keep harvesting those lower leaves! Over time, your kale plant may look something like an umbrella.
- Share extra harvest with friends, neighbors, chickens, or consider freezer storage.
To the Kitchen:
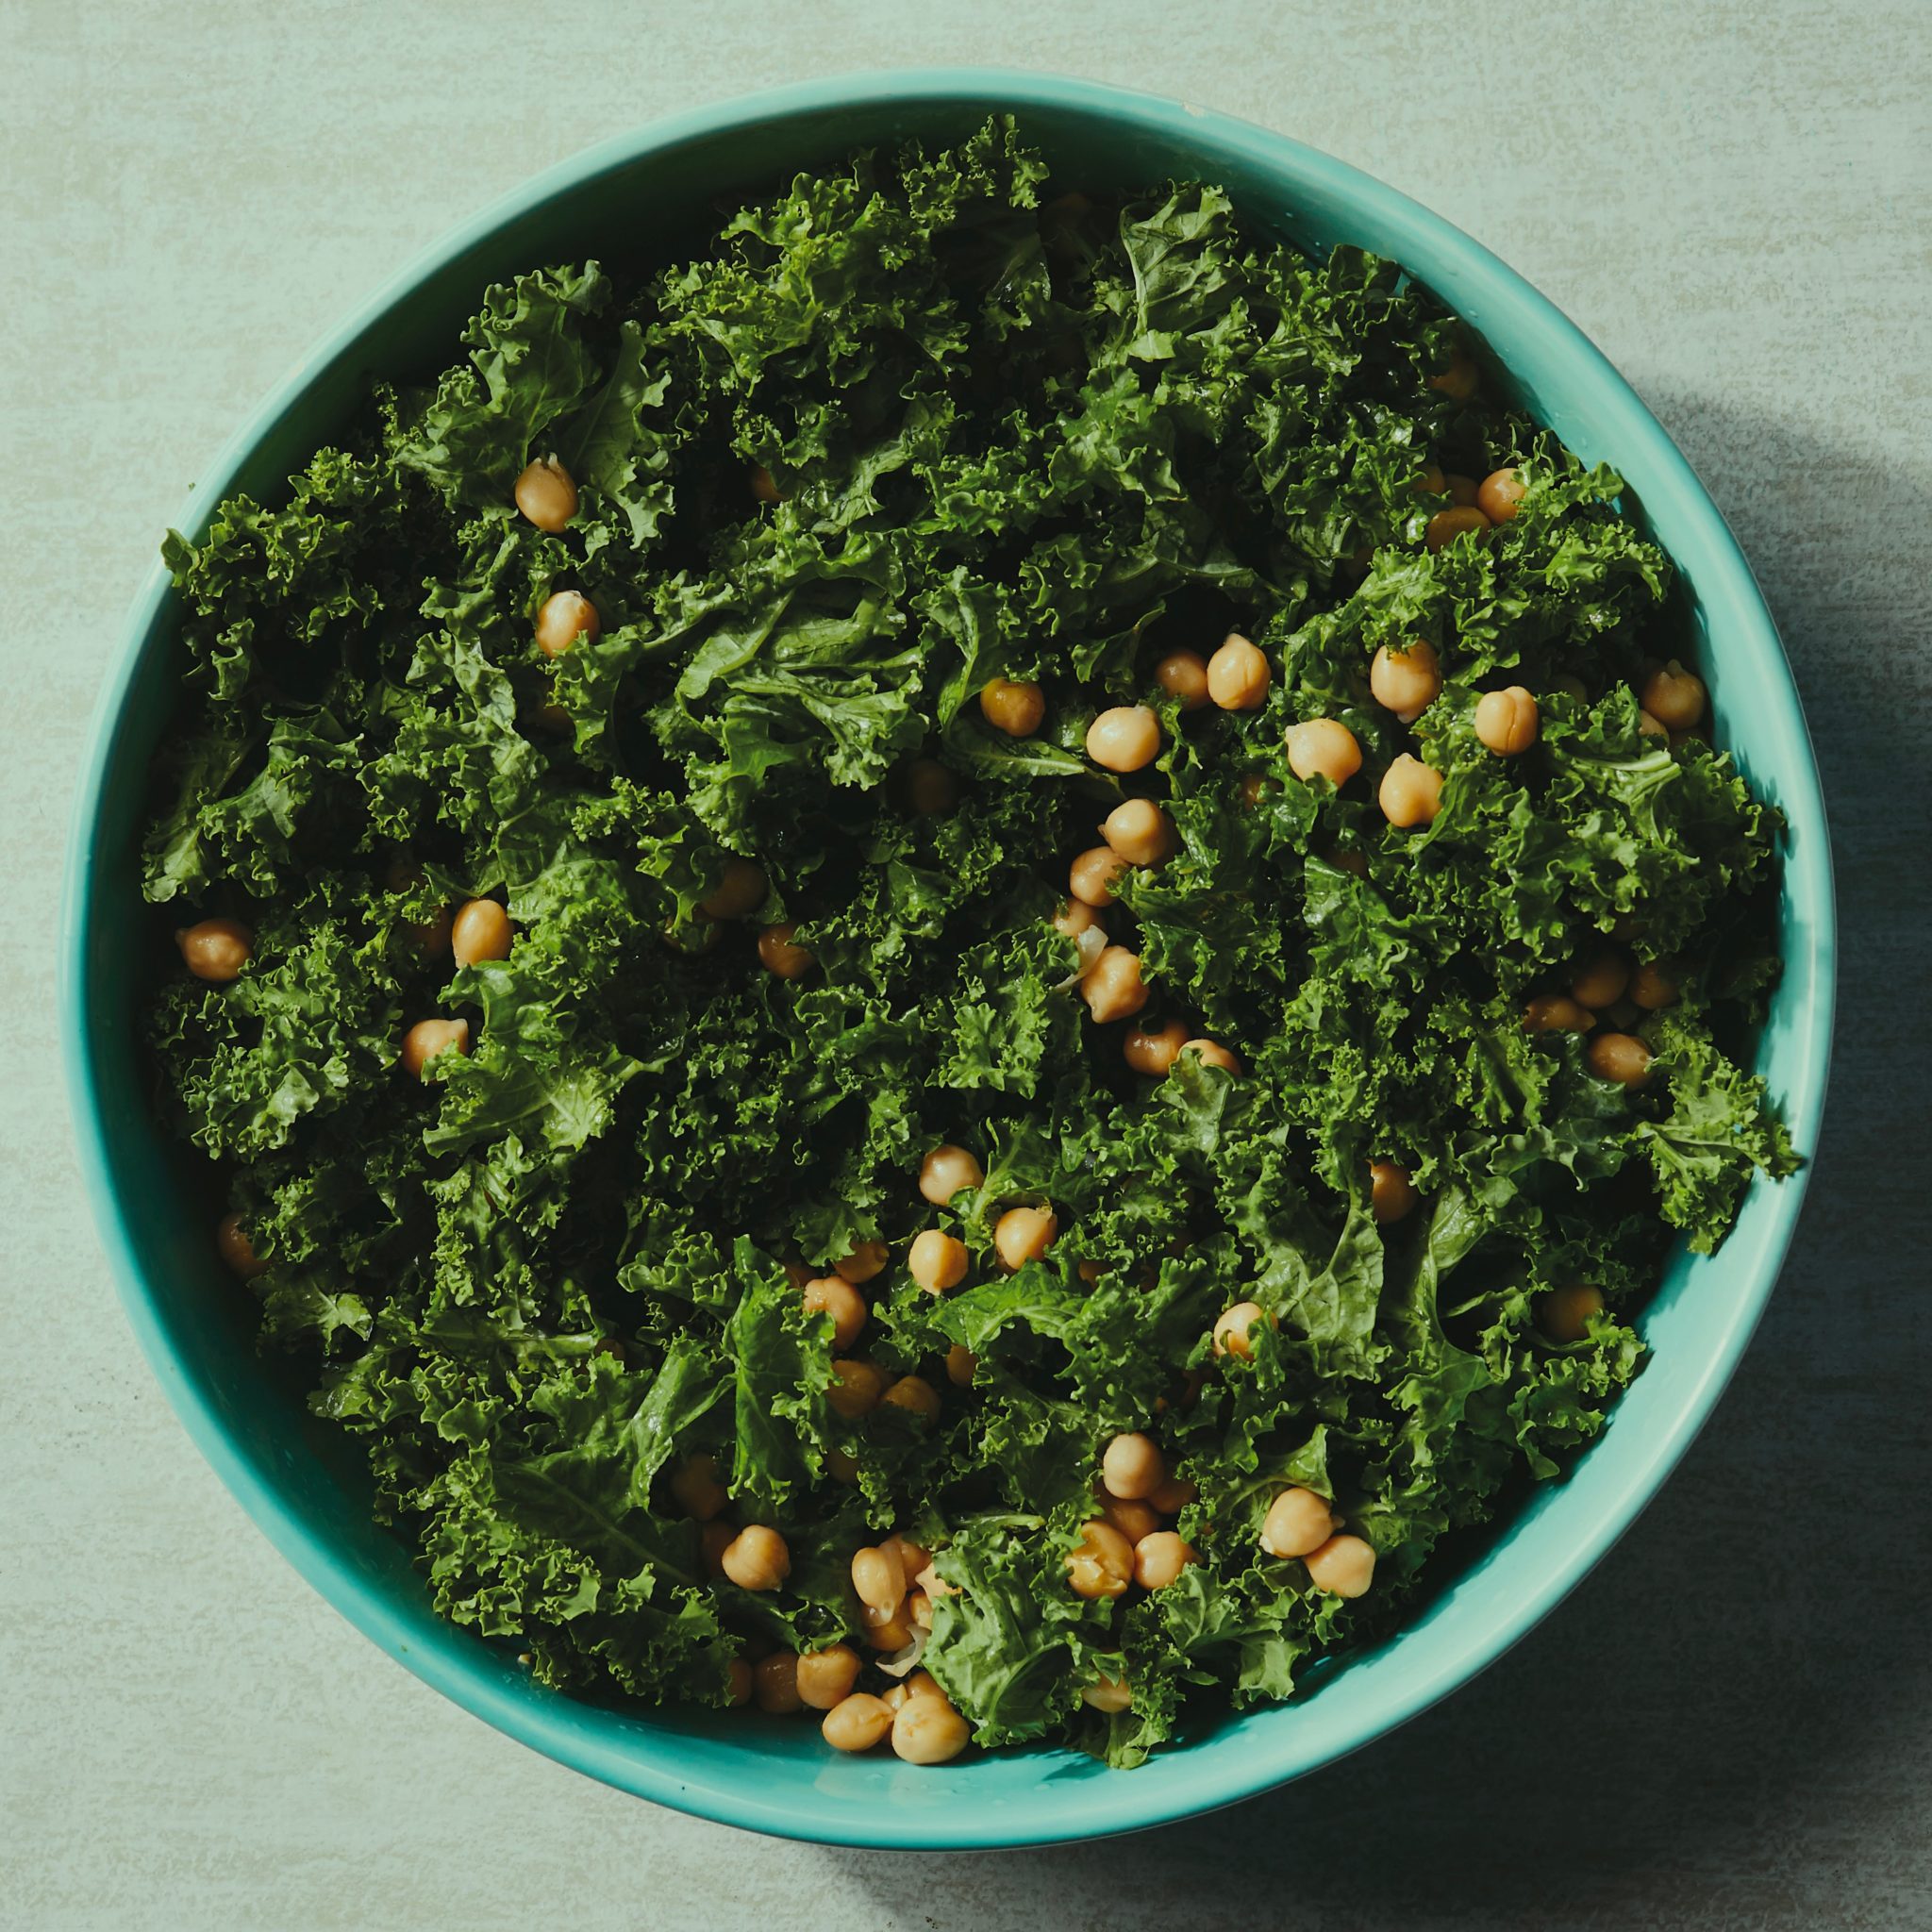
Kale is an excellent source of Vitamin C, as well as other vitamins and minerals, and a great leafy green for its versatility. Read below to learn about kale preparation and explore delicious kale recipes.
Preparation of younger leaves:
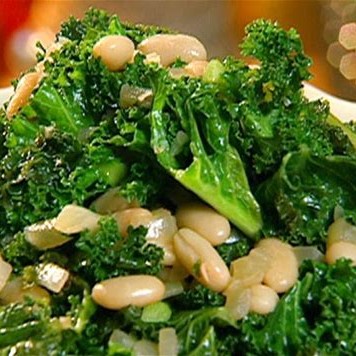
- More tender and most appropriate for salads, such as the one featured below.
- Try massaging leaves with oil or salad dressing. This breaks down tough cellulose for a softer mouth feel texture while eating.
Preparation of older leaves:
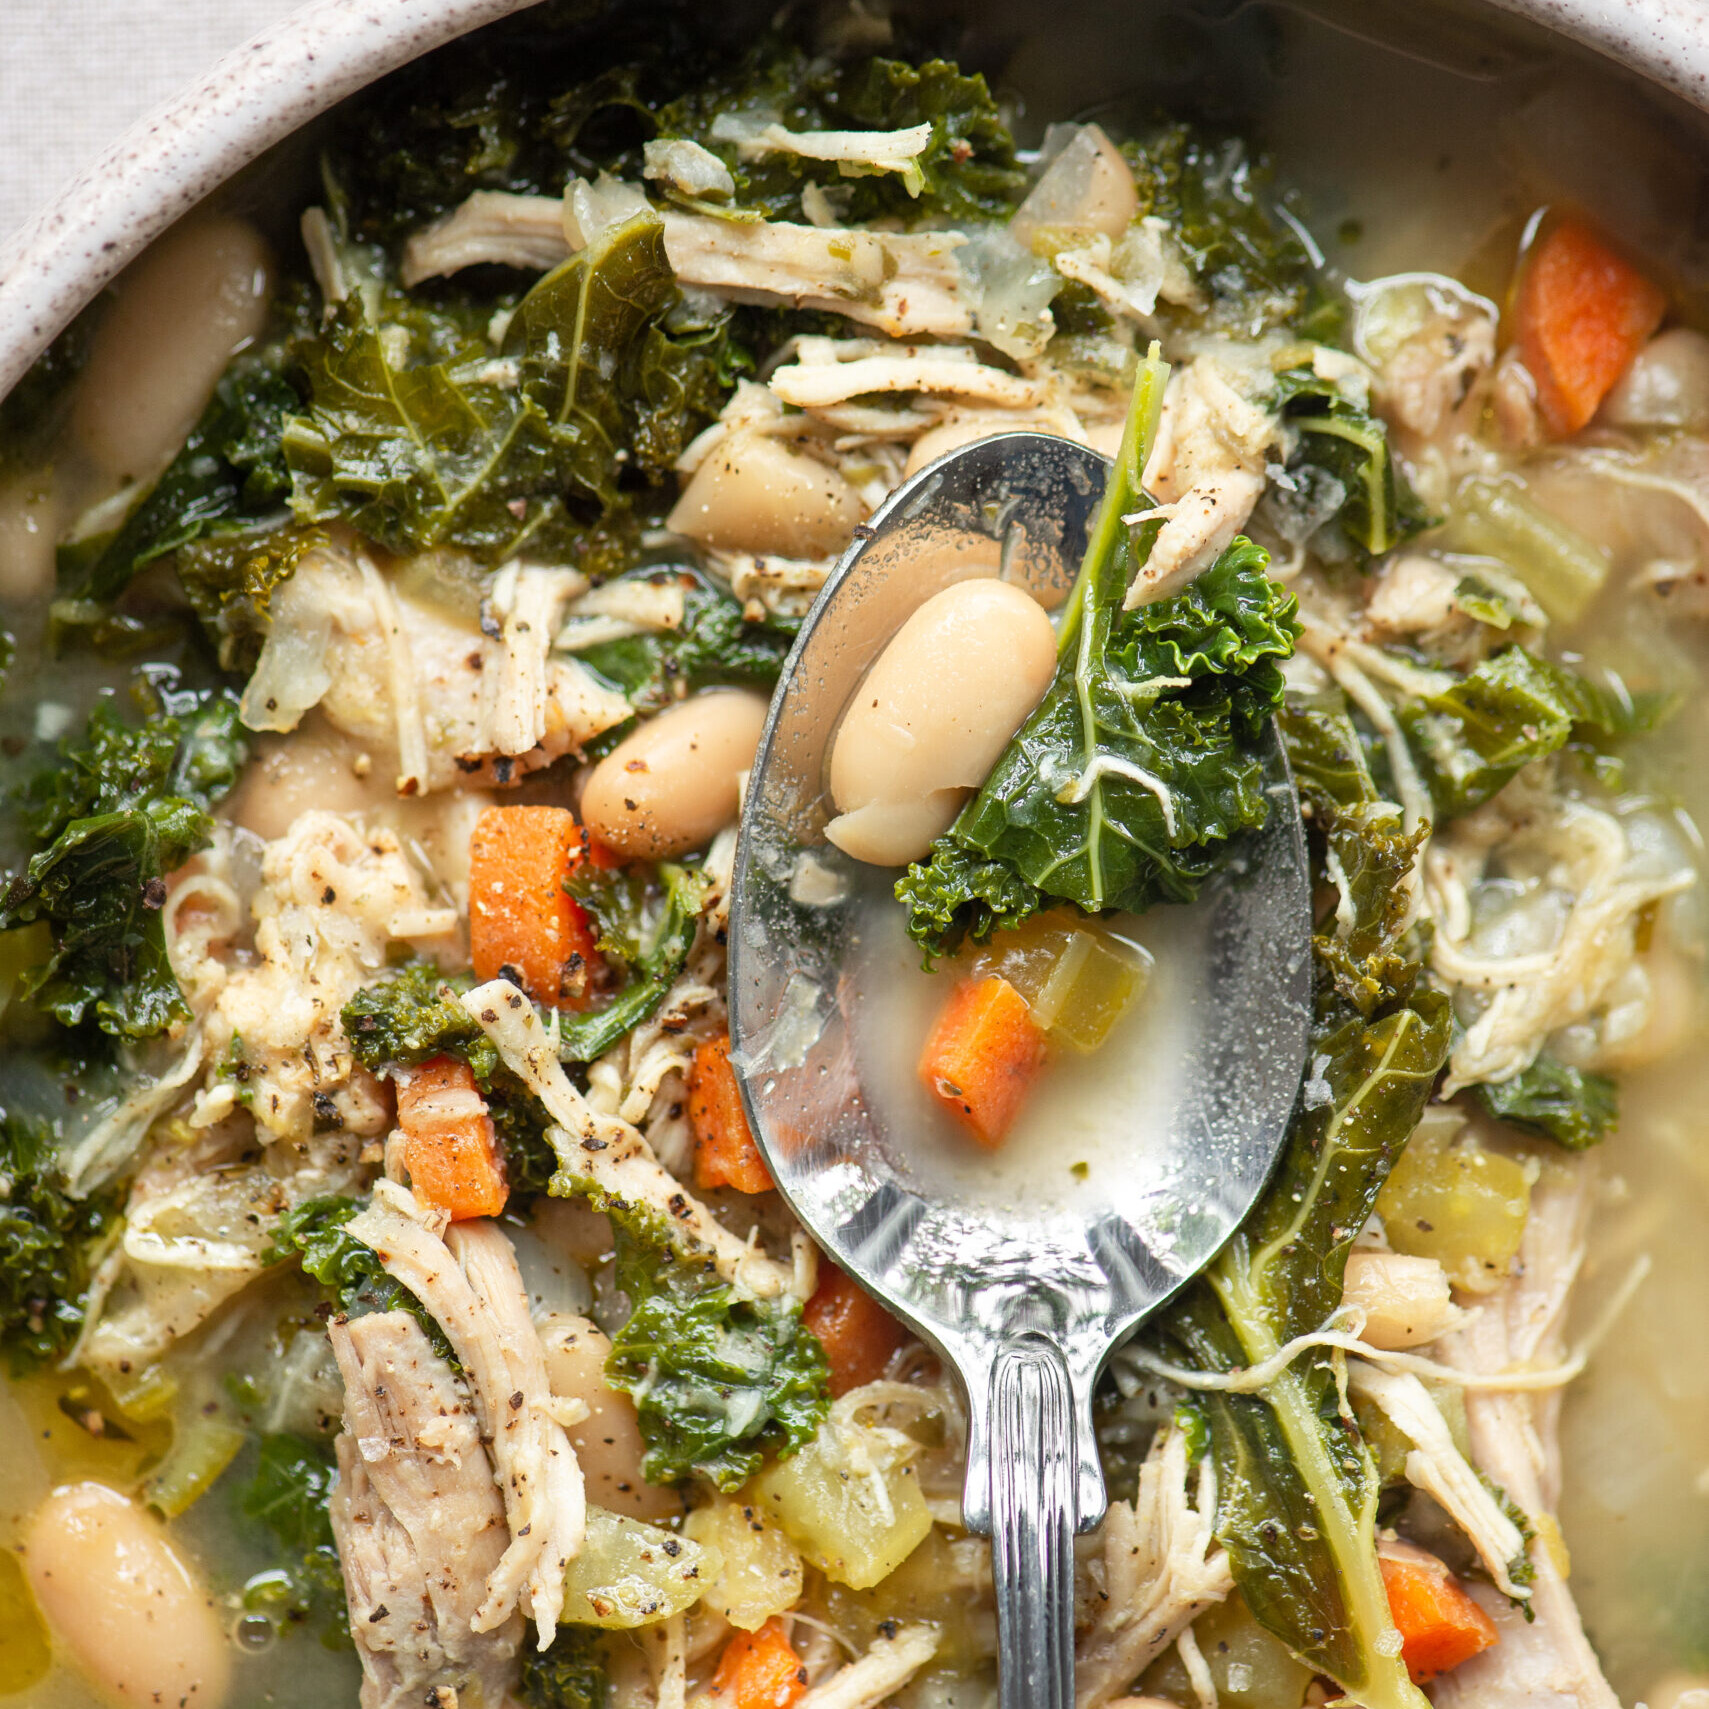
- If you’re not picking kale leaves straight from your garden every other day (most of us aren’t), chances are you have access to older, tougher leaves, rather than the younger, more tender leaves. These bigger leaves are still delicious and are best sauteed, steamed, or incorporated into a soup.
Recipes:


 All hail kale! Kale is worthy of praise as one of North Carolina’s most cold-hardy and problem-free crops. This month, learn how to get the most out of your kale through the winter, as well as how to deter pests and diseases in the coming spring.
Winter Care:
-
- Kale will grow in temperatures as low as 20°F.
- If a hard freeze is expected, insulate the plants with something you have around the house, such as tarps, old sheets, cardboard boxes, or even overturned buckets.
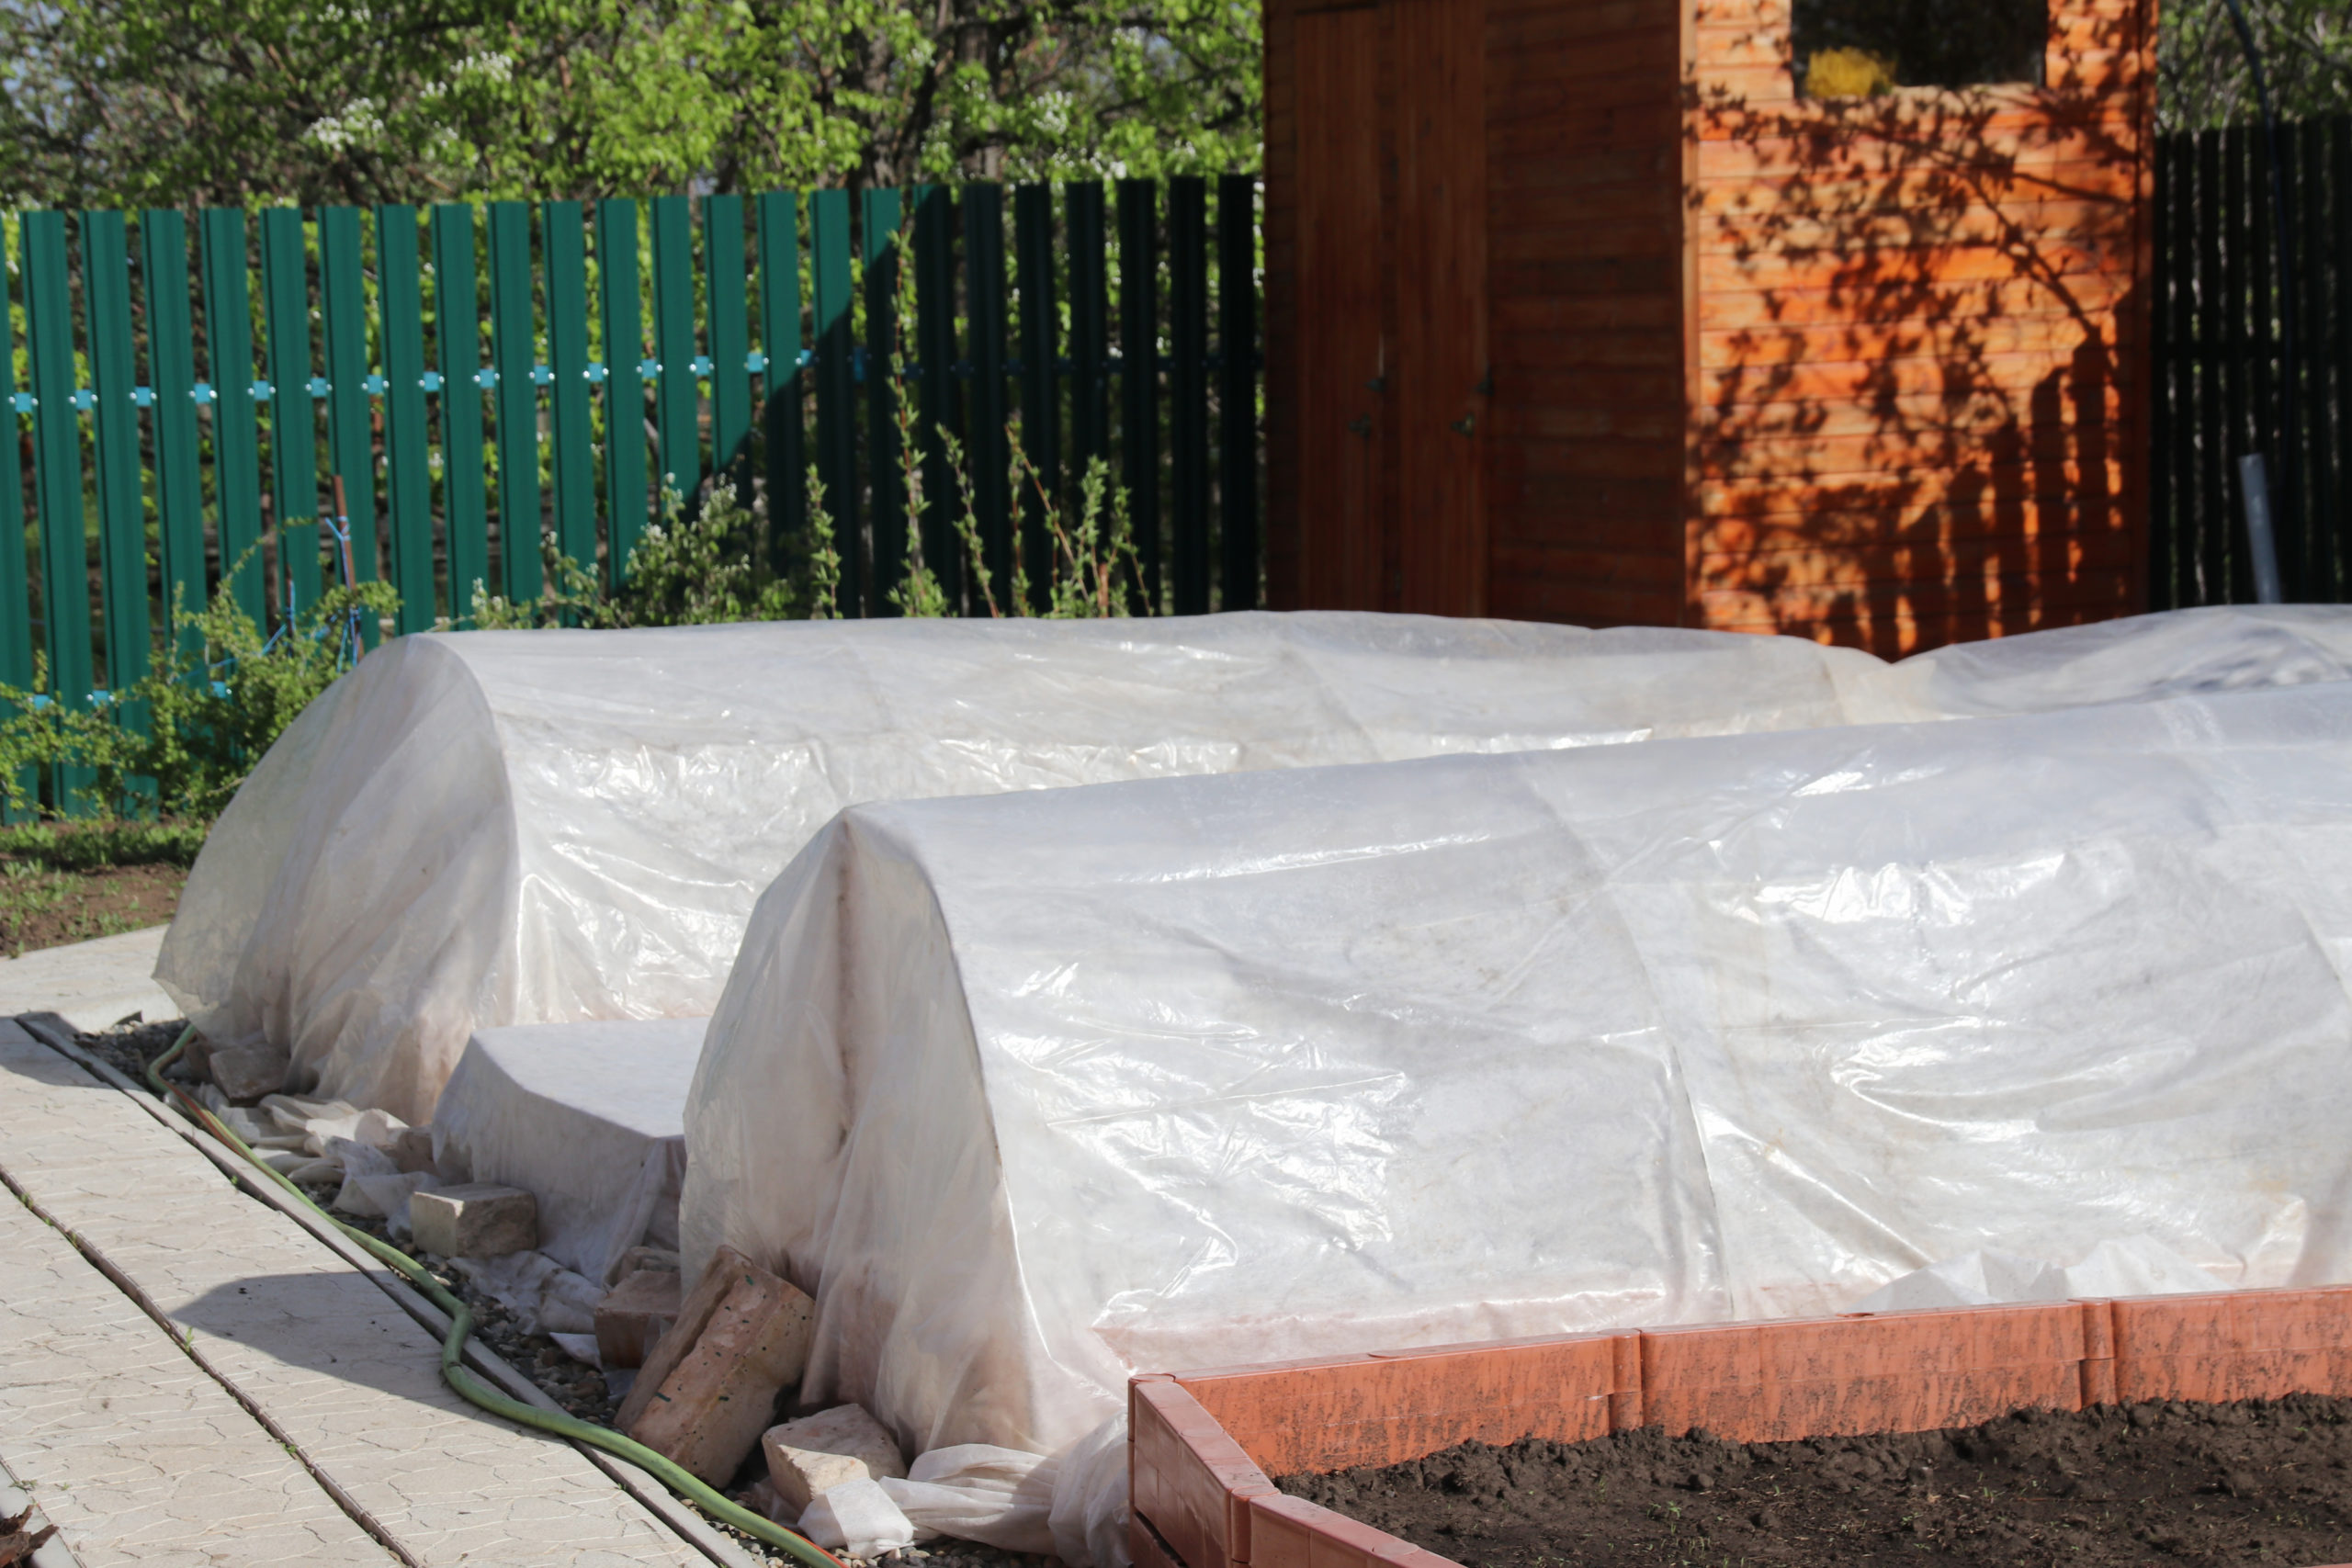 Try to keep the kale leaves from coming in contact with the cold covers.
- Watering the soil 24 hours before a hard freeze can actually help kale defend against the cold since moist soil retains heat better than dry soil.
- If ice or snow coats the leaves, resist the urge to shake it off. Let it melt naturally. Physically moving frozen leaves can damage plant cells and cause breakdown.
- Keep harvesting those lower kale leaves all winter so your plants get the signal to keep growing younger, softer leaves.
Pests / Diseases:
Kale has relatively few problems when it comes to pests and diseases. Aphids, cabbage worms, and black rot are a few examples. Luckily, you can take easy steps to prevent and treat most kale issues. Set your plants up for success by practicing crop rotation – try not to plant kale, or other crops in the “brassica” family (ie. cabbage, broccoli, brussel sprouts, etc), in the same location more than once every 3-4 years. If your kale does appear stressed (holes, discoloration, dying leaves, etc), the recommended treatment is usually in the short list below.
- Physically remove pests by hand or water stream.
- Spray leaves with an insecticidal soap.
- Remove infected plant parts.
- Add native plants so beneficial insects will come and eat the pests.
Learn more about specific kale pest/disease symptoms and control measures.
To the Kitchen:
Dark leafy greens, such as kale, contain lots of nutrients and are a great source of fiber. Kale is a cruciferous vegetable, quite versatile, and can be eaten raw or cooked. If you don’t consume much dairy, consider dark leafy greens as a source of calcium. Kale is also a great source of iron, B Vitamins, and Vitamin C.


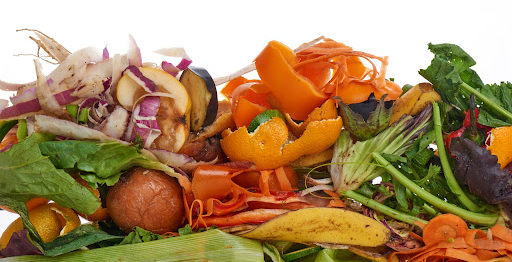
 You may be surprised to learn that households waste more food than restaurants, grocery stores, farms, and manufacturing facilities combined, according to the North Carolina Department of Environmental Quality. About half of household waste is food waste. This waste makes up 18% of landfills, making it the largest component found in most landfills. Additionally, 34 million people are food insecure in the US.
When it comes to gardening, food waste is an important topic to consider.

At the end of each garden season, most gardeners do a final harvest and clear out their beds in order to give the soil time to rest before adding new seeds and new transplants for the upcoming season. This big harvest day often yields a surplus of produce that is at risk of going to waste. Over the next few months, Poe’s Garden-to-Kitchen team will share some tips and strategies for better harvesting and food preservation – so that you can help tackle food waste – starting in your own garden.
Harvesting:
Many gardeners are often tempted to leave plants in their garden beds too long because the plants often still look good, or they may not be ready to plant for the next season. It is important to give your garden beds time to rest, which may mean harvesting and cleaning out beds earlier than you may think.
If you’re planning to sow seeds in March and transplant seedlings in April, strive to clean out your winter beds in February.
- Harvest all the produce first. Weigh and record the produce if you like to keep track of production. Bag and box the produce appropriately for the fridge or a cool dark pantry. Set aside to be gifted, eaten soon, or cleaned and preserved.
- Once the food has been harvested, pull everything else out of the beds, including the roots. This plant waste can be chopped and tossed in a compost pile with dry leaves on top to be used later as fertile soil. If your garden beds will be left undisturbed for many months (i.e. all of fall and winter), some gardeners recommend leaving roots in the soil to decompose.
- Once the garden bed has taken a long nap, amend your garden beds with compost in March. Conduct a soil test to determine the pH and nutrient content. This can be done by submitting a soil sample to your county’s Cooperative Extension.
Preservation:
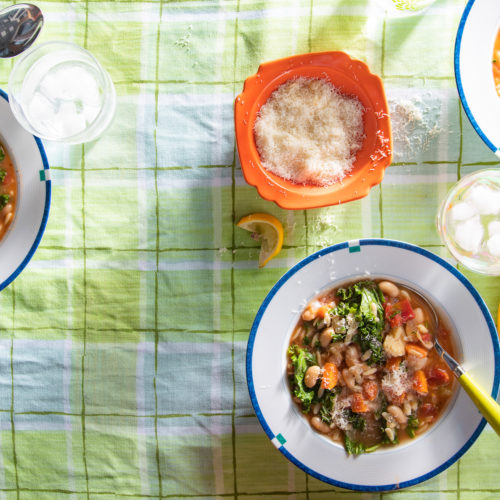
Some produce, such as melons, garlic, and onions, can be stored at room temperature in a cool, dark place. Perishables, such as collard greens, kale, brussel sprouts, and broccoli will benefit most from being stored in the fridge and used for meals within two weeks. If you’ve got more produce than you plan to eat before it goes bad, consider gifting your harvest to others or preserving it for future use. Food preservation includes freezing, drying, salting, and canning. Consider turning produce into a soup, stock, or prepared dish that can be frozen or canned. Pickling vegetables is another great way to keep your harvest fresh.
Recipes: You can also use up your harvest and reduce waste by trying new recipes. Here are a few to try.


Further Reading:
Come back next month for more information about reducing food waste and food preservation tips. April will be our first ever Garden to Kitchen vlog! In the meantime, read more about food waste reduction.
NC Farm Focus
 This month, Poe’s Garden to Kitchen highlights Richardson Herbal Farm in Bladen County, NC. We spoke with lead farmer Linda Tyndall to get her insights on growing herbs.
At her family farm, Tyndall grows a variety of herbs including rosemary, thyme, sage, camomile, mint, and mullein. In addition to herbs, they also grow produce and have a growing beehive. Containers, box gardens, and repurposed old tires are used to create garden beds.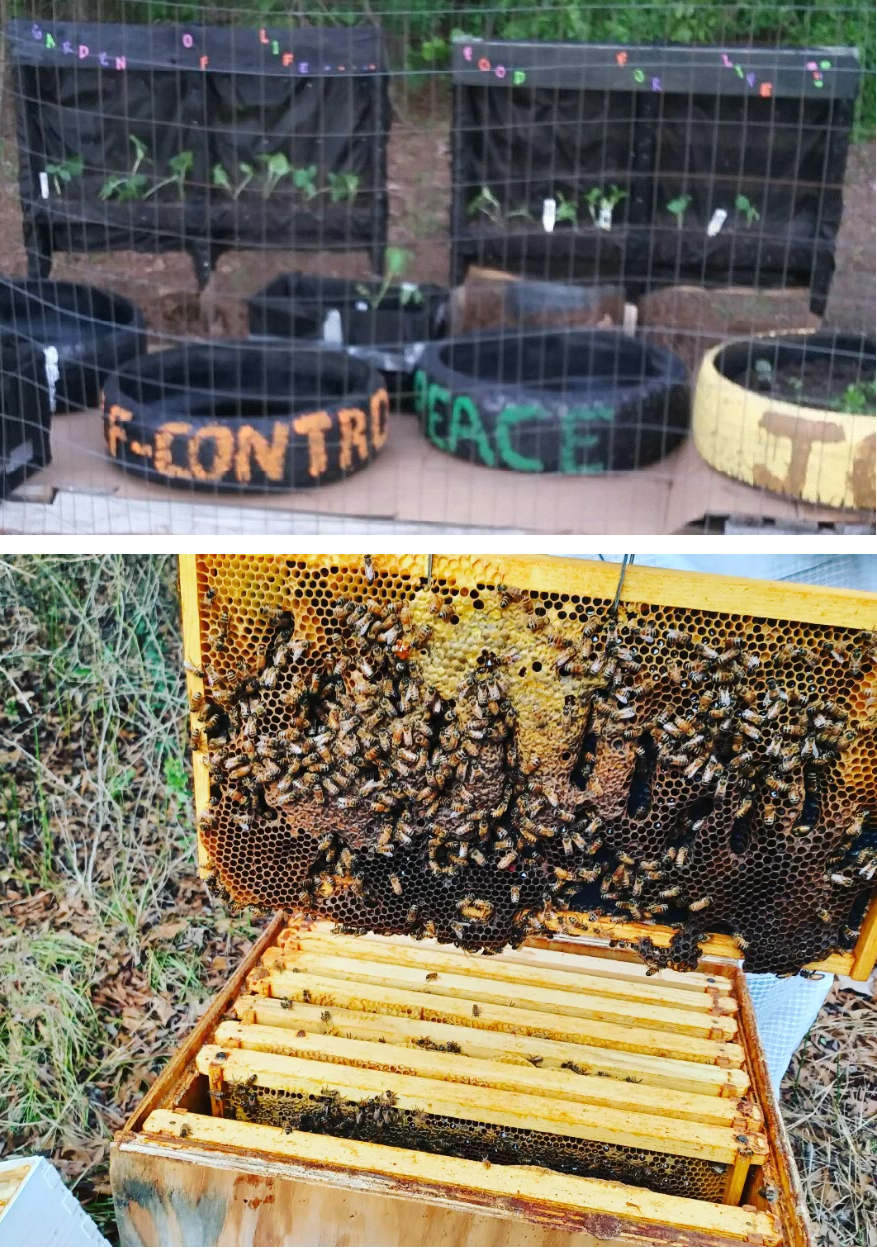
Tyndall makes tinctures, soaps, and teas from the herbs she grows and sells them on-site at her farm and at the Robeson County Farmers’ Market. She also travels to the Black Farmers’ Market in Raleigh and Durham.
Herbal farming has been instrumental in Tyndall’s life since birth. She grew up on a farm, and her family always used herbal remedies for illness. Tyndall believes that everyone has natural and spiritual connections to plants. This connection drives her passion to share her gifts with the community.
 Richardson Herbal Farms has generously provided community members with extra produce during the pandemic. Additionally, they plan to do community outreach and workshops in the near future. Tyndall would like to continue helping people from the inside out to become whole, and encourage youth to recognize that food helps healing.
Favorite Herb: Mullein
Tyndall favors mullein because it has small, fuzzy hairs that are similar to the cilia in our airways. This herb is traditionally used to support the respiratory system.

Tips on Herbs/Favorite Recipes:
Tyndall’s favorite way to eat herbs is to mix fresh herbs into salads for added flavor. She loves mixing cilantro, basil, sage, and oregano together in salads.
For more information on how you can purchase items from Richardson Herbal Farms, e-mail [email protected].
Guest Author: Catherine Wills, Assistant Garden Specialist
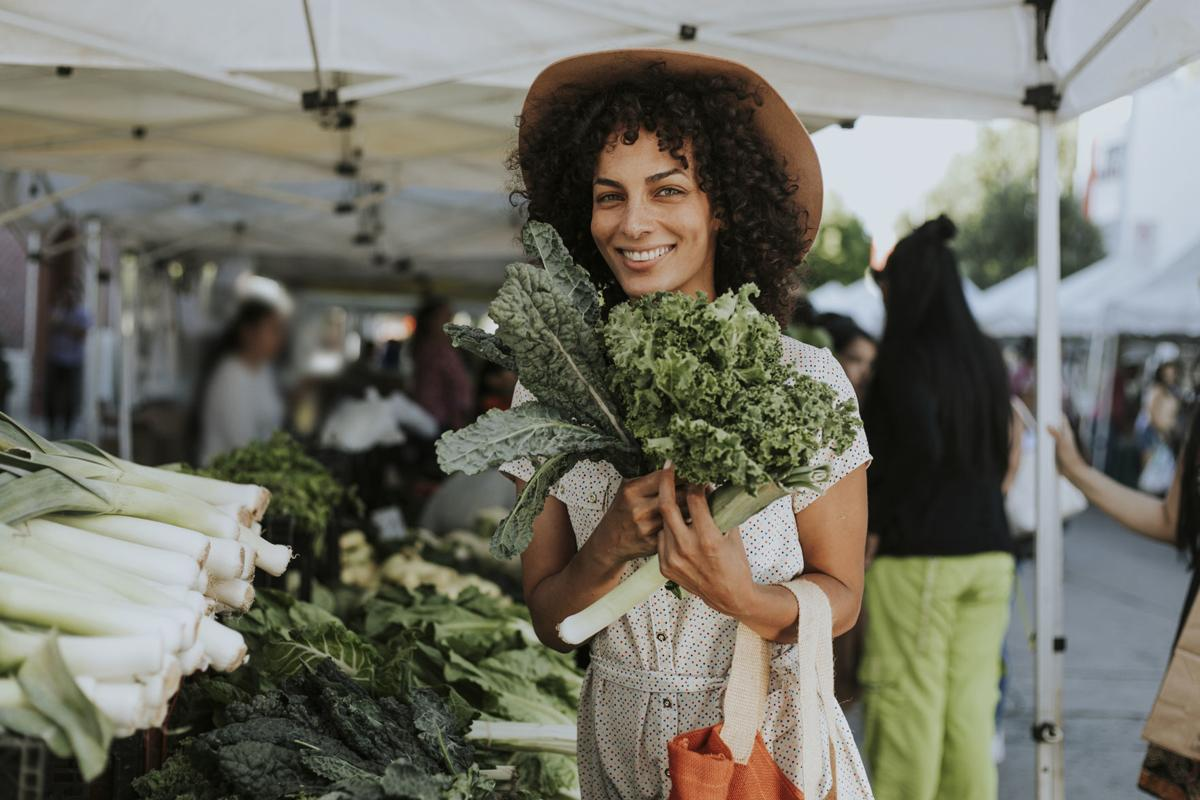
Farmers Market Kickoff
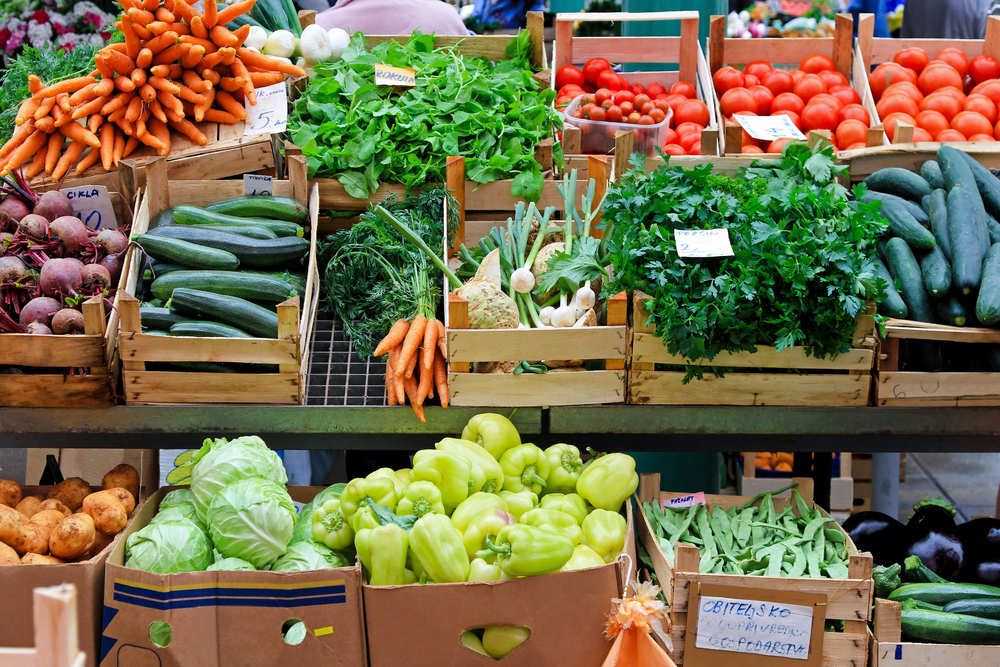 Get ready to get local! Many farmers markets around the state kickoff their produce-selling season in April or May. Other year-round markets tend to increase their hours during these months to accommodate more farmers and larger harvests.
Why choose the farmers market over the grocery store?
- Health Benefits: The fruits, veggies, meats, and many other goods that are often available at farmers markets tend to stay fresh longer because they have not had to travel as far. Fresh local foods are often more colorful, more delicious, more nutritious, and are not loaded with preservatives. This makes these foods better for your health and the environment.
- Better Deals: You often can get more bang for your buck at farmers markets. In times of plenty, small-scale farmers need to sell their product directly to individuals because they lack large-scale distribution ability. This means, in-season high-quality produce can cost less than its supermarket equivalent.
- Double EBT Dollars: An increasing number of markets are accepting, matching, and even doubling EBT dollars. For example, spend $5 of EBT and get $10 worth of food. Find which markets take EBT.
- WIC & Seniors Coupons: The Farmers Market Nutrition Program (FNMP) is also issuing coupons to eligible low-income participants to increase access to locally grown products. Learn more about WIC coupons and Senior coupons.
- Family Fun: Farmers markets tend to be a lively community event bringing people of all ages together. You can enjoy live music, playgrounds, arts and crafts, and grassy patches for picnicking. Take the whole family and make a day of it.
What’s at the market now?
 Right now at your local farmers market you will find collards, spinach, herbs, sweet potatoes, peanuts, asparagus, and other cold season crops. Use this chart to see what will be in season for each month. For example, strawberries are just a month away and will be available in mid-April. Beyond fruits and vegetables, you can also purchase locally sourced honey, eggs, meats, brews, baked goods, jewelry, dog treats, flowers, soaps, and so much more. Most market websites give you a good idea of what’s available through a list of vendors.
What is a CSA? Should I join?
CSA stands for Community-Supported Agriculture. Some farms at the market offer CSA membership options in which you pay a certain amount regularly and get a pre-packed box of produce on a weekly or monthly basis. This is a great way to simplify shopping, save money, try new recipes, and help sustain small-scale farms. Some even offer delivery options. Check out your market website or talk to farmers directly on market day to learn more.
Find a Market Near You
Download the Visit NC Farms app to locate nearby farms, markets, fisheries, and activities for the whole family.
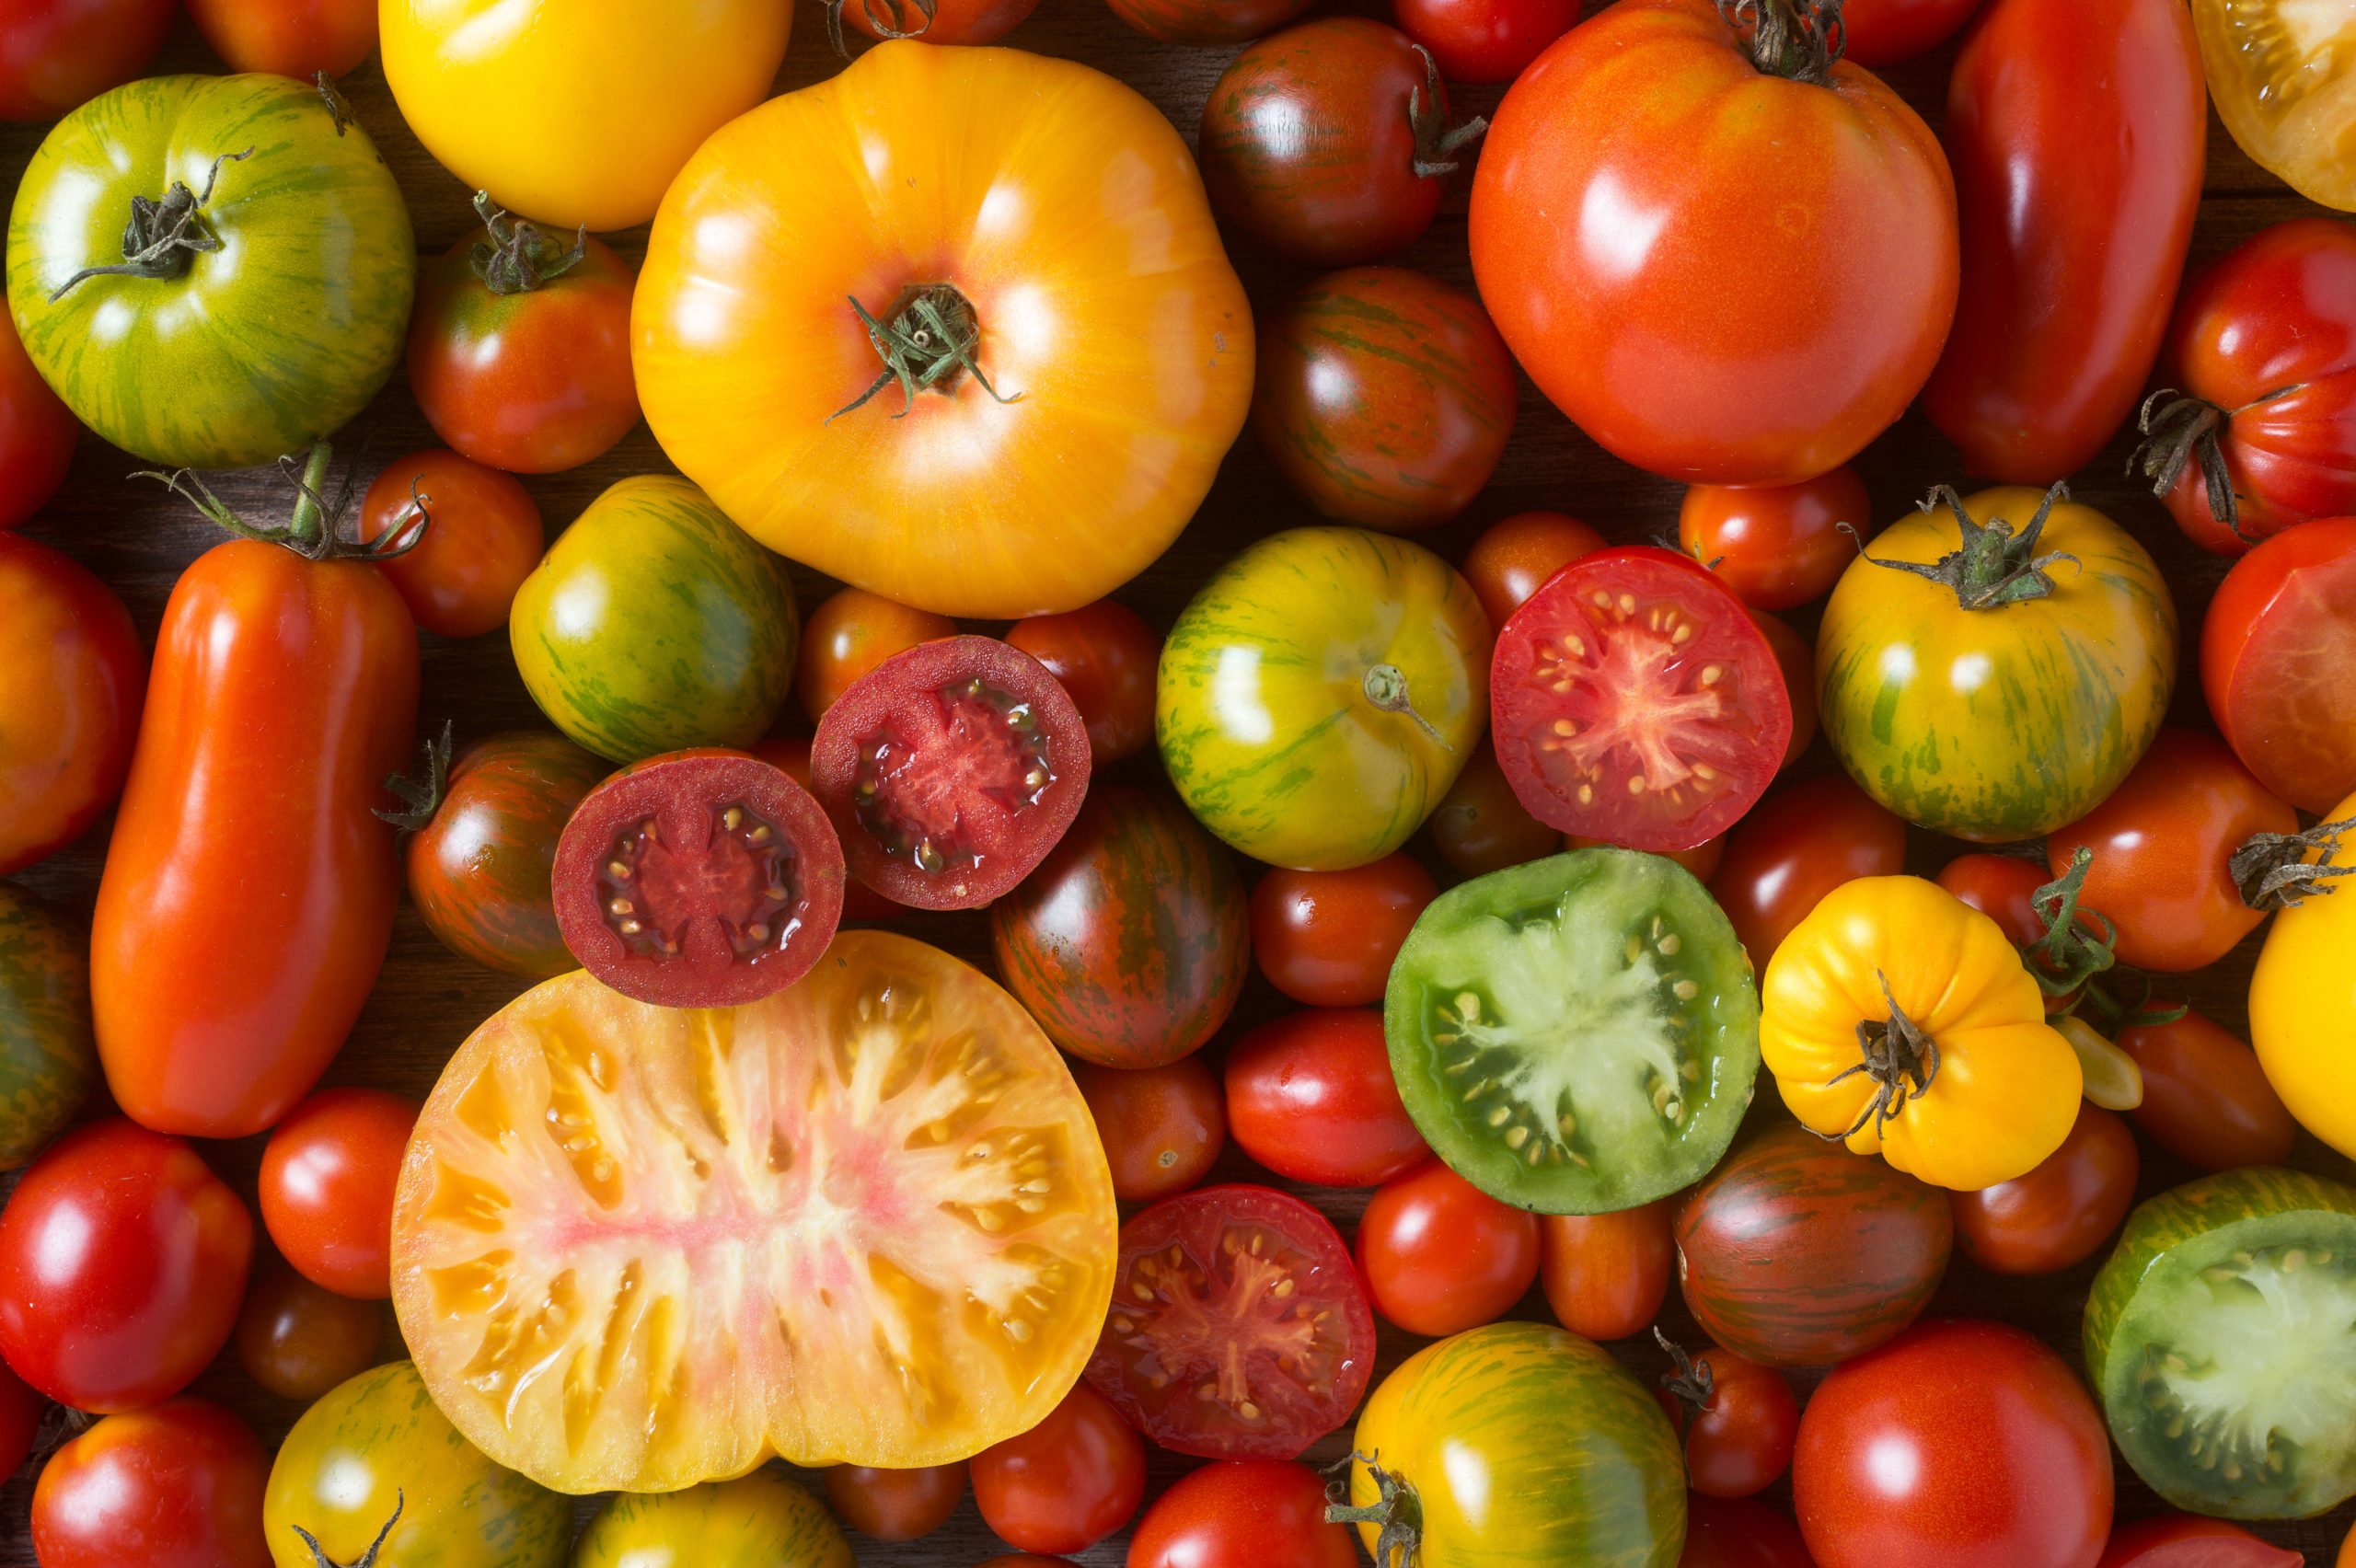
For this month’s Garden-to-Kitchen series on tomatoes, we visited the State Farmers Market in Raleigh, NC. Follow garden health educator, Catherine Wills, as she shares her experience learning how Tart’s Produce grows and sells tomatoes.![]()
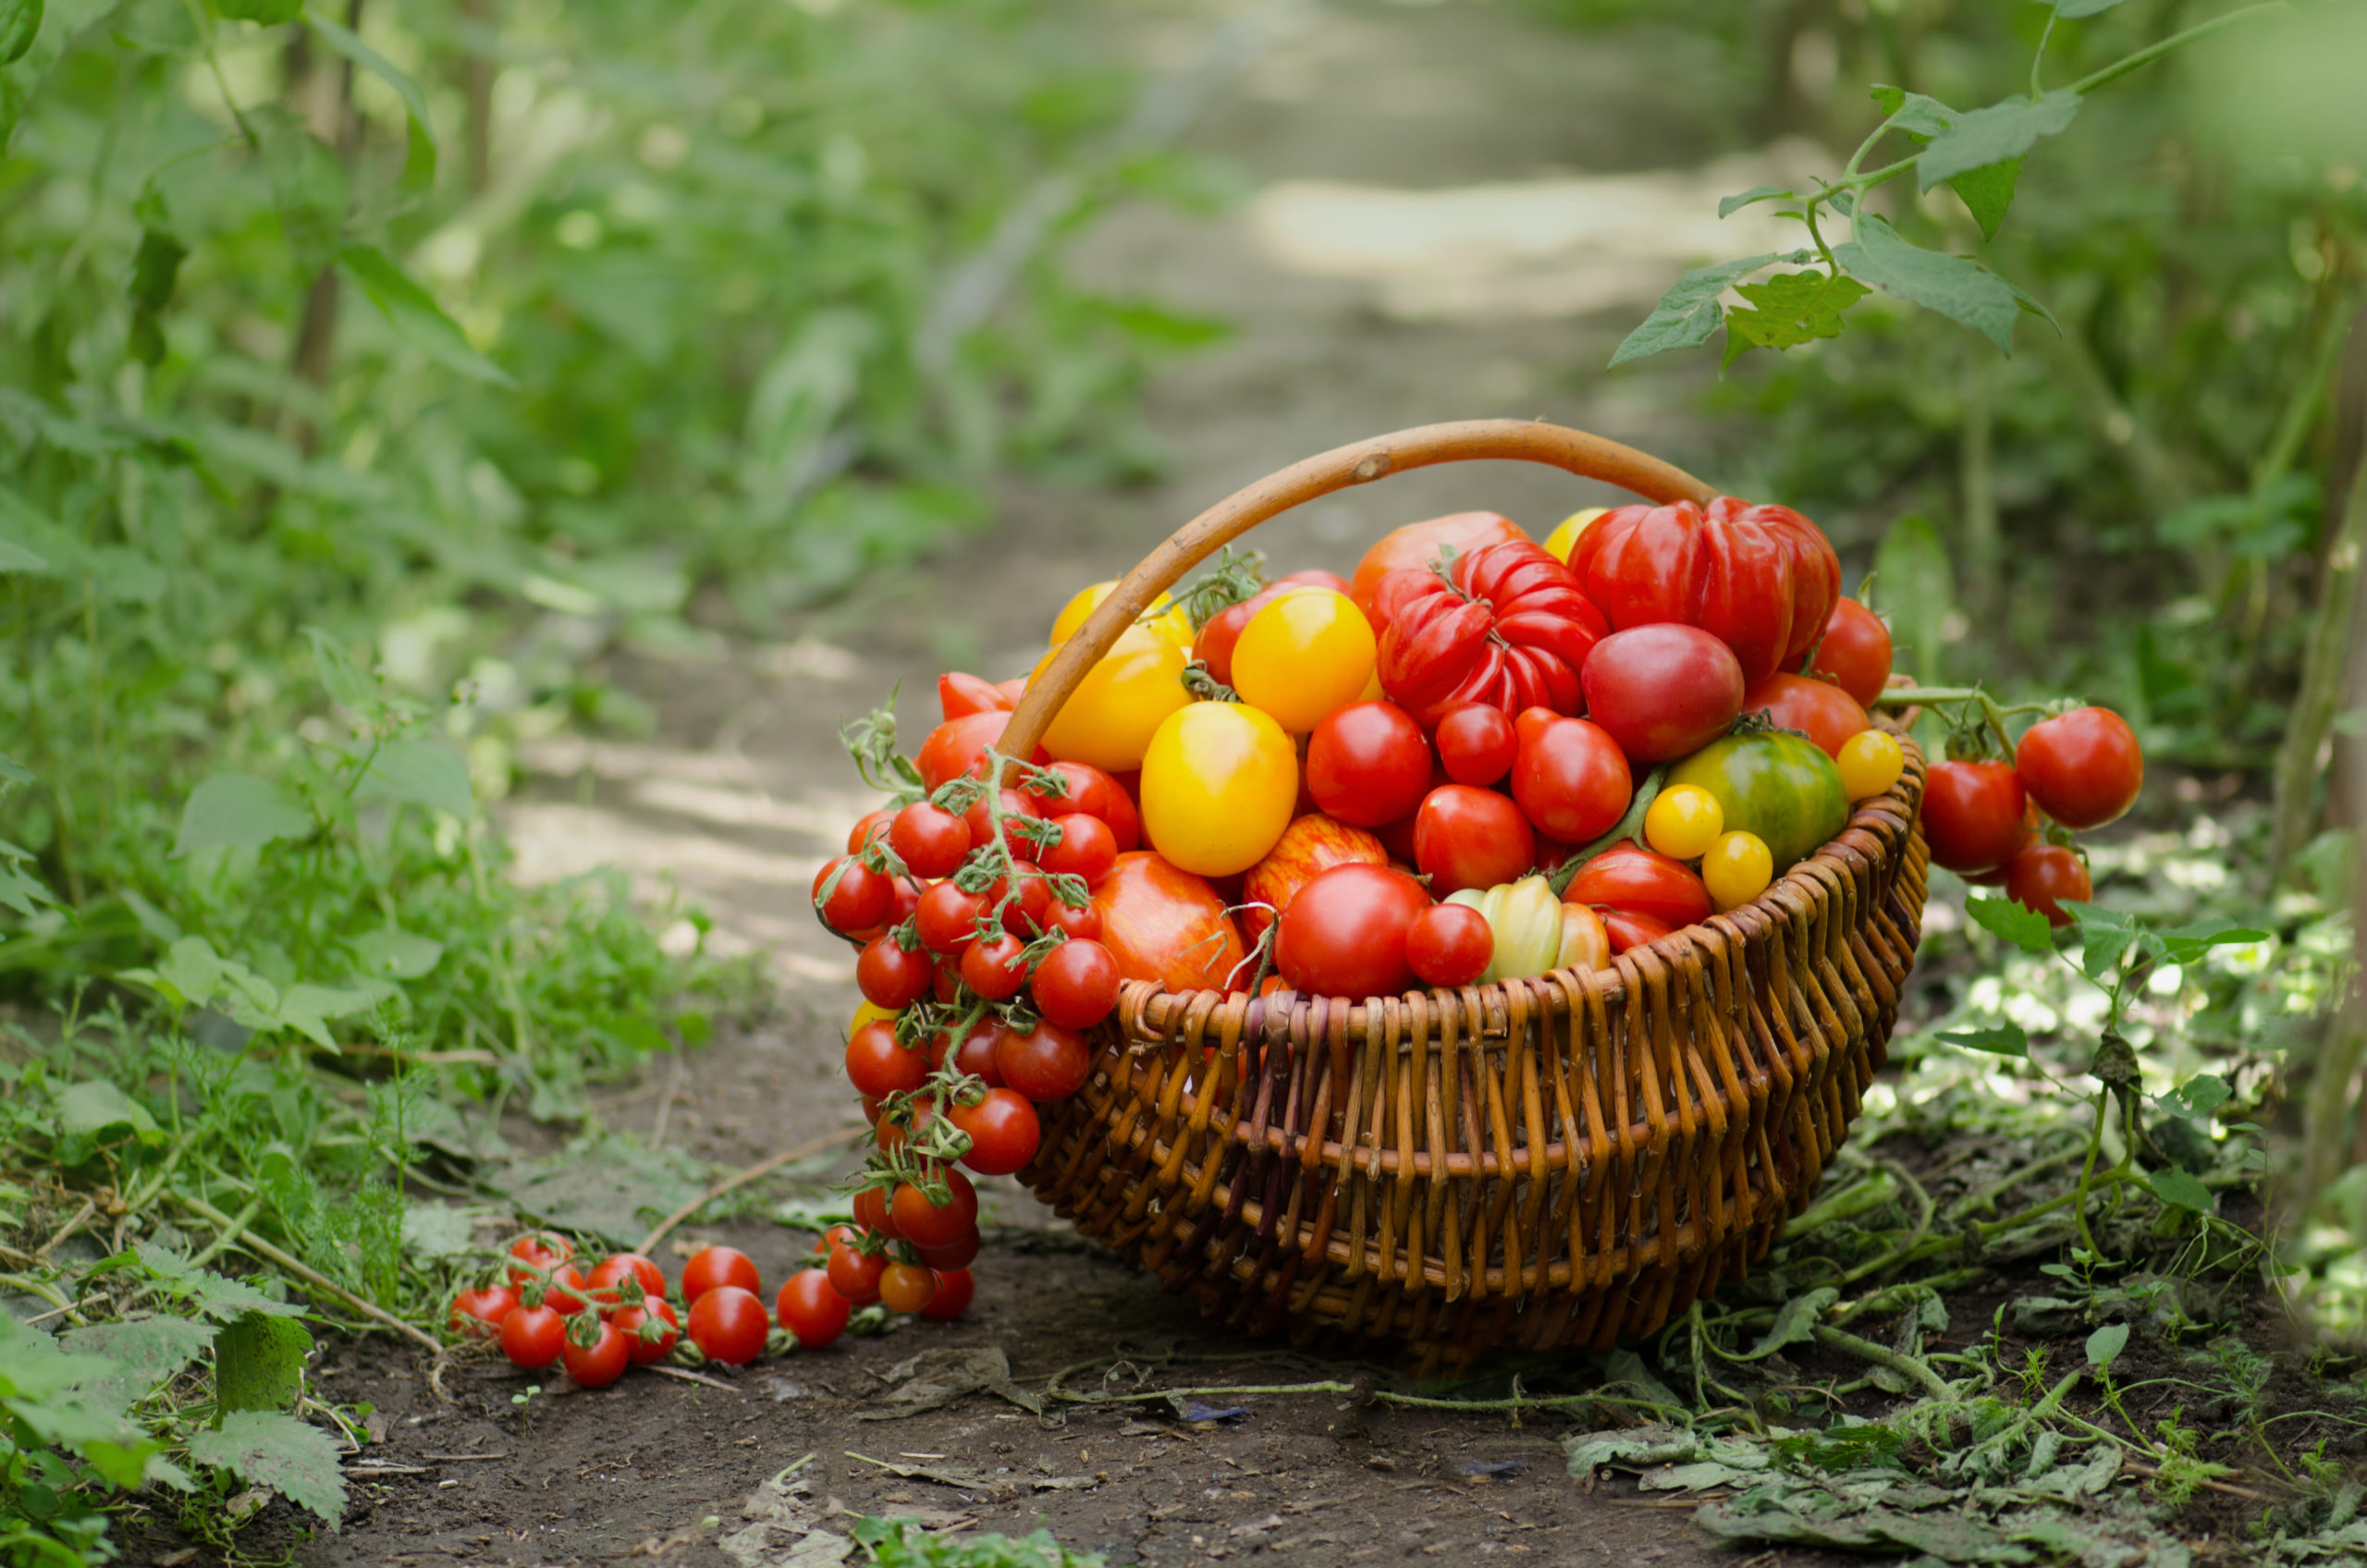
I recently took a trip to the State Farmers Market to learn more about how NC farmers sell tomatoes. Of course, I also bought some produce – I couldn’t resist! When I walked into the market, my attention was immediately caught by a display of bright, beautiful tomatoes, and I made my way over to Tart’s Strawberry and Produce. At the stand, I met an employee of Tart’s and had a conversation all about tomatoes.
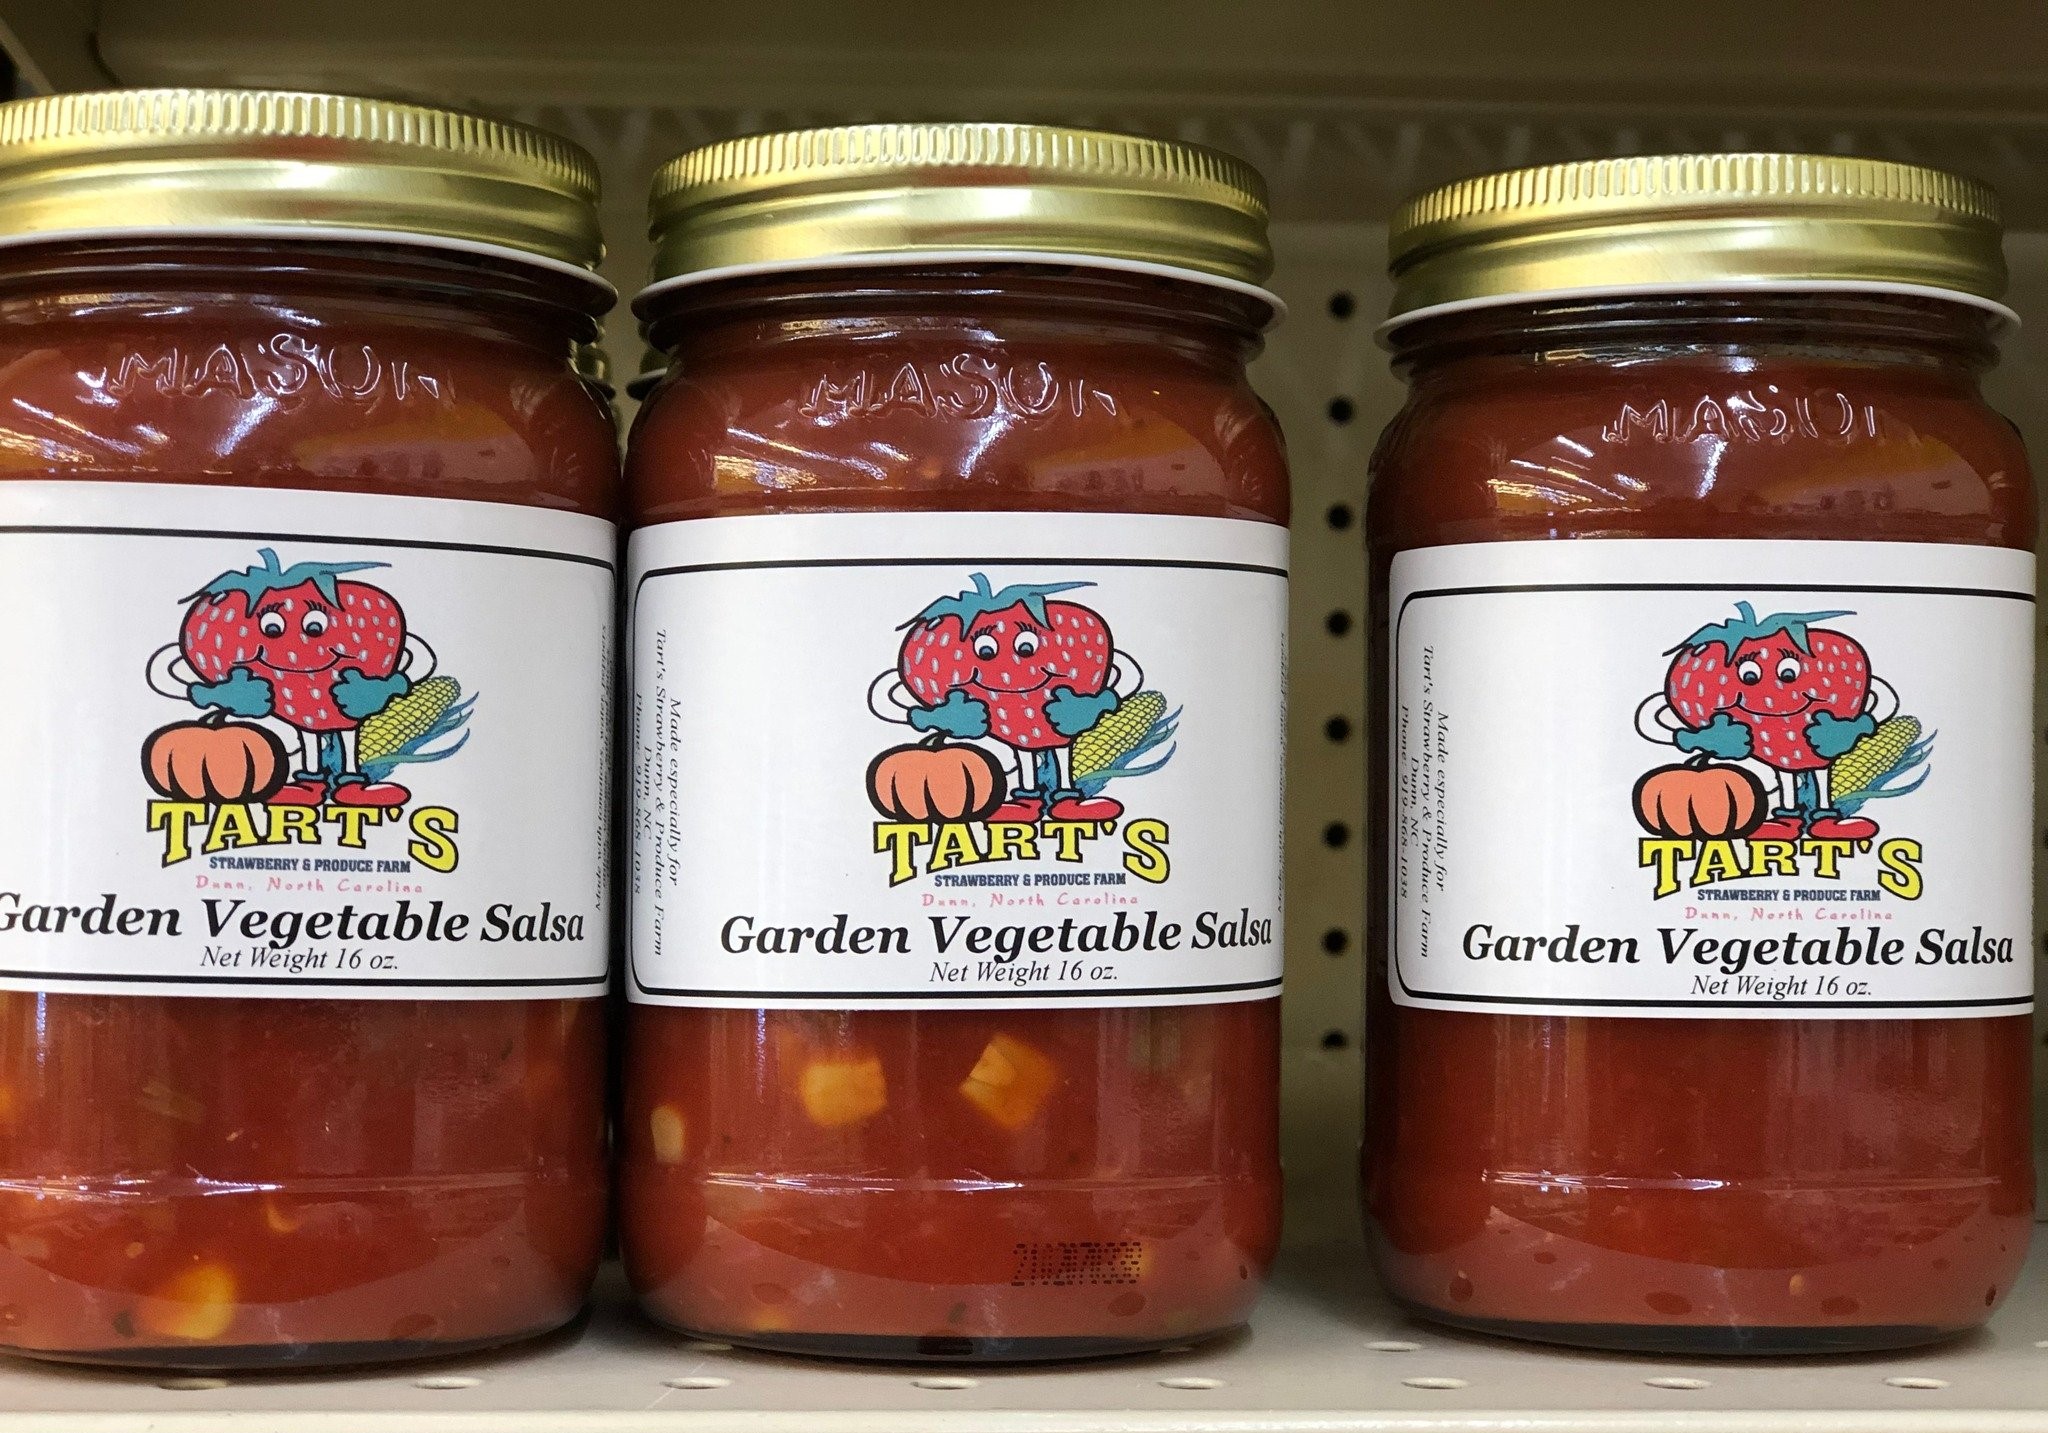
 Tart’s Strawberry and Produce, owned by Charles Tart, is a family-owned business located in Dunn, NC. They are primarily known for growing strawberries, but their tomato selection is equally impressive. They also sell other produce, such as corn, squash, okra, and cucumbers. They recently expanded their retail area at their Dunn location to include a gift shop with a bakery and a variety of homemade jams, jellies, and preserves. Find out what’s available now on Tart’s Produce Facebook page.
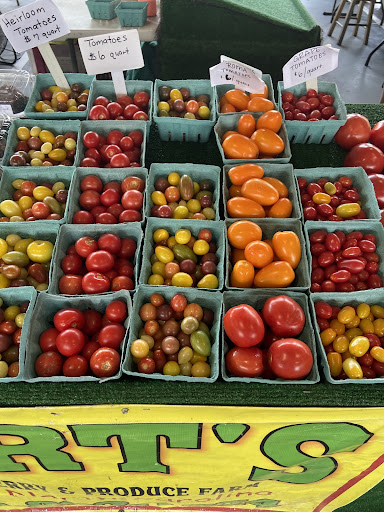 Let’s talk tomatoes. Tart’s had a diverse variety of tomatoes including Trust, BetterBoy, Heirloom, Roma, Grape, and Cherry. We discussed that Tart’s has perfected their selection of varieties over the years based on what grows best and what the customers request. Tart’s typically sells tomatoes from May-July/August and will have more varieties later in the season. I asked about Tart’s process of storing and transporting their tomatoes. Tart’s tomatoes are picked fresh and stored at room temperature until ready for transport. I browsed their selection of tomatoes and asked how to pick the perfect tomato. It’s all about the senses! To pick the ripest tomato, aim for a deep, vibrant color and make sure it’s somewhat firm but not too hard. I was let in on a secret: Don’t skip the imperfect or misfit tomatoes, they’re usually the best ones.
With that good advice in mind, I confidently bought a BetterBoy tomato. When I got home, I knew exactly how I wanted to enjoy my fresh tomato. I simply sliced the tomato with cucumbers and seasoned it with salt and pepper. I added a splash of apple cider vinegar and voila! I enjoyed a refreshing summer salad.
Tart’s Strawberry and Produce
100 North Powell Avenue
Dunn, NC 28334
910-892-1324
https://tartsstrawberryproduce.net/
[email protected]


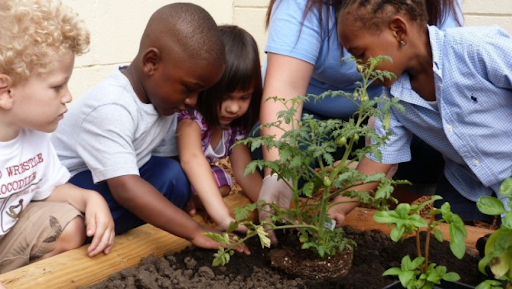
In honor of upcoming National Farm to School (F2S) Month in October, we interviewed local F2S experts Remi Ham and Tracey Bates to showcase the importance of farm to school, and learn a little more about how to get involved.
Remi Ham, MLA
Assistant Teaching Professor
Cooperative Extension Farm to School Coordinator
Department of Horticultural Science
North Carolina State University

Tracey Bates, MPH, RDN, LDN, FAND
School Nutrition Promotion Specialist
Co-Chair for the Farm to School Coalition of North Carolina

Question 1. What is Farm to School?
Remi’s Answer:
Farm to school connects local agriculture, schools, and partners to benefit students, educators, farmers, families, and communities. These programs support local food procurement, school gardens, and nutrition education.
School nutrition professionals, teachers, administrators, school nurses, school health coordinators, local farmers, students, families, policymakers, and community organizations each have an important role in building capacity for and establishing a sustainable farm to school program.
For more information visit CEFS Farm to School.
Tracey’s Answer:
Farm to school can vary across settings, but it always includes one or more of the following: purchasing, promoting, and serving local food as part of school meals, snacks or taste tests, interactive learning through gardening, and/or engaging educational activities related to agriculture, food, health, or nutrition.
Question 2. What is your role with Farm to School?
Remi’s Answer:
NC Cooperative Extension Farm to School Coordinator and Co-Lead of Cooperative Extension Local Food Farm to School Working Team.
Tracey’s Answer:
Farm to school is woven into my work as a School Nutrition Promotion Specialist with the Office of School Nutrition, North Carolina Department of Public Instruction. In this role, I develop resources and identify best practices to assist local education agencies (LEAs) in implementing, expanding, or enhancing farm to school activities and programming. This includes agriculture, nutrition and health place‐based education, school gardens, procurement of local agricultural products, and incorporation of local agricultural products into school menus.
I also have the honor of serving as Co-Chair for the Farm to School Coalition of North Carolina, which is dedicated to connecting local agriculture with schools, engaging with students and communities, and advancing a more equitable and just food system.
Question 3. Why do you think Farm to School is important for NC?
Remi’s Answer:
Farm to School helps to support a healthier food system across North Carolina. This community driven effort is at the heart of improving both health and wellness for children and the school communities’ they are connected to.
F2School Programing Examples:
- School nutrition professionals and farmers can work together to increase the procurement of local food for school meals and snacks. This also helps tell the story of local food systems.
- Teachers and school nutrition professionals can teach and promote farm to school to students and their families to increase the consumption of healthy foods.
- Students, families, and community organizations can advocate for farm to school programming in their local school districts.
- School administrators and policymakers can establish policies and practices in support of farm to school.
Tracey’s Answer:
Farm to school connects local agriculture, schools, and partners to benefit students, educators, farmers, families, and communities.
Experiential education offered through farm to school activities improves academic performance, supports social emotional learning, and helps students, school staff, and their families learn more about and appreciate how food is grown, harvested, distributed, prepared, and served. This knowledge can help kids and adults to make more informed food choices to support not only their health but also their local communities.
Purchasing of local food by schools for meals, snacks, and taste tests provide additional market opportunities for farmers.
Question 4. What can we look forward to with Farm to School this coming year?
Remi’s Answer:
In the upcoming year, we are developing an online training course – The NC Farm to School Training Initiative (NCFSTI). This initiative has three significant project goals.
First, is to develop an online educational training platform for individuals, groups, and entities seeking to implement and support more resilient food systems for our school communities. This goal is supported through an online certificate program featuring a diverse range of educational modules. Modules will include an introduction to farm to school, how to build farm to school teams, how to establish a school garden classroom, incorporating cooking in the classroom, racial equity, strengthening local food procurement, farm field trips, improving student engagement, and program evaluation. Participants can take all modules of this online training for course certification, or by choosing training modules of interest.
A second goal of the NCFSTI is to create free and easily accessible online tools for continuing education and outreach.
Last, the NCFSTI will work to provide partners mechanisms for developing communities of praxis and sharing in the advancement of farm to school in NC.
The North Carolina Farm to School Training Initiative is supported by the National Institution of Food and Agriculture Grant. We hope to launch this training in 2023.
Tracey’s Answer:
Farm to School and Early Care and Education Month is celebrated in October. The North Carolina Crunch, hosted by the Farm to School Coalition of North Carolina and the N.C. Farm to Preschool Network, is an opportunity for kids and adults to taste and learn about North Carolina-grown fruits and vegetables and honor all those involved in feeding our kids and communities.
The Farm to School Coalition of NC is currently offering a Racial Equity in Farm to School virtual workshop series that will run through the fall. Everyone can look forward to these and other professional development opportunities from the F2SCNC and our partners. Through the NC Jr. Chef Competition, high school students can work with their teachers and local School Nutrition Programs to create a school lunch entrée recipe that appeals to students, features North Carolina-grown ingredients, and adheres to federal nutrition regulations for a chance to win scholarships. Be on the lookout for the timeline, guidelines, and other details for the 2022-23 competition.
Question 5. How can parents, teachers, or community members get involved?
Remi’s Answer:
Websites to connect with F2S activities, trainings, and events:
Tracey’s Answer:
Schools, early care and education centers, agencies, organizations, businesses, individuals, and families can participate in the N.C. Crunch. Folks can sign up to receive a free guide with tips, resources, and templates to promote farm to school and early care and education and celebrate the N.C. Crunch. Learn more and sign up for the N.C. Crunch.
Everyone can be involved with the Farm to School Coalition of North Carolina. Check out our website at
https://www.farmtoschoolcoalitionnc.org to learn more, follow us on social media at @F2SCoalitionNC, and sign up for our listserv to receive the latest info on events, professional development opportunities, grants, resources, and more.
 Bond’s Endless Greens – Kale Spotlight
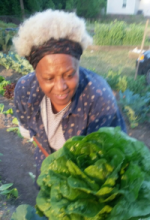
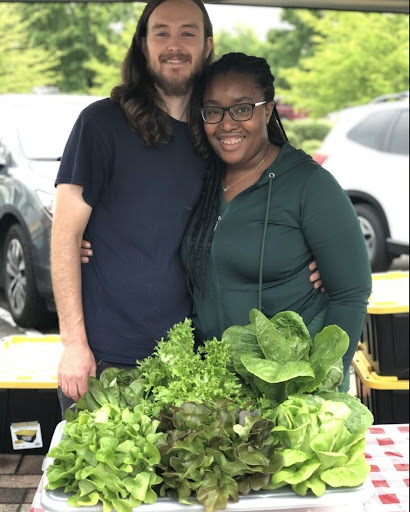
This month, The Poe Center’s Garden-to-Kitchen highlights Bond’s Endless Greens. Bond’s Endless Greens is a small family farm in Oxford, NC that uses hydroponic and traditional farming to produce fresh and delicious leafy greens, vegetables, microgreens, and herbs. We spoke to husband-wife duo, Felicia and Reuben Bond, to learn more about growing kale.
Felicia and Reuben started growing herbs in 2020 out of an indoor-home counter-top hydroponic garden system and were impressed with the quality and growth rate of the herbs. That excitement and ingenuity led Reuben to build a larger hydroponic system, growing more herbs and leafy greens.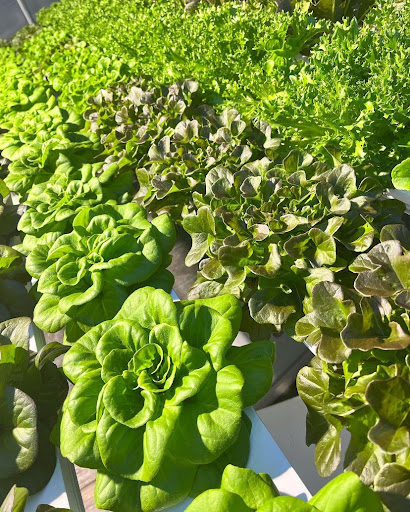 The couple began to share their produce with family and friends, who also raved about the quality and taste. As the Covid-19 pandemic continued, the Bonds used this time to expand their custom-built hydroponics and newly built greenhouse, establishing Bond’s Endless Greens. In addition to kale, they sell varieties of lettuce, arugula, bok choy, and microgreens, such as broccoli, arugula, mustard greens, and radish.
Growing Kale:
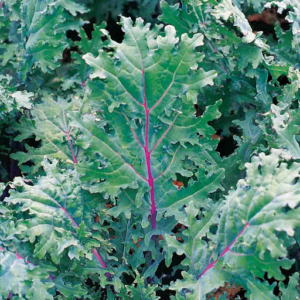
The Bonds use hydroponics to grow their favorite variety of kale, Red Russian kale. This variety of kale has purplish-red veins with flat, ragged leaves. Felicia and Reuben chose Red Russian because it is more tender and less bitter than other varieties of kale, such as Blue Dinosaur. Their customers love this variety, use it in salads, and even eat it fresh. The couple also notes that growing kale using the hydroponic technique produces consistently larger kale than traditional farming.
Harvesting and Selecting Kale:
 At Bond’s Endless Greens, they use the “haircut method” to harvest kale. This includes cutting right before the new growth is coming in. Just gather a bunch of leaves and cut straight across. This method is super easy and low maintenance for the kale. Reuben mentions not to worry about cutting too much because it grows back very quickly.
Favorite Kale Recipes:
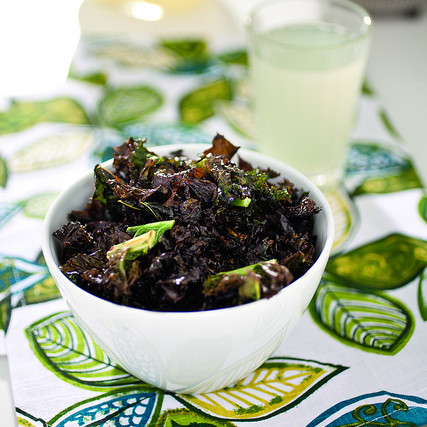
 The Bonds love to add kale to a traditional southern dish: collard greens. Felicia mixes kale with collards and turnip greens, then cooks it down until the greens are tender. Their family also loves making kale chips.
Give it a try. Break up kale into small pieces and season with salt, pepper, and garlic powder. Bake in the oven at 275°F until crunchy.
Availability of Greens:
The Bonds anticipate reopening in Spring 2023 and will be at several Raleigh-Durham farmer markets. Contact Felicia and Reuben on their website, www.bondsendlessgreens.com/, or by email, [email protected] for more information on when their greens will be available!
![]()
Herb Gardens
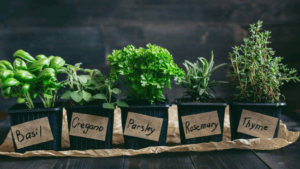
Growing herbs is a rewarding way to garden. They thrive indoors and outdoors, are fairly pest free, and are low maintenance.
If you don’t have an herb garden, follow this link for steps to make a simple herb garden at home with the whole family.
Tips for Your Herb Garden:
- Herbs love sunlight. Put them by your sunniest window if indoors or in your sunniest location outside (often on the South-facing side of your building). Herbs prefer 6-8 hours of sunlight and 8 inches of well-drained soil.
- Cut back or prune your herbs regularly. Cut the longest stems with scissors regularly even if you don’t plan to use them right away. This will encourage the plant to grow more. Just be sure to leave at least one third of the plant intact at all times. Basil especially loves to be cut regularly! Live clippings can be put in a glass of water or in a ziplock in the fridge for a few days before adding them to a recipe.
- Water your herbs slowly each week. It is actually possible to water too much or too fast! If you water too quickly, the water can drain straight through the soil before roots can absorb enough. Herbs like for the soil to dry out some before the next watering. If you touch the soil and it is damp, wait a day or two. Water when the soil is dry to the touch.
- Feed your herbs with an organic fish or seaweed based fertilizer if they look alive but unhappy.
Be sure to enjoy your herbs, use them in a recipe like this Kale Pesto recipe.
Additional Resource:
 As daily temperatures and sunlight decrease you may be wondering if your herbs will survive. With the right care, many of them can!
Tips to Help Herbs Survive Fall and Winter:
If your herbs are indoors…
- Keep them indoors in a nice sunny spot. The best growing temperature is 60-70F. If an extra cold night is predicted, pull your herbs away from the window about 6 inches to keep them cozy. It’s also a good idea to move herbs away from any heat vents to avoid drying out.
If your herbs are outdoors, a few options are…
- Dig them up and bring them inside. You can do this in stages. Transfer your herbs to pots, water well, leave the pots outside in partial shade for 1-2 weeks, and then bring them in. This is especially recommended for your parsley.
- Leave cold-tolerant herbs outside and winterize. A layer of organic mulch 2-3 inches thick around the base of the plant will help protect the roots from cold damage. In the spring, you should see new growth emerge. This technique works well for chives, oregano, and thyme but will not work for tender annuals like basil.
- Take cuttings and root them indoors. Herbs like basil, rosemary, and lavender can grow roots easily from clippings.
- Cut at a node (where leaves attach to the stem) around 4-6 inches from the top of the plant.
- Remove lower leaves. Place in water.
- After a few weeks, roots should appear, and it’s ready to be planted in a pot with soil.
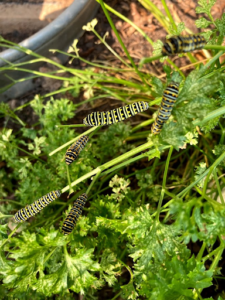 Parsley is so delicious that sometimes black swallowtail caterpillars eat it down to the stems in a matter of days. Amazingly, parsley can recover. Harvest and enjoy when the plant looks lush again.
Try this delicious recipe for Parsley Puree. Use it as a dipping sauce, spread on sandwiches, or drizzle on top of a protein!
Sources:
NC State Extension Publications – Winterizing the Herb Garden
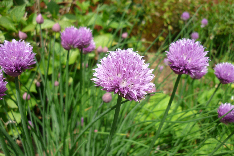 You may find that chives are the last herb standing in your herb garden. This is because chives are surprisingly tough. They are cold and drought tolerant.
Read below for more fun facts, tips, and uses for chives.
Chives Facts:
- Chives are a perennial herb meaning they come back year after year.
- Chives are in the onion family. They grow from underground bulbs in clumps.
- Chives have long hollow leaves and produce edible purple flowers in the spring. You can eat the whole plant!
- Eating chives can help improve heart and bone health, as well as boost your immune system.
Chives Tips:
- How to harvest – regularly cut leaves 1-2 inches from the base.
- How to store – best when fresh, but store in a ziplock back in the fridge or freezer to make them last longer.
- How to divide – in the spring, dig down to the bulbs of your outdoor chive plant and pull a clump of 10+ bulbs away from the group. Plant this bunch in a new spot. Repeat every 2-3 years.
Chive Uses:
- Create a chive border outside – divide chives over the years and transplant along the edge of a garden bed. The border will be edible, beautiful, and may even deter some pests.
- Clip chive flowers in the spring to make a lovely bouquet.
- Experiment with chives in fun recipes like these:
- Chives recipes in English or en Español.
Sources:
Nutrition and You – Chives Nutrition Facts
University of Illinois Extension – Herb Gardening: Chives
 Rosemary is an evergreen herb originally from the Mediterranean. It is deer resistant, drought resistant, and delicious all year.
Read below for more about the planting, maintenance, and uses of rosemary.
Rosemary Growing Tips:
- Start from Cuttings:
- Clip stems 4-6 inches from the top of the plant.
- Remove the lower leaves.
- Place the stems in a jar of water on a windowsill.
- Wait 4-8 weeks for the roots to grow.
- Plant in a potting soil/sand mixture.
- Transplant outdoors once you see new growth and after the last spring frost.
- Where to plant:
- Full sun – Rosemary thrives in 6+ hours of sunlight a day.
- Well-draining soil – Plant uphill or on a mounded area if possible. Avoid heavy clay and low-lying areas where water pools.
- Plenty of space – Rosemary can grow to a 4 foot tall 4 foot wide shrub.
- Harvesting/Pruning:
- Rosemary can be harvested at all times of the year, but is best after new growth in the spring.
- For ideal flavor, harvest from the tips just before flowering when the oils peak. Harvesting in the morning after the dew dries but before midday heat also enhances flavor.
- Feel free to prune (cut back) severely after the blooms fade. This will encourage dense growth and allow you to shape the shrub.
- When pruning, always leave at least one third of the plant for photosynthesis purposes.
The Many Uses of Rosemary:
Nutritional Benefits of Rosemary:
Rosemary is high in antioxidants and can help boost the immune system. Even smelling rosemary can help reduce stress!
Storage:
- Store fresh rosemary in a glass of water or loosely wrapped in a damp paper towel in the refrigerator.
- Dry rosemary by hanging several sprigs upside down in a cool, dry place with adequate airflow for several days. Once rosemary has dried, store in an airtight container for later use.
Recipe:
- Rosemary compliments most meats and poultry, along with roasted vegetables and stews. It pairs well with garlic and oregano.
- Rosemary can be used dried or fresh in many recipes thanks to its bright but earthy flavor.
- Tip: Make rosemary-infused olive oil by adding a sprig of rosemary to a jar of olive oil.
- Try rosemary with this recipe for Chicken, Sweet Potato and Butternut Squash Hash.
Sources:
North Carolina Extension Gardener Plant Toolbox – Salvia rosmarinus
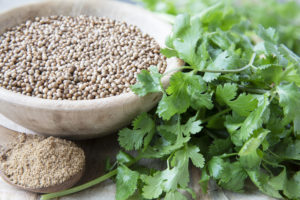
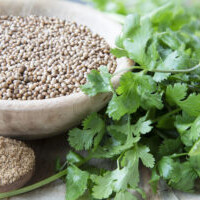
Cilantro (Coriandrum sativum)
This more sensitive annual herb gives us edible leaves, stems, flowers, and seeds. Did you know that cilantro and coriander are the same plant? “Cilantro” refers to the leaves and stems whereas “coriander” refers to the seeds. Both pack a unique flavor and are used in kitchens around the world.
How to Grow:
- Start from seed: Cilantro is a cool season crop preferring 50-85F. Plant seeds outside from Feb-Mar for a spring harvest and in late Sept for a fall harvest (Central and Eastern NC). Space the seeds 2-4 inches apart in a sunny, well-draining location. Water regularly.
Plant Part Tips:
- Lower Leaves: the outer lower leaves are most flavorful and best used fresh in recipes. Cut stems that are 4-6 inches long near the base of the plant just before mealtime. Removing these older leaves encourages the plant to “stay young” by focusing energy on new leaves.
- Upper Leaves: You may notice thin fern-like leaves starting to grow as the weather warms. Your plant wants to bolt upwards to produce flowers. Avoid bolting as long as possible by cutting out these leaves at their base. They are also edible but more bitter.
- Flowers: When your cilantro eventually bolts, it is okay and even a good thing. The white to pink flowers attract beneficial insects like butterflies and predatory hoverflies. The flowers can also replace leaves in a recipe for a more mild flavor.
- Seeds (a.k.a. Coriander): If you’d like to harvest the seeds, be sure to allow flowering and pollination. When the seed heads look brown, cut them off, hang upside-down in a paper bag in a cool dry place, and let the bag catch mature seeds as they fall. After fully dried out, store your coriander seeds in an airtight container.
How to use fresh cilantro:
Cilantro makes an excellent addition to many dishes thanks to its fresh and vibrant flavor. It can be finely chopped and incorporated into mixed dishes, or sprinkled on top for added flavor as a garnish.
How to prepare cilantro:
- Thoroughly rinse the cilantro stems and pat dry with a towel. Allow cilantro to completely dry before using.
- Cilantro leaves provide the most flavor. Remove the leaves by picking them off the stem. Young children can help with this easy kitchen task. Alternatively, you can cut the leaves off the top of the cilantro bunch in one chop, and remove the stems by hand.

- Next, chop the cilantro to your liking. Bunch leaves together in a pile and roughly chop for a garnish or topping. Finely chop if incorporated into a mixed dish like salsa or sauce.
- Want to use the stems and the leaves? Turn the cilantro into a pesto or sauce (see recipe below) to use both the leaves and stem.
How to store fresh cilantro:
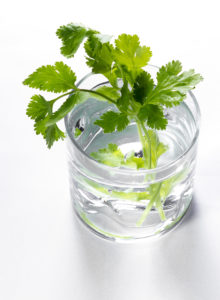 Place fresh cilantro stems in a glass of water. Cover the leaves with plastic wrap or a bag to keep them fresh. Store in the refrigerator for up to 1 week.
- Store already chopped cilantro leaves in an air-tight container in the refrigerator. Place a paper towel in the bottom of the container to absorb extra moisture. Change out the paper towel every few days to keep chopped cilantro fresh. Make sure that cilantro is fully dry before storing. Cilantro leaves may turn brown and soggy if stored wet.
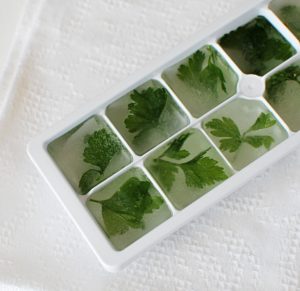
- Have lots of leftover cilantro? Mix chopped cilantro leaves with some water or oil and pour into an ice cube tray. Freeze cilantro cubes and add to cooked dishes for extra flavor, year round.
Recipes:
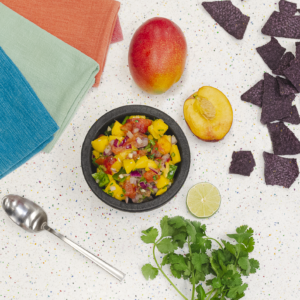
1. Use freshly chopped cilantro in this Poe Center recipe, Peach-Mango Salsa.
Ingredients:
-
- 1 mango
- 2 medium peaches
- 1 jalapeno (seeds removed)
- ½ bunch cilantro
- 1 red bell pepper
- 1 medium tomato
- 1 lime
- ½ red onion
- 1 clove garlic
- salt and pepper to taste
Instructions:
-
- Dice mango, peaches, bell pepper, tomato, and red onion into uniform pieces. Combine into a medium sized bowl, including any juices as a result of chopping.
- Finely chop jalapeno and cilantro. Mince garlic. Add into the bowl and stir until combined.
- Squeeze the juice from 1 lime into the bowl. Season with salt and pepper according to your taste preference. Refrigerate until ready to serve.
- Note: you can adjust the flavors of this recipe by adding more garlic, onion, cilantro, or jalapeno depending on your preference.
2. Try out coriander in this Roasted Falafel Chickpea recipe.
3. Use both the cilantro leaves and stem in this Cilantro-Herb Pesto.
Sources:
MasterClass – How to Plant Cilantro
North Carolina State University: NCSU Edibles – Cilantro (Coriandrum sativum)
Produce
 It’s Tomato Time
Get excited for tomato season, it’s just around the corner. Tomatoes are one of the most popular summer crops amongst NC gardeners. They are fun to grow, highly productive, and diverse in size, color, and taste. Now is a great time to prepare your planting site and choose the tomato varieties that will best suit the needs of your family.
Tomato Plant Preferences:
-
- 70-80°F daytime temps
- Full sun (6+ hours of direct sunlight)
- Well-draining soil with a pH of 5.5-7.0
- 2 inches of water per square foot each week
- Generous spacing for airflow
- Physical supports
Site Prep:
Tomatoes do well in traditional garden beds, raised beds, and containers. Choose the sunniest spot near a water source, and if possible, conduct a soil test to determine soil pH. Add lime to raise the pH of your soil as needed.
-
- Did you know you can get your soil tested for free starting April 1st? Learn more about soil testing or visit your county Cooperative Extension Office.
Two weeks before planting, most gardens will benefit from 1-2 inches of compost incorporated into the top 6 inches of soil. When able, grow tomatoes where members of the nightshade family (tomato, pepper, eggplant, potato) have not grown in the last 3 years. This will help reduce soil-borne tomato disease and pest issues.
Planting:
 While you can start tomato seeds indoors 6-8 weeks before transplanting, most gardeners prefer to buy transplants from a nursery and plant them directly outside after the danger of frost. This ideal planting time will be mid-April for Eastern/Central, NC and May for Western, NC.
Planting Tips:
-
- Space plants 2-3 feet apart depending on variety. Airflow reduces disease.
- Bury tomato plants up to their first leaves. Roots grow from the buried stem, which creates a stronger base. If you don’t have enough depth, dig a 4 inch trench and cover the stem sideways.
- Place tomato cages or stakes in the soil at the time you plant. This will keep the fruit off the ground, and is much easier to do at the start.
- Water generously, aiming for the roots and avoiding the leaves.
Tomato Varieties:
There are thousands of tomato types to choose from. It can feel overwhelming so start by trying 3-5 varieties that do well in NC, and that are different in size and growth style. This diversity will provide an ongoing harvest and more recipe options. Below are a few favorites.
-
- Sungold Cherry Tomatoes: Sweet, orange, bear many small fruits early and all season. Great for kids and salads.
- Cherokee Purple: Heirloom, large, rich sweet flavor, dusky purple-pink. Great in caprese.
- Red Brandywine: Large, beefsteak shape, red, meaty, juicy. Great for sandwich slices.
- Dwarf Blazing Beauty: Shorter plant, medium size fruit, orange, a bit tart. Nice for smaller gardens or pots.
- Lemon Boy Hybrid: Mild flavor, yellow, medium size fruit, thrives in the ground.
- Better Bush: Strong, compact plant, medium size fruit, red. Great for containers.
Learn more about tomato varieties and return next month to learn about tomato plant maintenance, pests, and companion plants.
To the Kitchen:
Tomatoes make the perfect summertime kitchen companion. They complement a variety of other summer herbs and vegetables, and can be added into any cuisine. Freshly grown tomatoes picked ripe off the vine offer a burst of flavor for your summer kitchen. Thanks to the antioxidant lycopene, tomatoes have a bright red color and help protect the body against both heart disease and cancer. Tomatoes are also full of vitamin C, potassium, vitamin A, and vitamin K.
Try your freshly grown tomatoes in these delicious recipes:
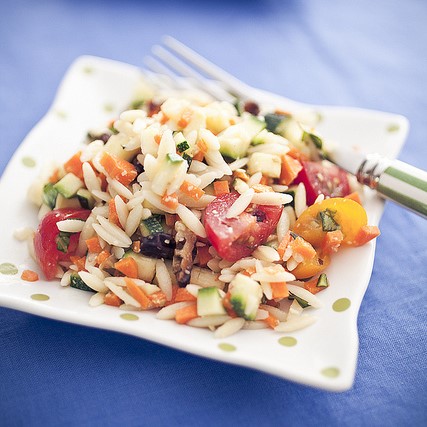
Confetti Orzo Salad: Greek Salad Kabobs:

Sources:
Tomato Factsheet – Clemson Cooperative Extension
What Are the Best Tomato Varieties – NC Cooperative Extension
Tomato Maintenance, Problems, & Companions
Here in the South, tomatoes feel right at home in the warmth of the summer. With this extended heat and humidity, tomato-loving insects, diseases, and other growing challenges are likely to emerge. Do not fret, the benefits of tomatoes far outweigh the challenges. Below you can learn simple ways to set your plants up for success and mitigate common tomato problems.
If you are just getting started with tomato-planting, be sure to first read our April 2022 post about preparing your planting site and choosing tomato varieties.
Support:
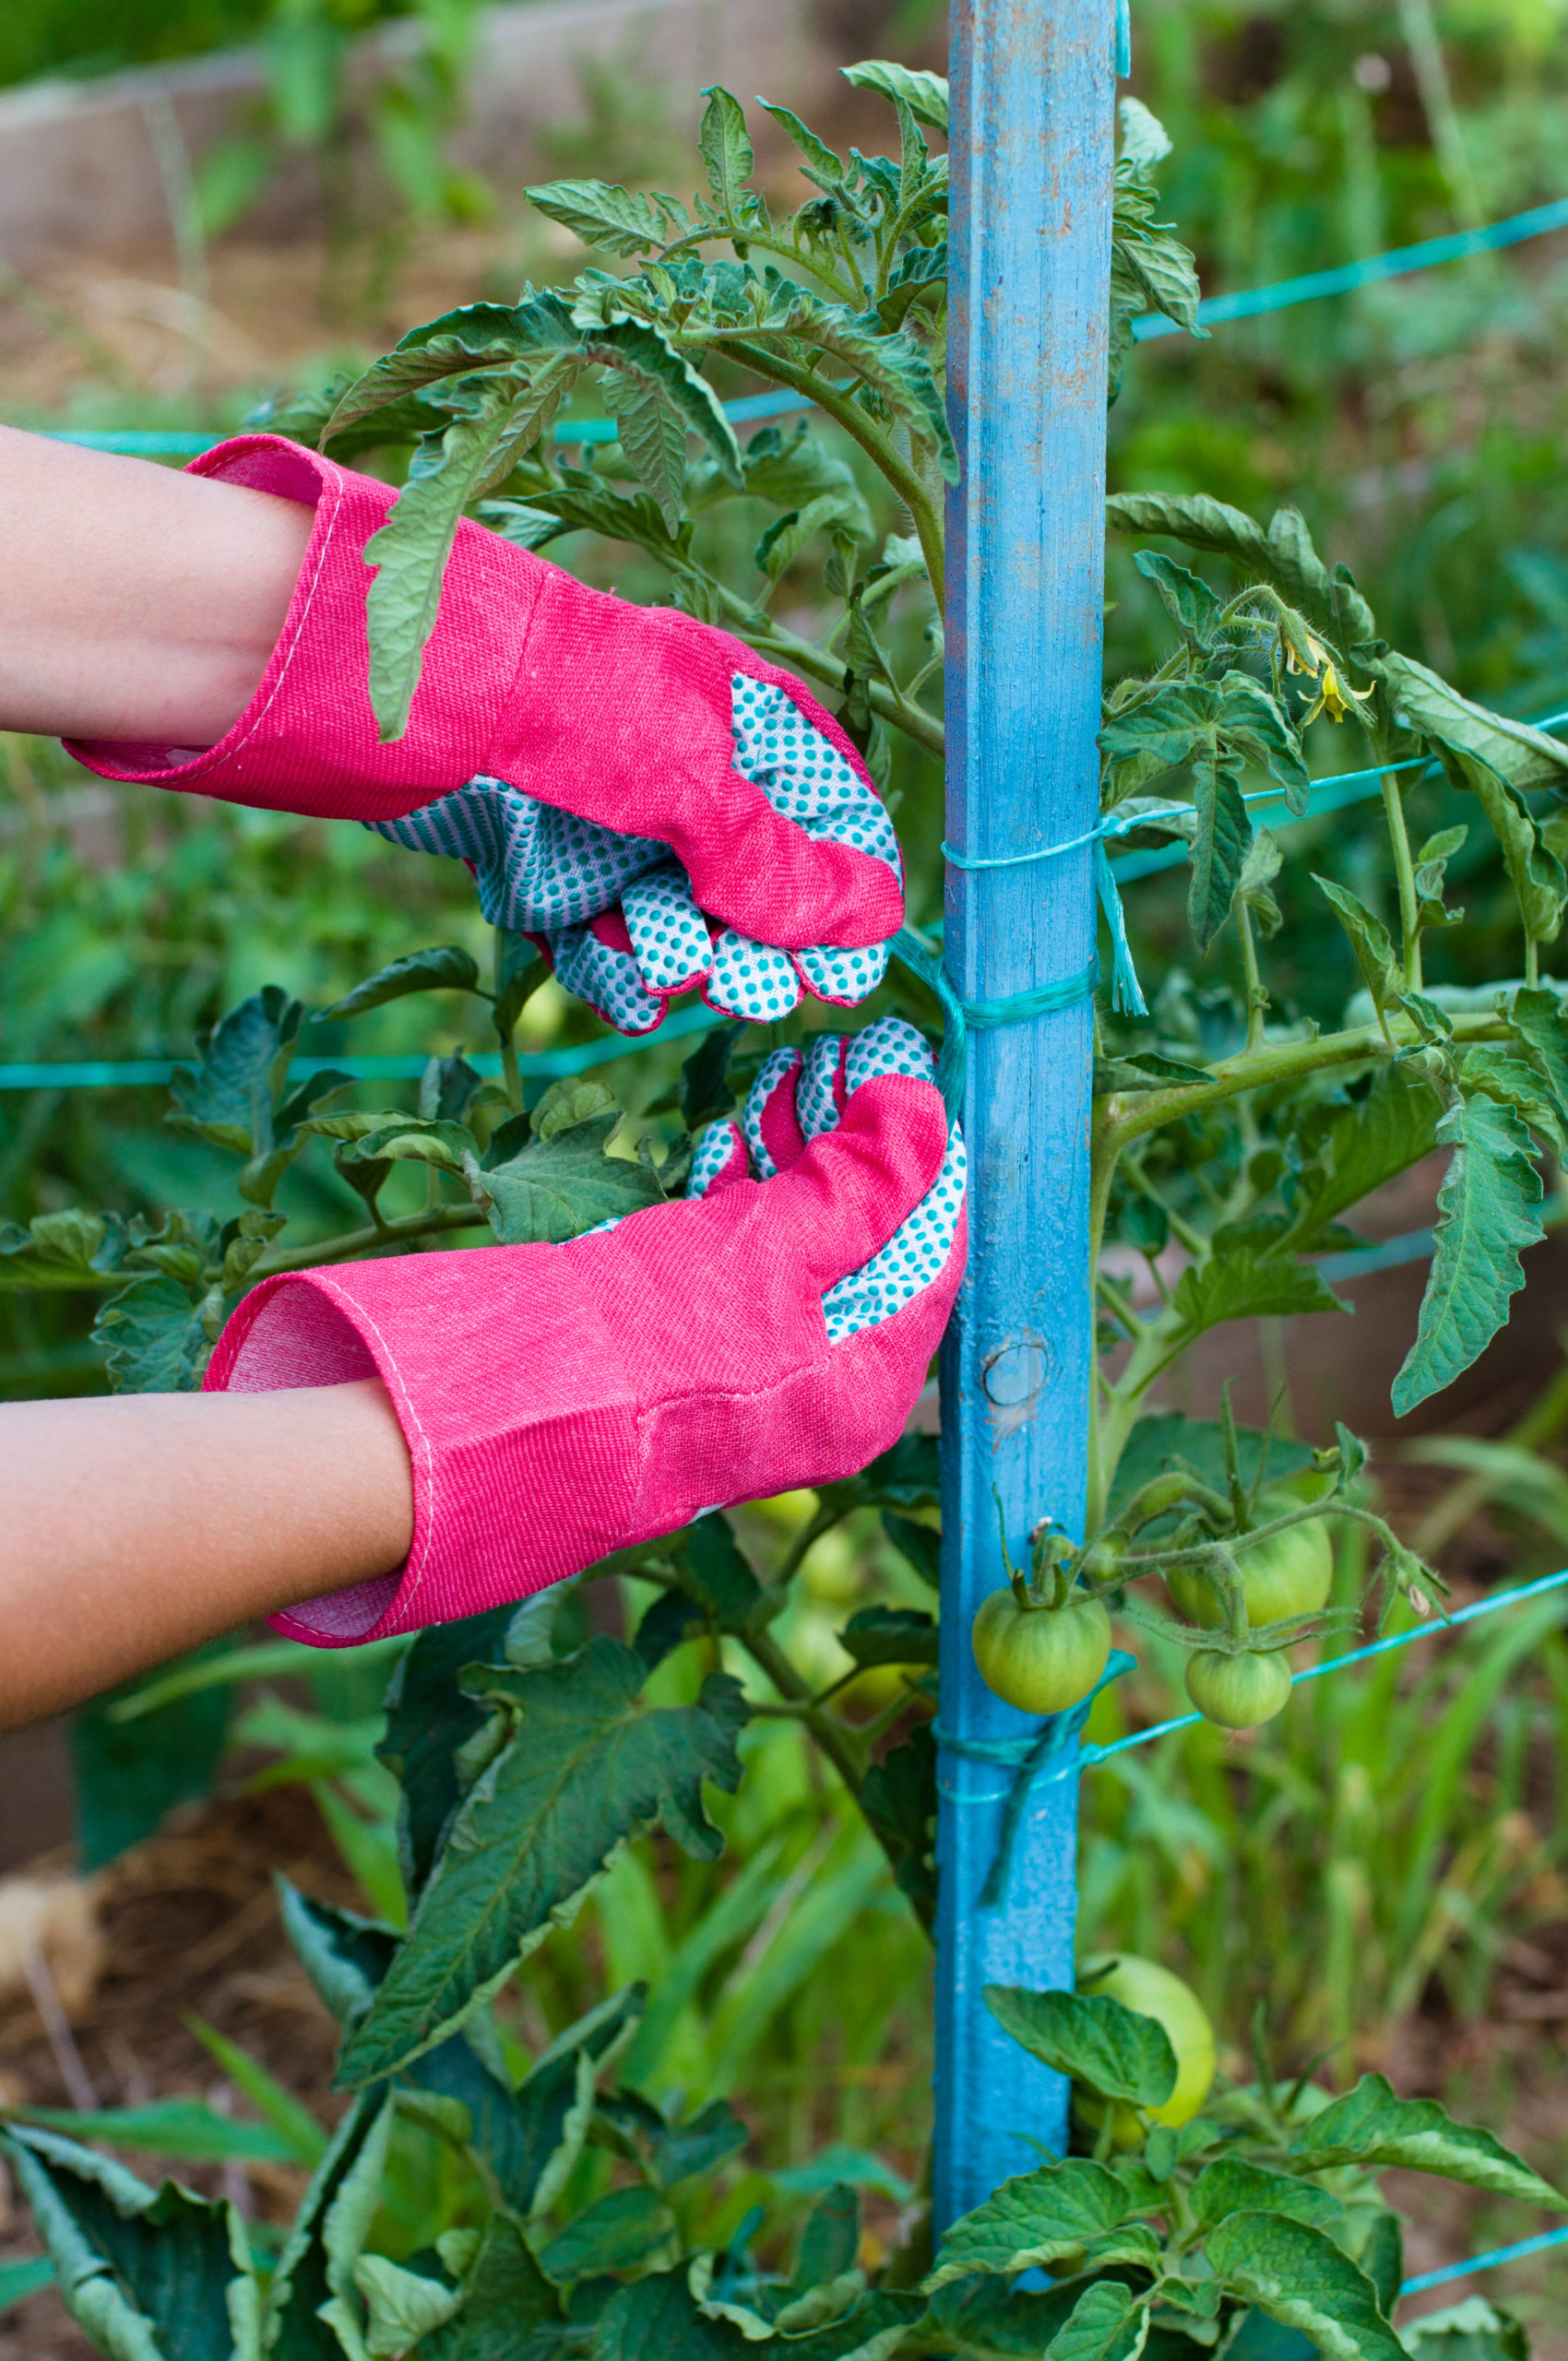
Physically supporting your tomato plants in an upright position maximizes sun exposure, fruit yield, and airflow. Increasing airflow is one of the most effective ways to reduce disease and pests. Plus, tomatoes are vines that need to climb. Set up supports as soon as possible after planting. You can use wood stakes, tall wire cages, steel remesh sheets arranged in a cylinder, a nearby fence for draping, or even a deck railing. Use soft string or strips of old cloth to attach tomato stems to the rigid supports. These flex with growth and prevent damage to stems.
Pruning:
There are many reasons to prune, or strategically remove branches, as your tomato plant grows. This practice will improve airflow, reduce humidity, decrease disease problems, help encourage flower/fruit growth, and can help produce larger fruit.
Pruning Tips:
- Find out if your tomato variety is determinant or indeterminant.
- Indeterminate vining varieties (that keep growing) should be pruned all season.
- Determinant bush or dwarf varieties (that stop growing after fruiting) should be pruned sparingly if at all.
- When cutting out branches, aim to maintain 1-3 main stems. Enjoy the following energy experiment:
- One main stem will make less, but larger tomatoes.
- Three main stems will make more, but smaller tomatoes.
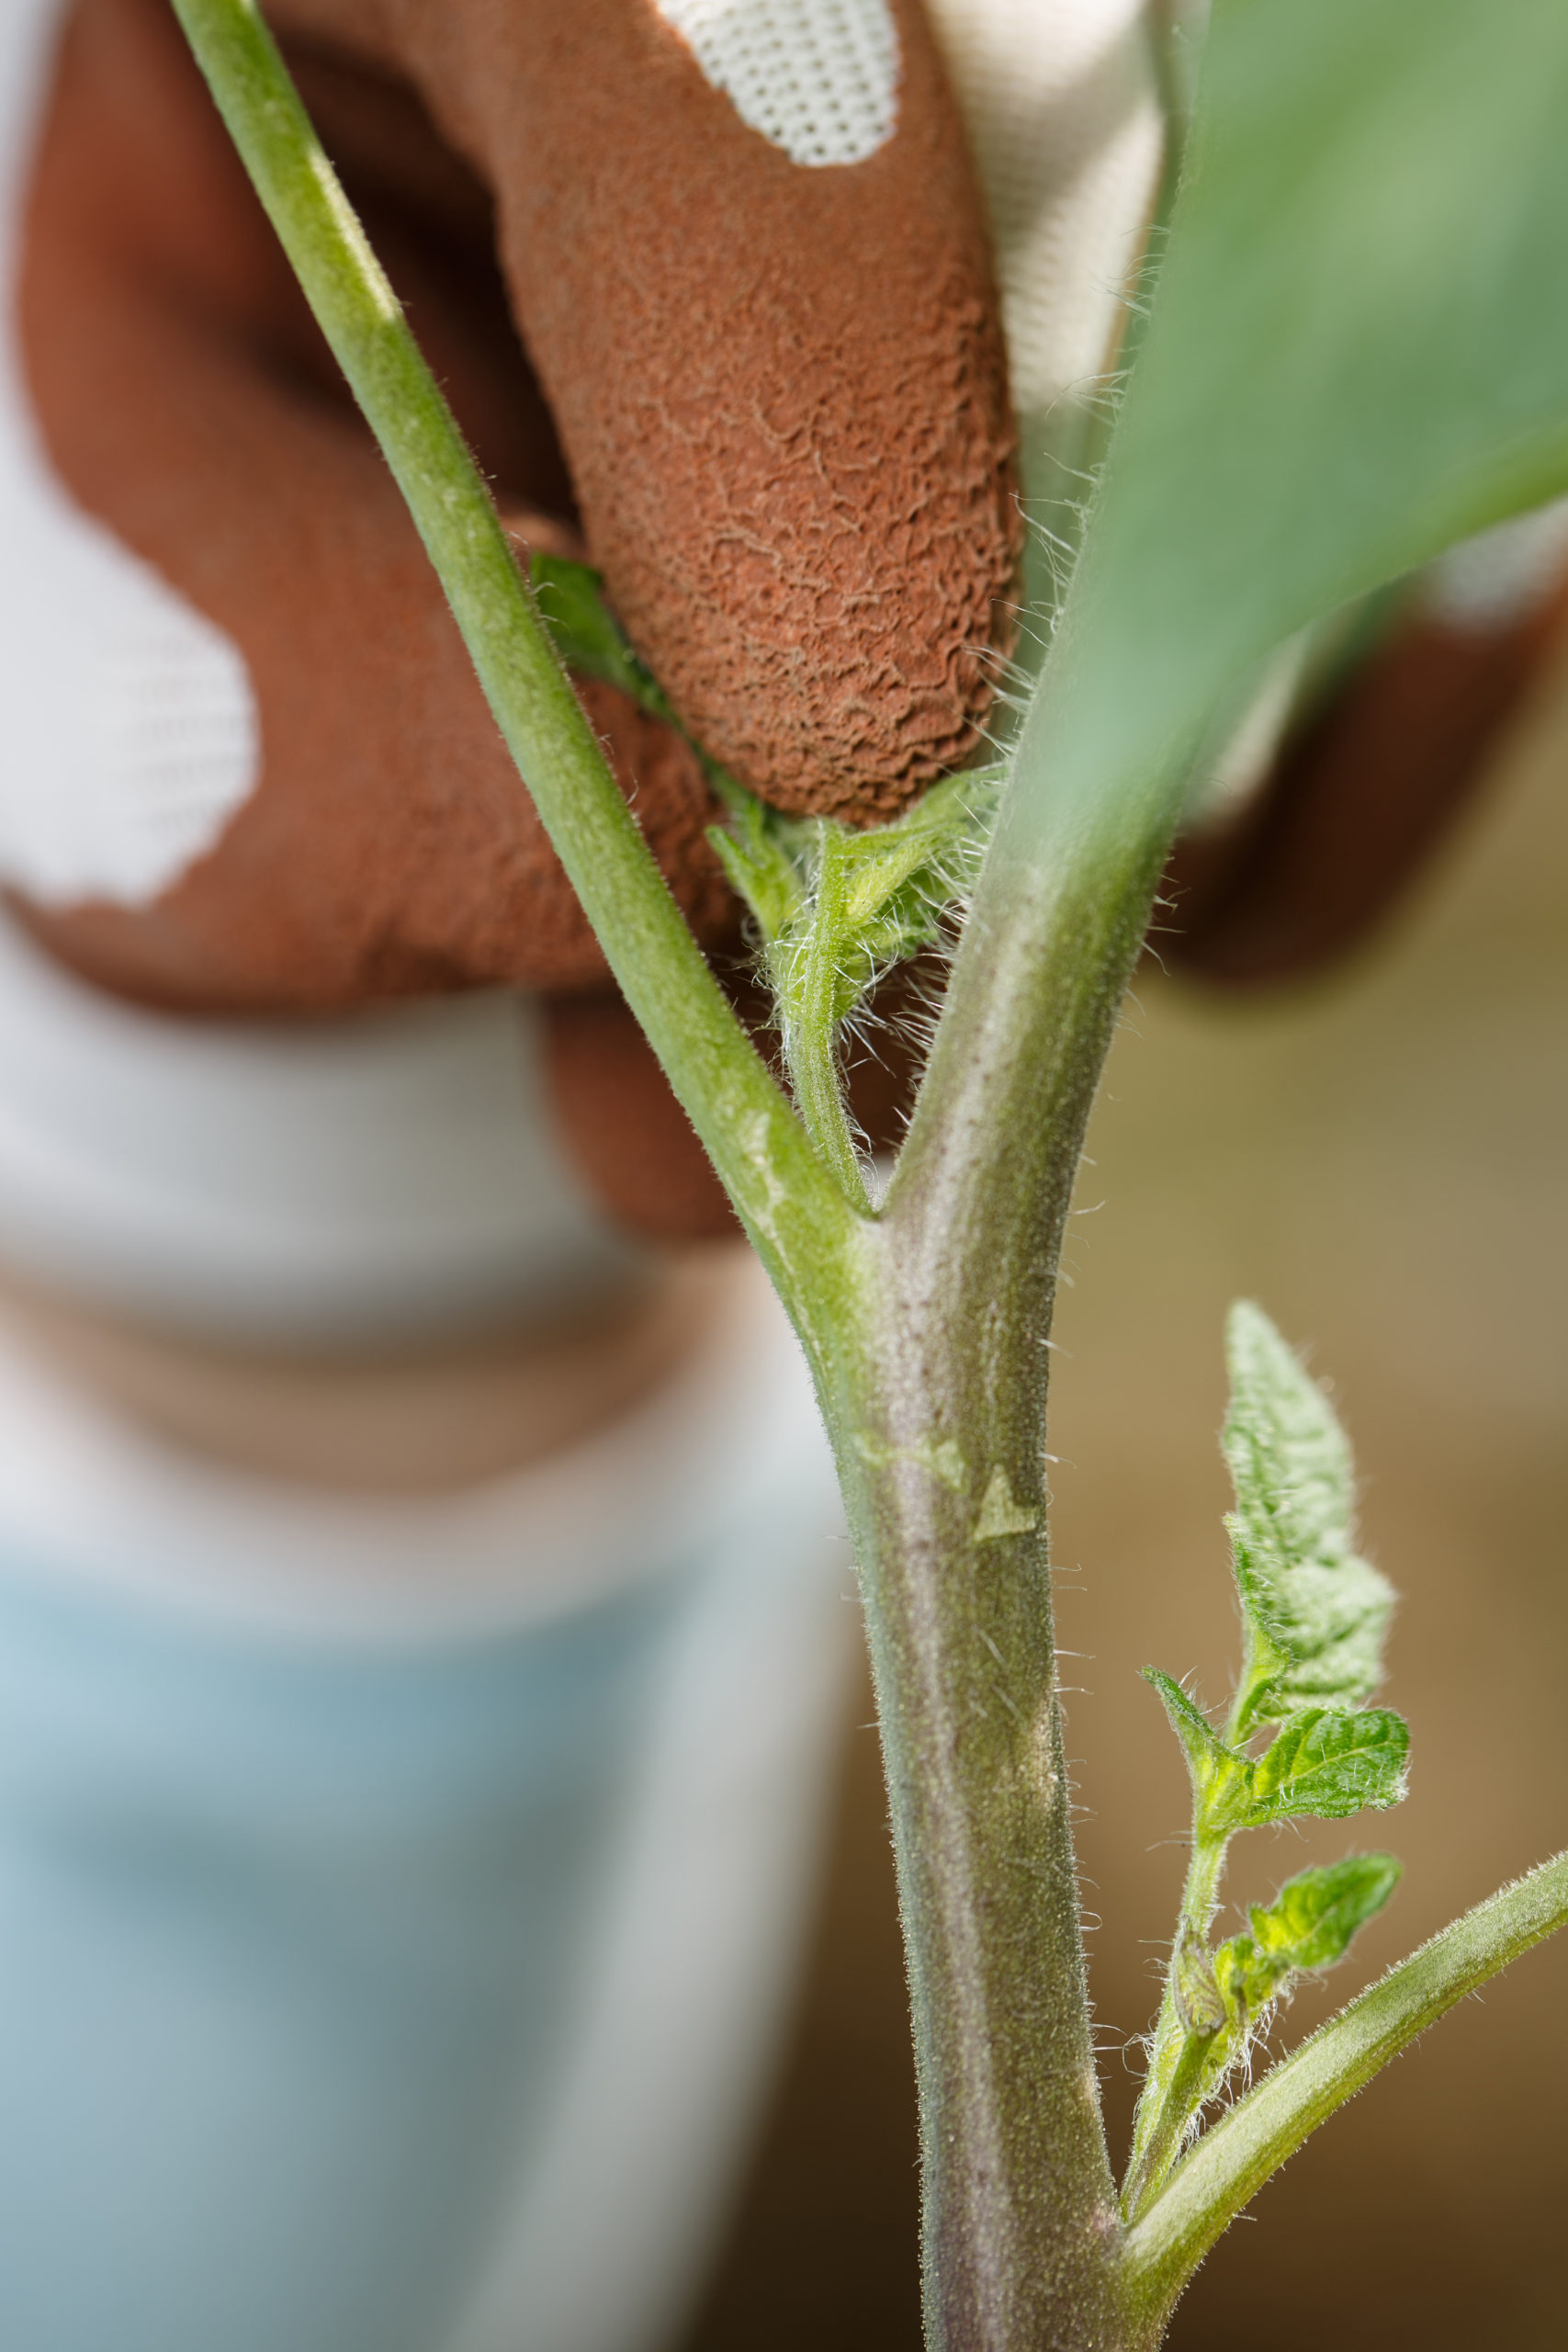
- Cut out “suckers” (small shoots growing between the main stem and a branch) when they are 4 inches or less.
- Once 4 feet tall, remove the lowest 12 inches of leafy branches to decrease soil-borne diseases from splashing up during a rain.
- Prune in a way that keeps tomato fruit in the shade of its leaves. Sudden sun exposure can cause sun scald.
View tomato pruning in action:
Watering:
Water regularly and evenly throughout the season but especially during drought periods. This helps reduce your tomato fruit from splitting open, called growth cracks. The best time to water is in the morning as the plant is gearing up for a day of photosynthesis. Be sure to aim watering towards the roots and not the leaves to reduce disease issues. A great way to retain moisture and decrease soil splash is to add 2-4 inches of organic mulch around the base of the plant.
Pests and Problems:
Tomato diseases and pests are quite numerous, but do not let this deter you. Many varieties have been made resistant to common infections. Additionally, a lot of tomato types grow aggressively enough to outpace tomato troubles. Despite diseases and pests, growing tomatoes are a worthwhile experience.
Below are some common tomato pests and problems in North Carolina and what to do about them:
- Aphids: Tiny, pear-shaped, green/pink insects. They pierce and suck sap, and can spread viral diseases.
- Water punch them off with the jet stream setting on your hose nozzle.
- Spray an environmentally safe insecticidal soap (such as diluted Dr. Bronner Pure Castile Soap) directly onto the leaves with aphids.
- Tomato hornworm: Two inch green caterpillars with diagonal white stripes and a horn-like structure. They eat tomato leaves.
- Hand pick them off unless it has white cocoons on its back.
 If it has white cocoons, leave it on your tomato plant! These are the pupae of the beneficial Braconid wasps that will not sting unless abused. The wasps will emerge and help control the next generation of hornworms.
- Bacterial wilt (aka. Southern bacterial blight): Caused by soil-borne bacteria Ralstonia solanacearum that thrives in hot, moist conditions. It enters through microscopic wounds and causes rapid wilt and decline.
- Remove infected plants immediately. Discard in a garbage bag to reduce spread.
- Practice crop rotation by planting non susceptible crops like corn, beans, or cabbage.
- Blossom-end rot: The fruit has a brown decayed area opposite the stem. It’s caused by a lack of calcium in the soil often due to uneven watering.
- Leaf sprays with calcium nitrate can restore calcium. Always follow the label.
- Easy to prevent next year by following lime/fertilizer recommendations from a soil sample well before planting.
Here are a few resources to help troubleshoot other tomato diseases and pests.
Companion Plants:
Companion planting is a fun way to garden. These are plants that are beneficial to grow together. Consider planting some of these tomato companions for the benefits they bring to your garden and kitchen.

- Garlic, onion, chives: Repel some pests like aphids.
- Basil: May improve tomato yield. Compliments tomatoes in recipes.
- Peas: Legumes which add nitrogen back to soil.
- Lettuce: Acts as living mulch keeping soil cool and moist for tomatoes.
- Carrots: Loosen soil for tomato roots.
- Cucumber: Has similar soil, water, and sunlight needs. Fill in well along the ground under tomato plants.
To the Kitchen:
Want to try eating your tomatoes before they are fully ripe? Try tasting green tomatoes. Green tomatoes are not fully ripe yet, and are pale green in color. They taste more tart than ripe tomatoes, and can be ripened in a brown paper bag on your kitchen counter. Try out green tomatoes with the following recipe.
Crunchy Baked Green Tomatoes:
Ingredients:
- 4 large firm green tomatoes
- 1 ½ cups all purpose flour
- 1 teaspoon salt
- ½ tsp pepper
- 1 cup plain greek yogurt
- ½ cup buttermilk
- 1 ½ cup bread crumbs
- Cooking spray or olive oil
Directions:
- Slice tomatoes ⅛ inch thick. On a large plate mix flour, salt, and pepper. Place yogurt and buttermilk on a second plate, and Panko Bread Crumbs on a third plate. Coat tomatoes with the flour mixture, then the yogurt – buttermilk mixture (you may want to put the yogurt in a small bowl so that dipping them is easier), then the Panko bread crumbs.
- Place coated tomatoes on a cookie sheet and spray with Pam cooking spray liberally on both sides or drizzle them on both sides with olive oil. Bake in a 350°F oven for about 7 minutes on one side then flip them over and bake for another 5 to 7 minutes. Transfer to a platter, sprinkle with extra salt and serve warm.
Want more recipes or to learn more about green tomatoes? Check out this link from NC Cooperative Extension.
Sources:
N.C. Cooperative Extension – Pruning for Healthier, More Productive Tomatoes
University of Florida IFAS Extension – Organic Vegetable Gardening Companion Planting
Tomato Harvest and Uses
Tomatoes (Solanum lycopersicum) range in color from yellow and red to purple when fully ripe. They originate from western South America and have been spread worldwide with Spanish colonization. Read below to learn about harvesting, cooking, and storing tomatoes.
Harvesting Tips:
 Be ready! Tomatoes can be harvested mid to late summer, sometimes on a daily basis, depending on the variety.
- Harvest individual tomatoes right away once they are fully ripe to achieve ideal flavor and to beat any pests that might enjoy your ripe tomato.
- The best tomato quality results from temperatures averaging around 75°F. Harvest every 1-2 days when air temps hit 90°F. Extreme heat softens the fruit and diminishes flavor.
- If you have trouble staying ahead of the heat and/or pests, try harvesting tomatoes when they have just a touch of color, and allow them to continue ripening indoors.
- If a killing freeze is expected, harvest all tomatoes (greens included) and bring inside to continue ripening.
- Store freshly harvested unwashed tomatoes on the counter around 60-70°F and watch them ripen.
- Learn 4 indoor ripening strategies that include the bag, box, window sill, and upside down methods.
Warning: The leaves, stems, and green unripe fruits contain small amounts of toxin alkaloids known as tomatine and solanine. The tomato plants are toxic to dogs if a significant amount of the fruits or foliage are eaten.
Nutritional Benefits of Tomatoes:
Tomatoes are delicious and nutritious. In addition to keeping you hydrated, just one tomato can provide 57% of your daily vitamin C, 25% of your daily vitamin A, and 8% of your daily iron.
Storage:
- Fresh: Tomatoes can be stored fresh on the counter, out of the sun. Refrigerating them will change the texture and the flavor.
- Frozen: Fresh tomatoes can be frozen if you have extras. Core tomatoes and put them in a freezer bag or container. Remove air, seal, label, and freeze. Pull them out of the freezer in the dead of winter for a fresh summer flavor! The skins will slip right off when they thaw, and they are great for sauces and soups.
- Canned: Tomatoes are also a great candidate for being canned. Make sure to use fresh tomatoes, sterilized materials, a clean kitchen, and always follow a canning recipe from a reliable source.
- Resources for Home Preserving Tomatoes.
Chopping Tips:
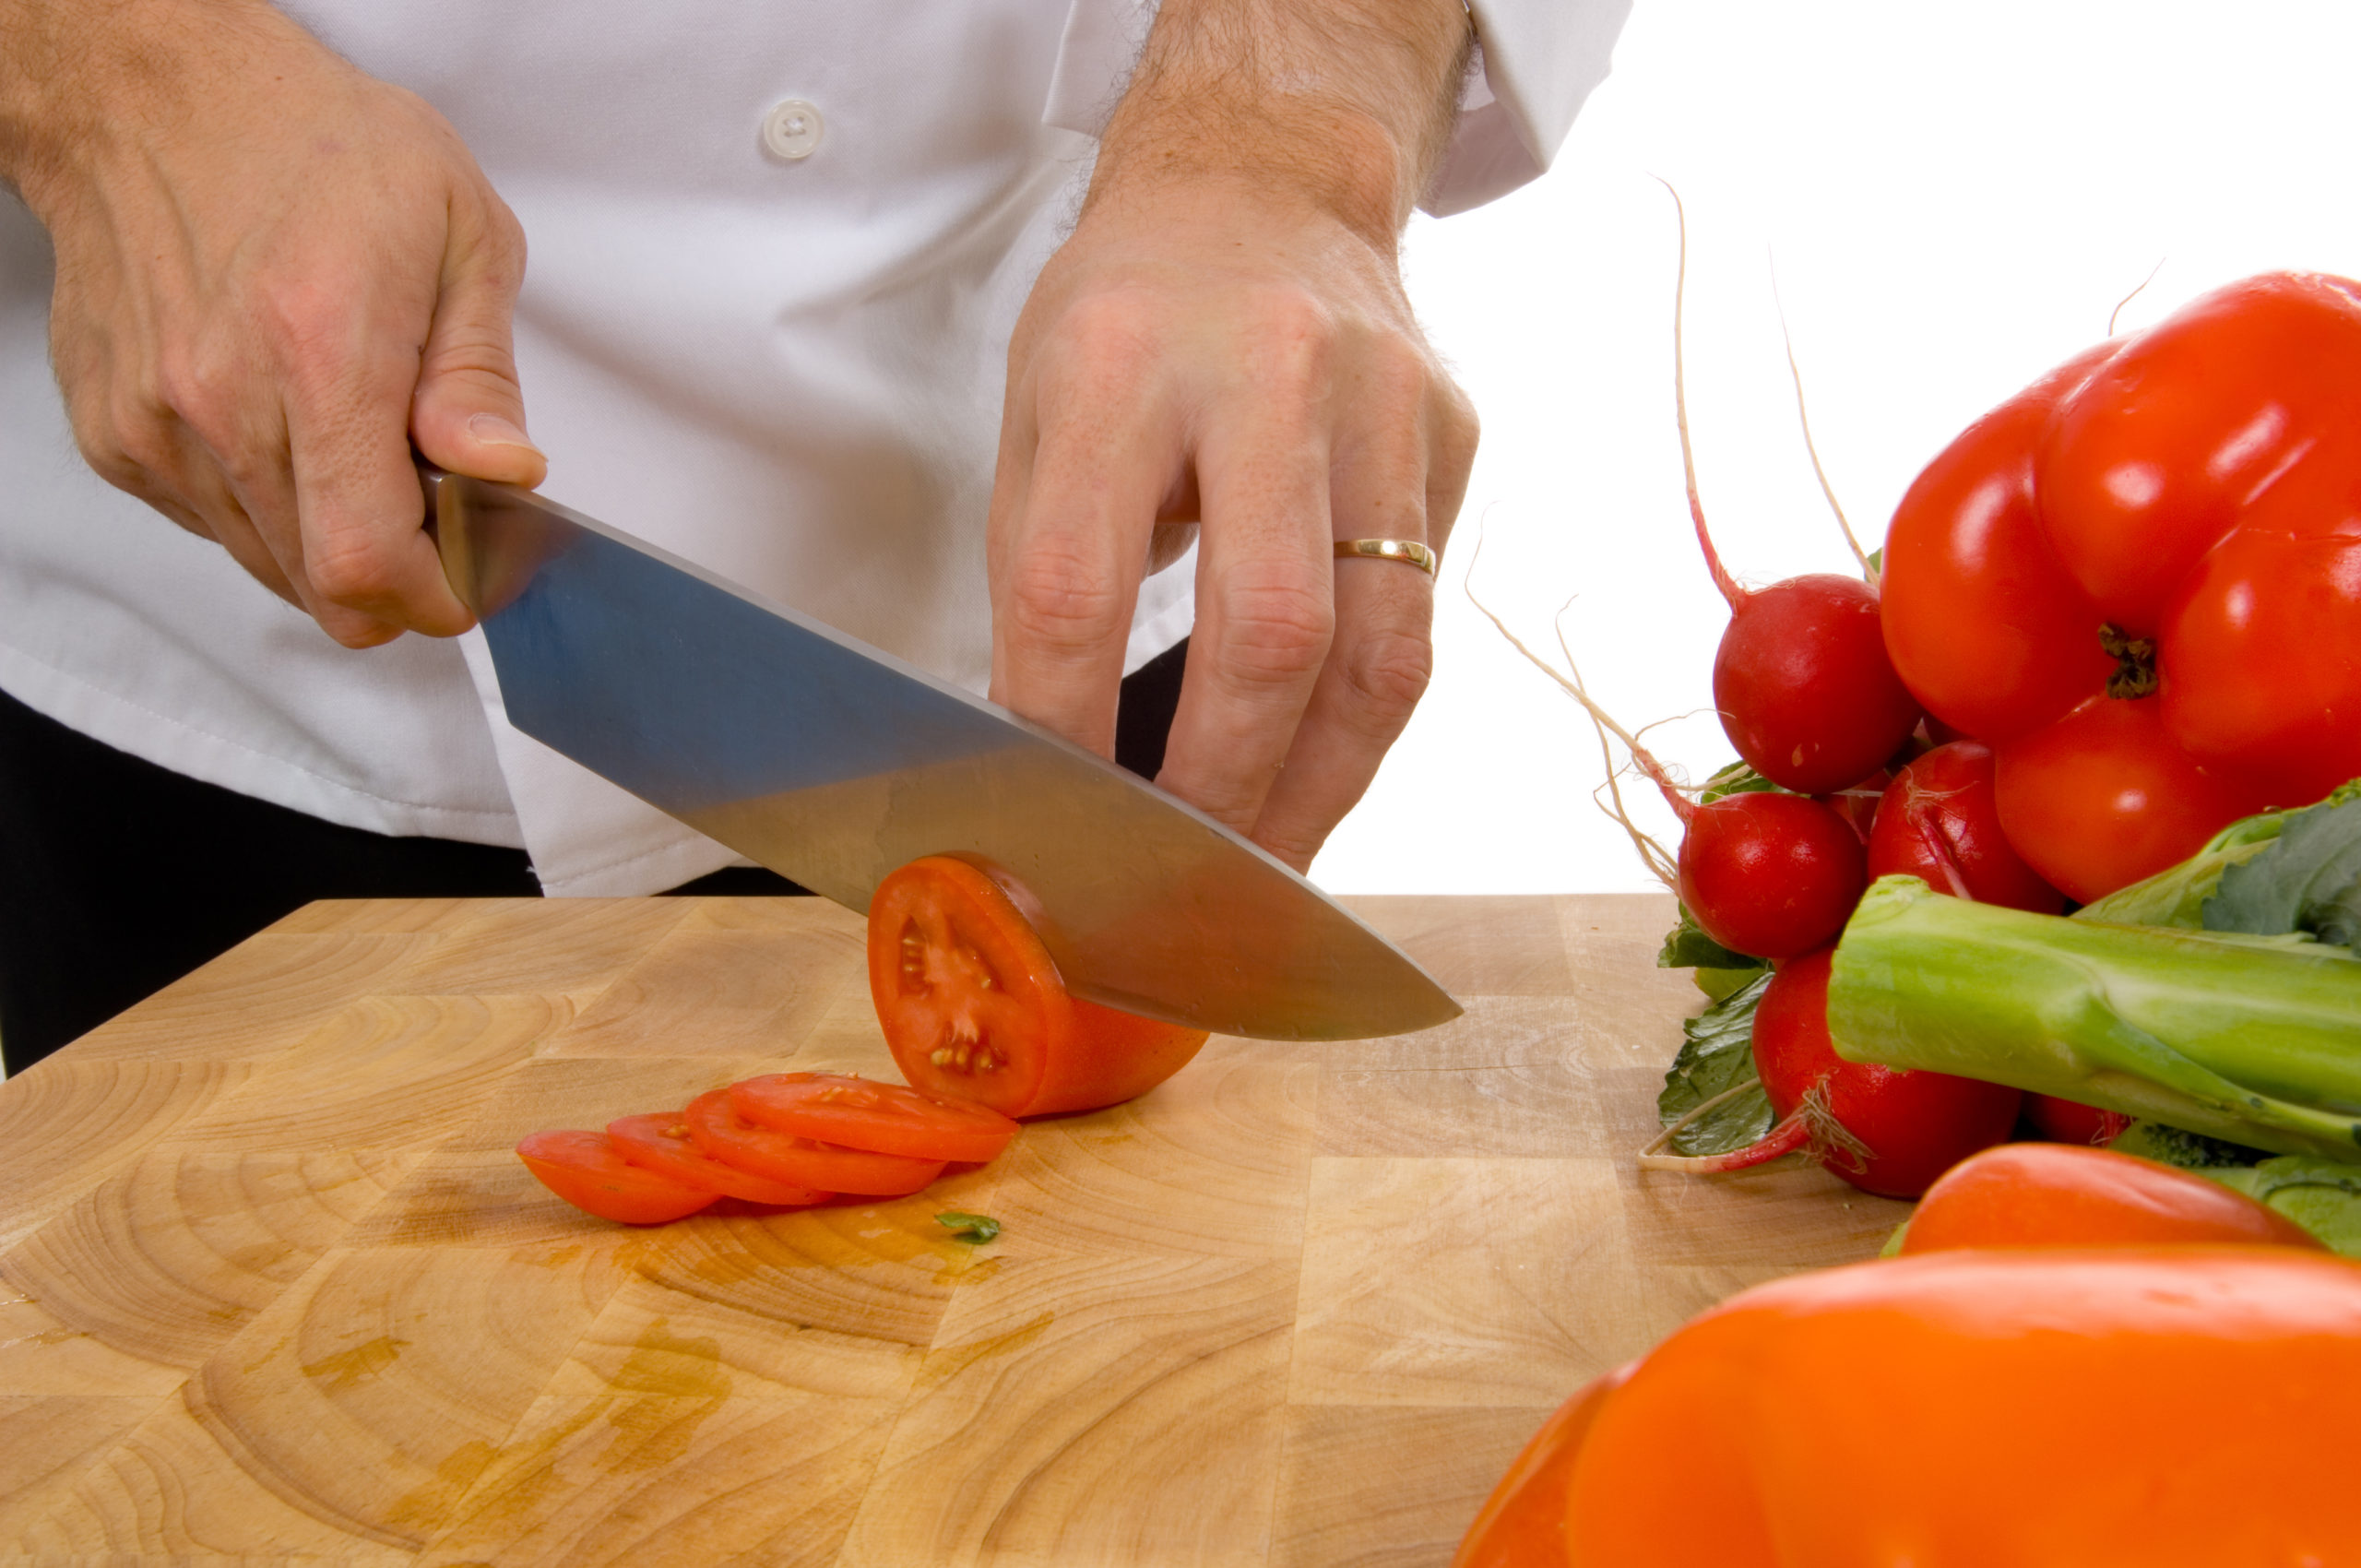
Tomatoes have a very slick skin and require a very sharp knife for slicing or dicing. A serrated knife is also a great option. Grip your knife with your dominant hand. Your palm should be on the handle of the knife, and your thumb and index finger should hold the top of the blade.

Your helping hand will stabilize the tomato, using the “bear claw” method to keep your fingers safe. Move the knife slowly in a rocking motion.

Slice vs. Dice:
- Slicing a tomato works best with a very sharp knife or a serrated knife. Wash and dry the tomato, first. Then, place it on a clean cutting board. Use your helping hand to hold the tomato firmly and your dominant hand to firmly hold your knife and gently cut off the top of the tomato. Continue slicing the tomato, each time parallel to the last slice.
- If you need your tomatoes diced, stack a few slices on top of each other and make parallel cuts in one direction first, and then the other.
Recipes:

Try these fun kabobs as an afternoon snack or a compliment to go with your dinner. These are great for getting kids involved.

Nothing pairs better than pasta and tomatoes. This salad makes a perfect side dish, and with the addition of cheese and/or beans it can be a great main dish too.
Sources:
N.C. Cooperative Extension – Solanum lycopersicum
University of Illinois Extension: Watch Your Garden Grow – Tomato
Farmers’ Almanac – 4 Easy Ways To Ripen Green Tomatoes Indoors

GrowWELL Garden Programs
Poe offers GrowWELL Garden programs taught in our interactive outdoor classroom.
Poe & Grow Garden - Online
Explore gardening basics through the growing seasons with Poe’s interactive online garden.

Get Fit with #PoeFit
For more helpful tips and information on gardening and nutrition, follow The Poe Center’s weekly tweet series, #PoeFit.
Monthly Garden-to-Kitchen Videos